Last Updated on May 6, 2025 by Souhail
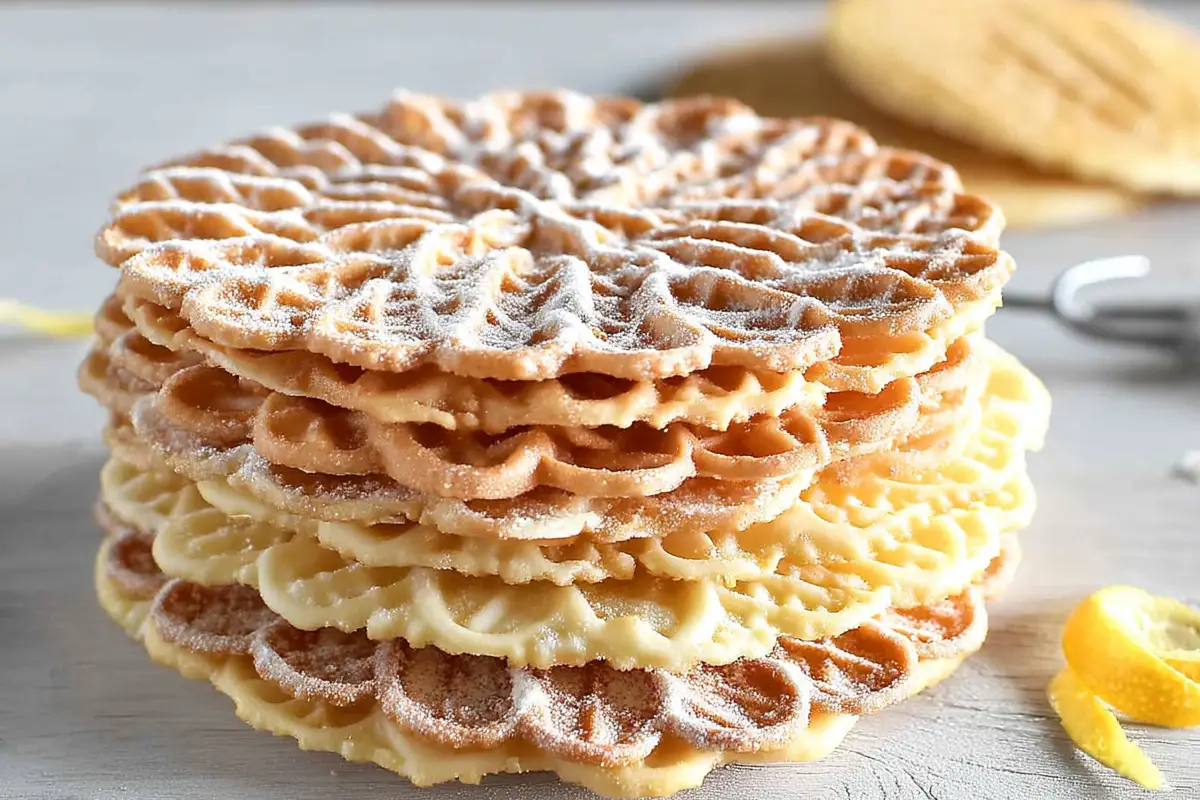
Let’s talk pizzelle, those light, crisp Italian cookies that somehow feel like both a treat and a tradition. Whether you go classic with anise or switch it up with vanilla or citrus zest, this pizzelle recipe brings all the cozy, nostalgic vibes.
I still remember the smell of buttery pizzelle wafting through my grandma’s kitchen, it was the kind of aroma that made you want to stay awhile. They’re a holiday staple in many Italian homes, but honestly, they’re too good not to make year-round.
Easy to whip up and endlessly versatile (hello, cannoli shells and ice cream sandwiches), pizzelle are proof that simple can still be seriously special.
Table of contents
Why This Recipe Works
Crafting the perfect pizzelle requires just a handful of ingredients and a bit of finesse. What sets this recipe apart is the balance it strikes between tradition and versatility. Let’s break down why you’ll want to bookmark this version:
- Crisp Texture, Every Time
Pizzelle are meant to be thin and crispy, but achieving that perfect texture can be tricky. This recipe uses just the right ratio of eggs to flour, ensuring the batter spreads evenly in the pizzelle maker and crisps beautifully as it cools. - Flavor Customization
While anise is the traditional pizzelle flavor, it’s not everyone’s cup of tea. This recipe allows you to explore alternatives like vanilla, almond, or even lemon zest, making it adaptable for any palate. - Modern Baking Tools, Timeless Results
Using an electric pizzelle maker ensures consistency and speed. This recipe works beautifully with both traditional iron plates and modern electric appliances, so no matter your equipment, you’re covered. - Perfect for Gifting or Storing
These pizzelle stay fresh for days, making them an excellent choice for gifting. Plus, their intricate designs add a touch of elegance to any dessert table. - Dietary Adaptations
Need to go gluten-free or dairy-free? No problem. This recipe includes simple substitutions to make pizzelle inclusive without compromising on flavor or texture.
Now, let’s dive into the ingredients and process, followed by tips to ensure your pizzelle are a resounding success.
Ingredients Breakdown
To make these classic pizzelle, you’ll need just a few pantry staples. Each ingredient plays a crucial role in achieving the signature flavor and texture of these delightful cookies. Here’s what you’ll need:
Ingredients of Pizzelle Recipe
- Eggs: 3 large
Eggs provide structure and help bind the ingredients together. They’re also responsible for the golden color of pizzelle. - Granulated Sugar: 3/4 cup
Sugar adds just the right amount of sweetness. Don’t skimp on this; it helps create the crispness we’re aiming for. - Unsalted Butter: 1/2 cup (melted and slightly cooled)
Butter gives pizzelle their rich, buttery flavor. You can substitute with a neutral oil for a dairy-free version, but the flavor may differ slightly. - All-Purpose Flour: 1 3/4 cups
Flour is the backbone of the pizzelle. If you’re making a gluten-free version, substitute with a 1:1 gluten-free baking mix. - Baking Powder: 1 teaspoon
A leavening agent that ensures the pizzelle are light and airy. - Anise Extract: 1 teaspoon (or substitute with vanilla or almond extract)
This is the traditional pizzelle flavor. If you’re not a fan of anise, opt for vanilla, almond, or even a citrus extract for a different spin. - Optional: Zest of 1 lemon or orange
Adding zest enhances the flavor with a subtle citrusy brightness, pairing beautifully with vanilla or almond pizzelle.
Step-by-Step Instructions
Ready to make the perfect pizzelle? Follow these simple steps to achieve thin, crispy, and beautifully patterned cookies.
1. Prepare Your Workspace (5 minutes)
- Plug in your pizzelle maker and let it preheat. Most machines have an indicator light that signals when it’s ready.
- Set up a cooling rack nearby for the pizzelle to cool and crisp up once cooked.
2. Whisk the Wet Ingredients (5 minutes)
- In a large mixing bowl, beat the eggs with an electric hand mixer or whisk until frothy, about 2 minutes.
- Gradually add the sugar and continue whisking until the mixture is pale and slightly thickened.
- Slowly drizzle in the melted butter while whisking continuously to ensure it incorporates smoothly.
3. Add the Dry Ingredients (5 minutes)
- Sift the flour and baking powder together in a separate bowl to remove any lumps.
- Gradually fold the dry ingredients into the wet mixture using a spatula or whisk. Be gentle to avoid overmixing. The batter should be smooth and thick but still pourable.
4. Add Flavorings (2 minutes)
- Stir in your chosen extract and optional citrus zest. For an authentic Italian pizzelle, stick with anise. If you’re experimenting, now’s the time to get creative!
5. Portion and Cook (15-20 minutes)
- Using a small cookie scoop or tablespoon, drop about 1 to 1.5 tablespoons of batter onto the center of each pizzelle mold. Close the lid and cook for about 30–60 seconds, depending on your pizzelle maker.
- Keep an eye on the first few pizzelle to gauge the correct cooking time. They should be golden brown but not burnt.
- Carefully remove the cooked pizzelle with a fork or spatula and transfer them to the cooling rack.
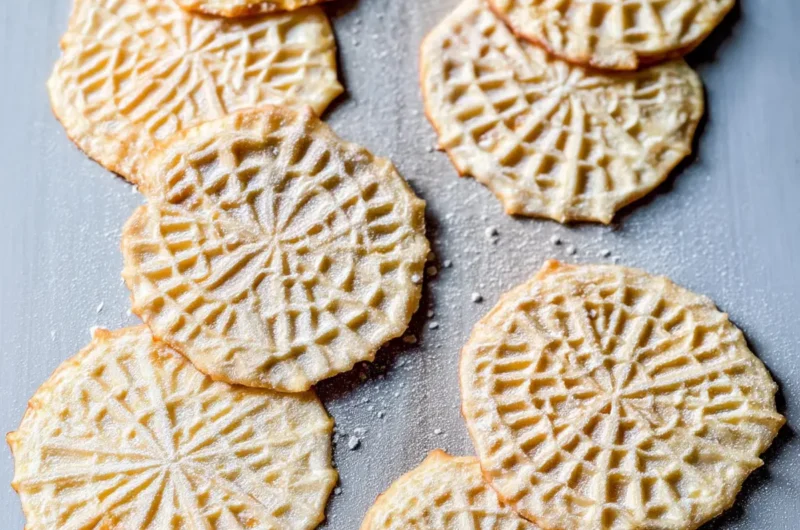
6. Cool and Store (10 minutes)
- Let the pizzelle cool completely on the rack. They will crisp up as they cool.
- Once cooled, store them in an airtight container at room temperature to maintain their crispness.
Pro Tips for Successful Pizzelle Recipe
Making pizzelle is part art, part practice, but these quick tips will make it way easier:
Keep It Clean
Wipe down the iron between batches to keep those pretty patterns sharp.
Heat It Up
Make sure your pizzelle maker is fully preheated. A hot iron = no sticking and even color.
Less Is More
Use about 1 tablespoon of batter, too much and it’ll spill over the edges.
Watch the Clock
Start with 30 seconds and tweak the time to get your ideal crispness and color.
Cool = Crunchy
They might be soft at first, but cooling on a rack helps them crisp up perfectly.
Mix Up the Flavors
Anise is traditional, but try vanilla, almond, hazelnut, or even cocoa for a chocolatey twist.
Batter Matters
You want it pourable, like pancake batter. If it’s too thick, thin it with a little water or milk.
Variants of the Recipe
Pizzelle are easy to customize for any taste or occasion. Here are some fun twists:
Savory: Skip the sugar and mix in Parmesan, rosemary, or black pepper for a unique appetizer or canapé base.
Chocolate: Swap ¼ cup flour for cocoa powder and add vanilla for a rich flavor. Great with powdered sugar or white chocolate drizzle.
Lemon: Add lemon zest and extract for a bright, citrusy twist, perfect for spring.
Almond: Use almond extract and a bit of almond flour for a nutty variation, topped with slivered almonds or glaze.
Gluten-Free: Use a 1:1 gluten-free baking mix and gluten-free baking powder for a crisp, classic feel without the gluten.
Spiced Holiday: Add cinnamon, nutmeg, or ginger for a cozy, festive flavor. Finish with powdered sugar or maple glaze.
Recipe Card of Pizzelle
Pizzelle Recipe
Cuisine: ItalianDifficulty: Easy24
servings10
minutes20
minutes80
kcalThese classic pizzelle are light, crispy, and beautifully patterned. Perfect for holidays, gifts, or a simple treat with coffee!
Ingredients
3 large eggs
3/4 cup granulated sugar
1/2 cup unsalted butter, melted and cooled
1 3/4 cups all-purpose flour
1 teaspoon baking powder
1 teaspoon anise extract (or vanilla/almond as desired)
Optional: Zest of 1 lemon or orange
Directions
- Preheat your pizzelle maker according to the manufacturer’s instructions.
- In a large bowl, whisk eggs until frothy, then add sugar and whisk until pale and thickened.
- Gradually mix in the melted butter until smooth.
- Sift together the flour and baking powder. Fold into the wet mixture until combined.
- Stir in the anise extract and optional zest. The batter should be thick but pourable.
- Drop 1 tablespoon of batter onto the center of each pizzelle mold. Close the lid and cook for 30–60 seconds, or until golden brown.
- Remove the pizzelle and cool on a wire rack. They will crisp up as they cool.
- Store in an airtight container for up to 2 weeks.
Notes
- Pizzelle Iron Care: Always preheat the pizzelle iron and lightly grease it with cooking spray or oil for the first batch to prevent sticking.
- Keep Them Fresh: Store pizzelle in an airtight container to maintain their crispness. If they lose their crunch, lightly toast them in the oven.
FAQs
Ensure your pizzelle maker is properly preheated and lightly greased before cooking the first batch. If sticking persists, add a small amount of melted butter or oil to your batter.
Pizzelle require the patterned mold to achieve their signature look. While you can try using a waffle iron, the results won’t be quite the same.
Soft pizzelle are often a result of undercooking. Cook them until they’re golden brown, and allow them to cool fully on a wire rack to crisp up.
Pizzelle store beautifully for up to 2 weeks in an airtight container or 3 months in the freezer. They’re an excellent make-ahead cookie for holidays or special occasions.
Absolutely! Vanilla, almond, or lemon extract are great alternatives. You can even experiment with unique flavors like hazelnut or coconut.
If the batter feels too thick to spread in the iron, add a teaspoon of water or milk at a time until it reaches the consistency of pancake batter.
Know the Story of Pizzelle
Pizzelle recipe trace their roots back to Southern Italy, with origins in the Abruzzo region. The name comes from the Italian word “pizze,” meaning flat or round, which describes their shape. Traditionally, pizzelle were made using ornate iron molds heated over an open flame, often bearing family crests or symbolic designs. They were served at weddings, religious feasts, and festivals, symbolizing unity and celebration.
For me, pizzelle are a reminder of cozy afternoons in my grandmother’s kitchen, where she would whip up dozens of these delicate cookies, filling the house with their warm, buttery aroma. Today, making pizzelle feels like a connection to that tradition, a little piece of history preserved with every batch.
Final Thoughts
I’d love to hear how your pizzelle turned out! Did you stick with the classic anise flavor, or did you experiment with something new? Share your photos, stories, or tips in the comments below. Don’t forget to tag me on social media if you share your pizzelle creations, I love seeing them!
Looking for more desserts? Check out Easy Rice Pudding Recipe: A Classic Treat You’ll Want to Make Again and Again or The Best Philadelphia Cheesecake Recipe for Rich, Velvety Texture for your next dessert adventure!
Now it’s your turn! Grab your pizzelle maker, gather your ingredients, and bring a little bit of Italy into your kitchen. Don’t forget to share your creations with us, we’d love to celebrate your success. Happy baking!