Last Updated on December 25, 2025 by Souhail
If you grew up going to holiday parties or family get togethers, chances are you have very strong feelings about a cheese ball. I know I do. This is one of those recipes that instantly takes me back to standing in my aunt’s kitchen, hovering near the snack table, pretending to socialize while absolutely demolishing crackers dipped into the creamiest, dreamiest cheese ball imaginable.
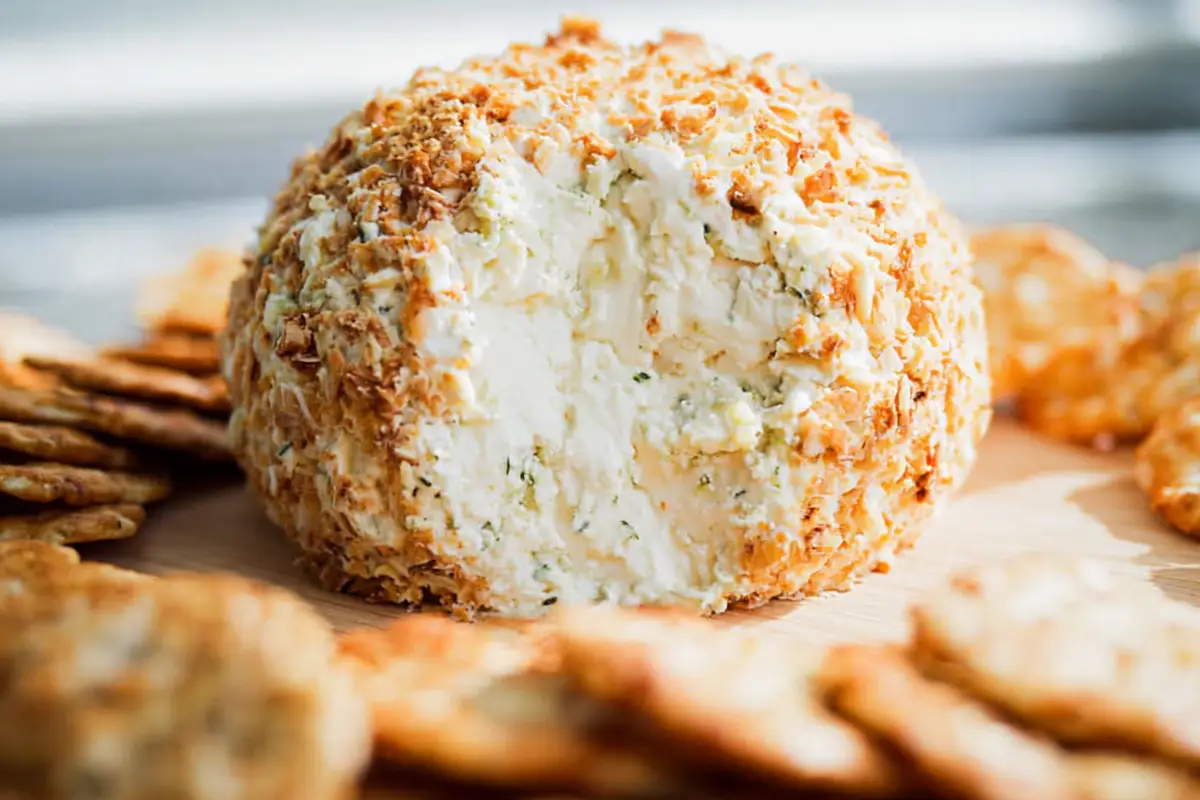
This cheese ball is one of those recipes that fits into real life perfectly. It is ideal for holidays, game days, potlucks, or those moments when friends text “we’re stopping by” and you need something impressive with minimal effort. The flavor is rich, savory, slightly tangy, and perfectly balanced with a crunchy nut coating that makes every bite irresistible. What makes this version special is how creamy it stays inside while still holding its shape, and how customizable it is depending on your mood or the occasion.
It is nostalgic, crowd pleasing, and honestly one of the easiest appetizers you can make that still feels special.
Table of contents
Why This Cheese Ball Just Works Every Single Time
There’s a reason this cheese ball ends up being the first thing gone at any gathering—and it’s not just because it looks adorable on a charcuterie board. It’s about that irresistible balance of flavor and texture. Here’s why this recipe is always a hit:
- The cream cheese base gives it that ultra-creamy, spreadable texture we all crave.
- A generous amount of sharp cheddar adds richness and depth without overpowering.
- A dash of Worcestershire sauce introduces a quiet umami that makes you go back for more.
- Garlic and onion powder bring warmth and savory notes that round everything out.
- And of course, the crunchy coating of chopped nuts—a texture lover’s dream—adds just enough contrast to keep each bite interesting.
I love making this when I’m planning a cozy appetizer night. It pairs especially well with hearty dishes like this lasagna soup—imagine that warm bowl of soup followed by a crunchy, creamy bite on a cracker. Total comfort food magic.
If you’re prepping for a party, pair this with protein-packed bites like chicken sausage balls or even turkey sausage balls. Together, they create a crowd-pleasing spread that hits all the right notes—savory, creamy, and satisfying.
How To Make It

Cheese Ball
12
servings10
minutes1
hour220
kcalA crowd-pleasing classic, this cheese ball is creamy, tangy, and wrapped in a crunchy coat of chopped nuts. Perfect for holidays, game day, or casual snacking, it comes together in minutes and can be made ahead for easy entertaining.
Keep the screen of your device on
Ingredients
16 oz cream cheese, softened
2 cups shredded sharp cheddar cheese
1 tbsp Worcestershire sauce
0.5 tsp garlic powder
0.5 tsp onion powder
Salt and pepper, to taste
1 cup finely chopped pecans or walnuts (for coating)
0.25 tsp smoked paprika or cayenne for heat (Optional)
1 tbsp finely chopped chives or green onions (Optional)
Directions
- Start by letting your cream cheese come to room temperature. This makes it so much easier to mix and gives you that perfect fluffy texture. Once it’s softened, add it to a large mixing bowl along with your shredded cheddar. I like using sharp cheddar here for that punch of flavor, but you can use mild if you prefer.
- Next, stir in the Worcestershire sauce, garlic powder, onion powder, and a little salt and pepper. You can also toss in optional ingredients like paprika, cayenne, or fresh chives if you want to level things up. Mix everything really well until the mixture is fully combined and smooth.
- Now comes the fun part—shaping! Scrape the mixture onto a piece of plastic wrap, gather it up, and form it into a ball. Don’t worry about making it perfect right away; once it chills, it’s easier to refine the shape. Pop it into the fridge for at least an hour (or overnight if you’re prepping ahead).
- When you’re ready to serve, roll the chilled cheese ball in finely chopped nuts. Press gently so the nuts stick to the surface. You can go classic with pecans or walnuts, or try something wild like crushed pumpkin seeds for a twist.
- Place it on a serving platter surrounded by crackers, veggie sticks, or sliced baguette—and watch it disappear.
Notes
- Use room temperature cream cheese for the smoothest blending—cold cream cheese will stay lumpy.
- Sharp cheddar is key for that bold flavor, but you can mix in pepper jack, gouda, or even blue cheese for variation.
- Prep ahead—make the cheese ball up to 3 days in advance, and roll it in nuts just before serving.
- Go nut-free by using crushed pretzels, pumpkin seeds, or herbs instead of nuts.
- Double the recipe for larger crowds or make two smaller balls with different coatings.
- Mini cheese balls are great for grab-and-go appetizers at larger events.
Nutrition Facts
- Total number of serves: 12
- Calories: 220kcal
- Fat: 19g
- Sodium: 280mg
- Carbohydrates: 3g
- Fiber: 1g
- Sugar: 1g
- Protein: 7g
Like this recipe?
Follow @wikitasty on Pinterest
Pro Tips for a Cheese Ball That People Talk About
Let’s talk strategy. Here are the little things that make a huge difference in turning a decent cheese ball into one that disappears in minutes:
- Let your cream cheese soften fully before mixing. This helps everything blend smoothly and gives you a fluffier, lighter texture. I usually set mine out on the counter for about 45 minutes.
- Taste as you go. Cheese balls are served cold, and flavors tend to mellow out after chilling. Go slightly bolder with your seasoning than you think you need.
- Chill before shaping and coating. This step is key. It firms everything up and helps the ball hold its shape.
- Use finely chopped nuts. Larger chunks don’t adhere well and fall off as people slice in. A finer chop gives you that beautiful crust and perfect crunch.
- For a fun flavor twist, try mixing in a little pot roast seasoning. It adds a deep, savory backbone that really wakes things up.
- Want to switch up the outer layer? Crushed pumpkin seeds are an amazing nut-free alternative—and they add a toasty, earthy flavor that’s especially perfect in the fall.
Fun Twists and Variations You’ll Want to Try
While I love the classic cheese ball just as it is, sometimes it’s fun to play around and add some variety to the party table. Here are a few of my favorite spins:
The Smoky Bacon Ranch Cheese Ball
Add a packet of ranch seasoning, mix in crumbled cooked bacon, and roll it in a blend of bacon bits and parsley. This one disappears faster than any other version I’ve made.
Nut-Free Herby Cheese Ball
Skip the nuts and roll the ball in a combo of chopped fresh parsley, chives, and green onions. It’s bright, fresh, and perfect for spring brunches or anyone with a nut allergy.
Spicy Jalapeño Popper Cheese Ball
Fold in diced jalapeños, a pinch of cayenne, and shredded pepper jack. Finish it with a coating of crushed tortilla chips for an epic game day twist.
Mini Cheese Balls for Individual Servings
Scoop tablespoon-sized portions, roll into balls, and insert pretzel sticks as handles. Great for buffets or outdoor parties where people want their own snack.
Serving Suggestions
This cheese ball practically begs to be the star of your next snack spread. I usually serve it with buttery crackers (Ritz, always a win), crisp celery sticks, sliced bell peppers, and toasted baguette rounds. It also looks gorgeous nestled in the middle of a charcuterie board with grapes, olives, and nuts.
For holiday gatherings, I sometimes shape it into a wreath or snowman for a playful, festive vibe. No matter how you serve it, make sure there’s a knife handy—though honestly, people tend to start dipping right in.
Storage and Reheating Instructions
You can make your cheese ball up to three days ahead—just wrap it tightly in plastic wrap and keep it in the fridge until ready to serve. If you’re storing leftovers, wrap again or place it in an airtight container to prevent it from drying out.
Cheese balls are served cold, so there’s no need to reheat. Just let it sit out for 15 minutes before serving to soften slightly for that perfect spreadable texture.
FAQs About Cheese Balls
A properly wrapped cheese ball will last up to 5 days in the refrigerator. Store it in plastic wrap or an airtight container.
Yes! In fact, it’s even better if you do. Make the cheese ball and refrigerate it (uncoated) up to 3 days in advance. Roll in nuts just before serving to keep the coating fresh and crunchy.
You can freeze it, but it’s best without the nut coating. Wrap it tightly in plastic and foil, then freeze for up to 1 month. Thaw in the fridge overnight and coat before serving.
Crackers, pretzels, sliced baguette, celery sticks, or even apple slices! You can also serve it alongside cozy dishes like lasagna soup for a comforting meal combo.
Add chopped jalapeños, cayenne pepper, or smoked paprika to the mix. Pepper jack cheese is another great option.
Yes! Try using low-fat cream cheese, mixing in Greek yogurt for tang, or rolling it in seeds or fresh herbs instead of nuts. You can even pair it with lighter snacks like roasted pumpkin seeds or fresh veggie sticks.
Let’s Wrap Up This Cheesy Goodness
This cheese ball recipe is your new go-to for parties, holidays, or whenever snack time calls for something a little extra. Creamy, crunchy, customizable, and just so fun to make (and eat), it’s one of those classic recipes that always makes people smile.
If you loved this, I highly recommend trying out my chicken sausage balls for a protein-packed bite, or serving this alongside cozy lasagna soup for the ultimate comfort night in. Either way, I’d love to see what you create—tag me or leave a comment with your version!