- Lean chicken sausage offers big flavor with less grease, letting cheese and spices stand out.
- Fast and easy: about 10 minutes prep and 20 minutes baking, with minimal pantry ingredients.
- Tips for success: use enough cheese, grate it fresh, avoid overmixing, and portion with a cookie scoop.
- Highly customizable: add jalapeños, swap cheeses, make gluten free, or mix in bacon or veggies.
- Great for make-ahead: refrigerate 4 days, freeze up to 2 months, and reheat in oven or air fryer.
Last Updated on December 19, 2025 by Souhail
Let me tell you, chicken sausage balls were not something I grew up eating, but the first time I brought a tray of these to a holiday potluck, they vanished in about five minutes flat. Since then, I’ve made them for brunches, football Sundays, weekday snacks, and even tucked into lunchboxes. They’re the kind of thing that somehow works for just about any occasion.
Chicken sausage balls are the lighter, slightly leaner cousin of the classic pork version, but don’t let that fool you. Thanks to sharp cheddar cheese, a touch of spice, and fluffy biscuit mix, these little bites are golden and crispy on the outside, tender and savory inside, and ridiculously easy to make. They’re like the Swiss army knife of appetizers, quick to whip up, endlessly adaptable, and always a crowd-pleaser.
Table of contents
- Why Chicken Sausage Balls Totally Work Every Time
- Let’s Make Some Chicken Sausage Balls!
- My Best Tips for Making Perfect Chicken Sausage Balls
- Chicken Sausage Ball Variations You’ll Love
- How to Serve Chicken Sausage Balls (And Make Them Extra Cute)
- How to Store and Reheat Chicken Sausage Balls
- FAQs About Chicken Sausage Balls
- Why Chicken Sausage Balls Deserve a Spot in Your Recipe Repeats
Why Chicken Sausage Balls Totally Work Every Time
There are a few solid reasons these chicken sausage balls have made their way into my “don’t even need to check the recipe anymore” list. They’re not just tasty—they’re practical, reliable, and incredibly versatile. Here’s why you’ll love them too:
- Lean but loaded with flavor: Chicken sausage has a milder, lighter profile than traditional pork, which lets the cheese and spices shine through. You get all the flavor without the extra grease.
- Quick to make: You only need about 10 minutes of prep time and 20 minutes in the oven. That’s it!
- Minimal ingredients: All you need are 4 or 5 pantry staples—perfect for last-minute guests or meal prepping.
- Freezer-friendly: These freeze beautifully, so you can make a double batch and save some for later.
- Customizable: Toss in some jalapeños for heat, swap the cheese, or try a gluten-free biscuit mix.
Want to compare with a heartier option? You’ll love these beef sausage balls for a meatier take on the classic.
Let’s Make Some Chicken Sausage Balls!
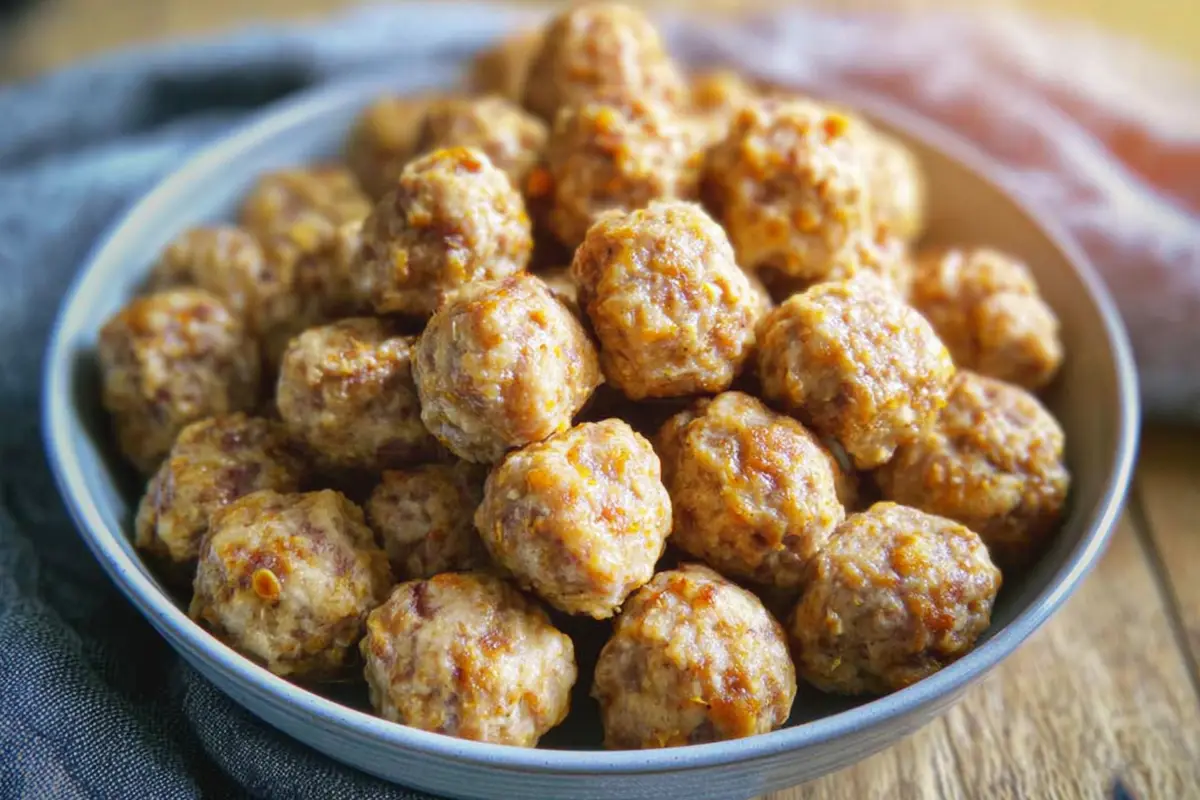
Chicken Sausage Balls
24
servings10
minutes20
minutes110
kcalA cheesy, juicy, and super easy chicken sausage balls recipe that’s perfect for parties, snacks, or even brunch. Made with biscuit mix and cheddar, these are a lighter twist on the classic appetizer.
Keep the screen of your device on
Ingredients
1 lb ground chicken sausage (spicy or mild)
2 cups biscuit mix (such as Bisquick)
1.5 cups shredded sharp cheddar cheese
Optional: pinch of garlic powder or smoked paprika
Directions
- Start by preheating your oven to 375°F (190°C). Trust me, you’ll want it hot and ready because these little guys bake fast!
- In a large mixing bowl, combine 2 cups of biscuit mix (like Bisquick), 1 pound of ground chicken sausage (you can use spicy or mild—whatever you love), and 1 ½ cups of sharp cheddar cheese. If you can, grate the cheese yourself. Pre-shredded will work, but freshly grated cheese melts more evenly and gives you that ooey-gooey texture we’re after.
- Now for the fun part: mixing it all together. You can totally use a wooden spoon, but I like to roll up my sleeves and use my hands—it just brings everything together faster and more evenly. Once you’ve got a cohesive dough, scoop out tablespoon-sized portions and roll them into balls. A small cookie scoop is perfect for keeping them uniform.
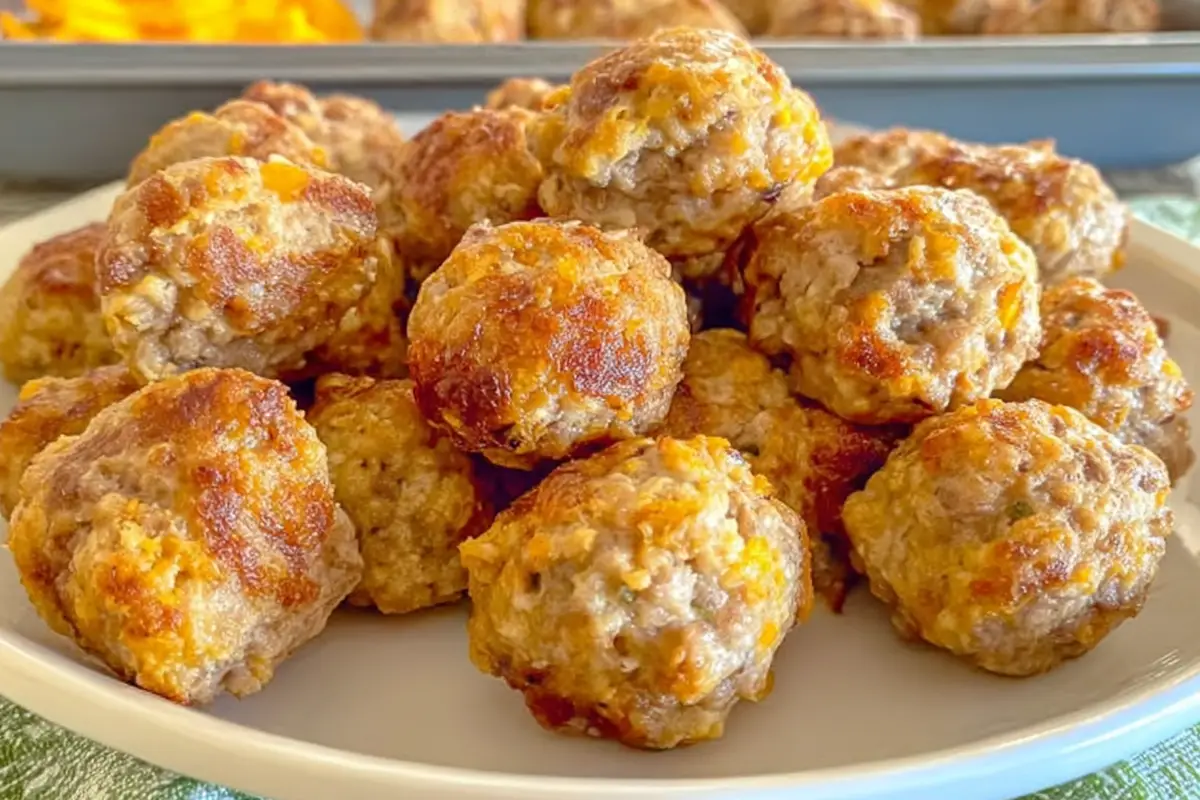
- Place the sausage balls on a parchment-lined baking sheet, spacing them a bit apart so they crisp up nicely. Pop them in the oven and bake for 18–20 minutes, or until they’re golden on the outside and cooked through.
- Let them cool for a few minutes (they’re molten-hot right out of the oven!) and serve them warm with your favorite dipping sauce.
Notes
- Use freshly shredded cheese if possible—it melts much better than pre-shredded.
- Make them spicier by using hot chicken sausage or adding red pepper flakes.
- You can prepare the mixture ahead of time and refrigerate overnight.
- Freeze uncooked balls for easy baking later—just add a few minutes to the bake time.
- Want them extra crispy? Bake them on a wire rack placed over the baking sheet.
Nutrition Facts
- Total number of serves: 24
- Calories: 110kcal
- Fat: 7g
- Sodium: 280mg
- Carbohydrates: 6g
- Sugar: 0.5g
- Protein: 6g
Like this recipe?
Follow @wikitasty on Pinterest
My Best Tips for Making Perfect Chicken Sausage Balls
Okay, now that you’re onboard, let’s make sure you nail them on the first try. These tips will help you avoid the dry, dense sausage balls that sometimes happen with lean meats like chicken.
- Use pre-cooked or raw chicken sausage—just know the difference: If you’re using raw chicken sausage, make sure it’s fully cooked in the oven. Pre-cooked? You’re just heating them through and crisping the outside.
- Don’t skimp on cheese: It’s the glue that holds everything together and gives you that melty, gooey bite.
- Grate your own cheese: Pre-shredded cheese is convenient but doesn’t melt as smoothly.
- Don’t overmix: Once everything is combined, stop mixing. Overworking the dough makes them tough.
- Use a cookie scoop: For even cooking, try using a small cookie scoop to portion out each ball. Keeps your hands clean too!
If you love cozy, make-ahead breakfasts, you might also want to check out this hearty mountain man crock pot breakfast. It’s another crowd-friendly favorite!
Chicken Sausage Ball Variations You’ll Love
Once you’ve nailed the basic version, it’s so easy to play around and make it your own. Whether you’re switching it up for dietary reasons or just love experimenting in the kitchen (like I do), here are a few ideas:
Spicy Jalapeño Chicken Sausage Balls
Add diced jalapeños and pepper jack cheese for a spicy kick. This one’s perfect for game day or when you want something bold.
Gluten-Free Chicken Sausage Balls
Use a gluten-free biscuit mix and make sure your sausage is GF-certified. They come out just as delicious and slightly nuttier in flavor.
Bacon & Maple Chicken Sausage Balls
Swap in maple-flavored chicken sausage and add crumbled cooked bacon to the mix. Sweet, smoky, and salty—this combo is hard to beat.
Veggie-Loaded Chicken Sausage Balls
Grate some zucchini or carrots into the mix (just squeeze out excess moisture first). Great for sneaking veggies into picky eaters’ plates.
If you’re into creative stuffing-inspired bites, I highly recommend trying these cozy turkey stuffing balls—especially during the holidays!
How to Serve Chicken Sausage Balls (And Make Them Extra Cute)
These little guys are super versatile. Serve them as an appetizer, snack, or even for brunch. Here are a few ways to elevate your presentation:
- Dip it good: Serve with honey mustard, ranch, or a spicy sriracha mayo. For a fun party platter, set out a trio of dips.
- Make it brunchy: Stack a few on toothpicks with cubes of cheese, cherry tomatoes, and olives for a brunch skewer.
- Add some greens: Serve with a side of arugula or a simple mixed greens salad to lighten things up.
- On-the-go snack: Pack a few in a container with some cut veggies and hummus.
They pair surprisingly well with a cozy bowl of lasagna soup if you’re looking to turn them into a meal!
How to Store and Reheat Chicken Sausage Balls
These reheat like a dream, which makes them ideal for meal prep or make-ahead party food.
- To store: Keep them in an airtight container in the fridge for up to 4 days.
- To freeze: Flash freeze on a baking sheet, then transfer to a freezer bag. They’ll keep well for up to 2 months.
- To reheat: Warm in a 350°F oven for about 8–10 minutes, or microwave in 30-second bursts until heated through. Add a damp paper towel over them in the microwave to prevent drying.
If you’re always looking for good snack prep ideas, these energy balls are another great option—sweet, portable, and no oven required!
FAQs About Chicken Sausage Balls
I recommend ground chicken sausage from the meat section—it’s less processed and more flavorful. Spicy or mild both work great!
Absolutely! Turkey sausage makes a great swap. You may need a touch more cheese or moisture if it’s extra lean.
Make sure not to overbake them, and don’t skimp on the cheese—it helps bind and moisten the mix.
This usually happens if the mixture is too dry. Add a splash of milk or another egg if it’s not coming together.
Yes! Air fry at 350°F for about 10–12 minutes, shaking halfway through. They’ll be extra crispy on the outside.
Not necessarily. You can make your own using flour, baking powder, salt, and a bit of butter. But biscuit mix makes it fast and foolproof.
Why Chicken Sausage Balls Deserve a Spot in Your Recipe Repeats
Chicken sausage balls are officially your new favorite back-pocket recipe. They’re fast, flavorful, and endlessly flexible—ideal for parties, snacks, or even a light meal. You’ve got the power to tweak them to your tastes and make them your own.
If you love savory bites like this, check out some of my other favorites like the beef sausage balls, turkey stuffing balls, or balance things out with some no-bake energy balls.
Try them out and let me know how it goes! Snap a pic and tag me—I love seeing your kitchen creations. Or leave a comment below with your favorite twist on the classic.