
Last Updated on May 6, 2025 by Souhail
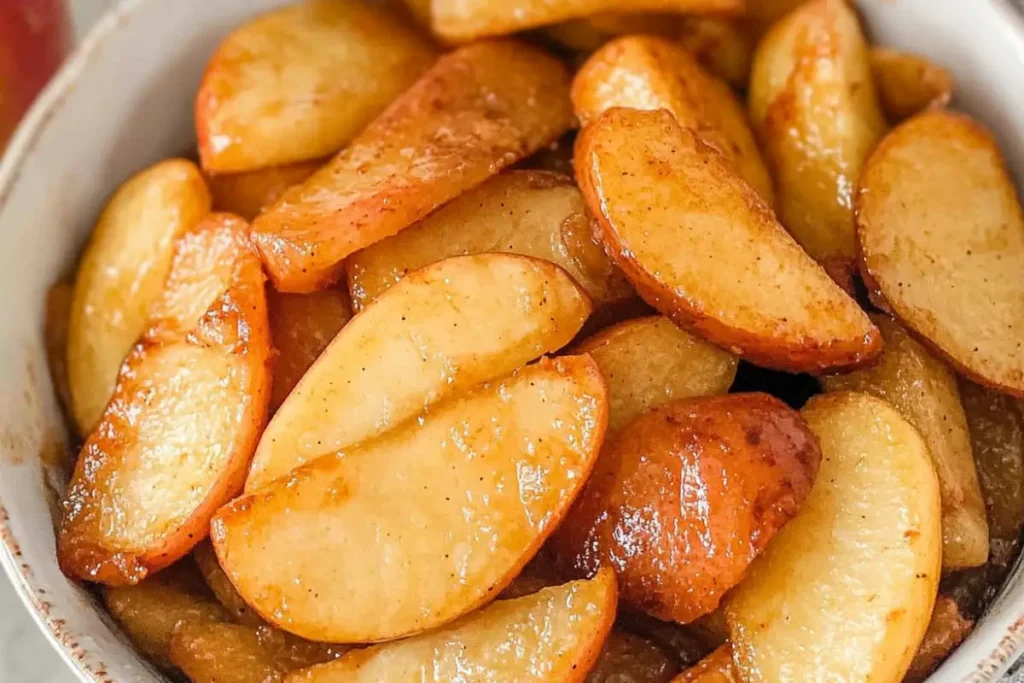
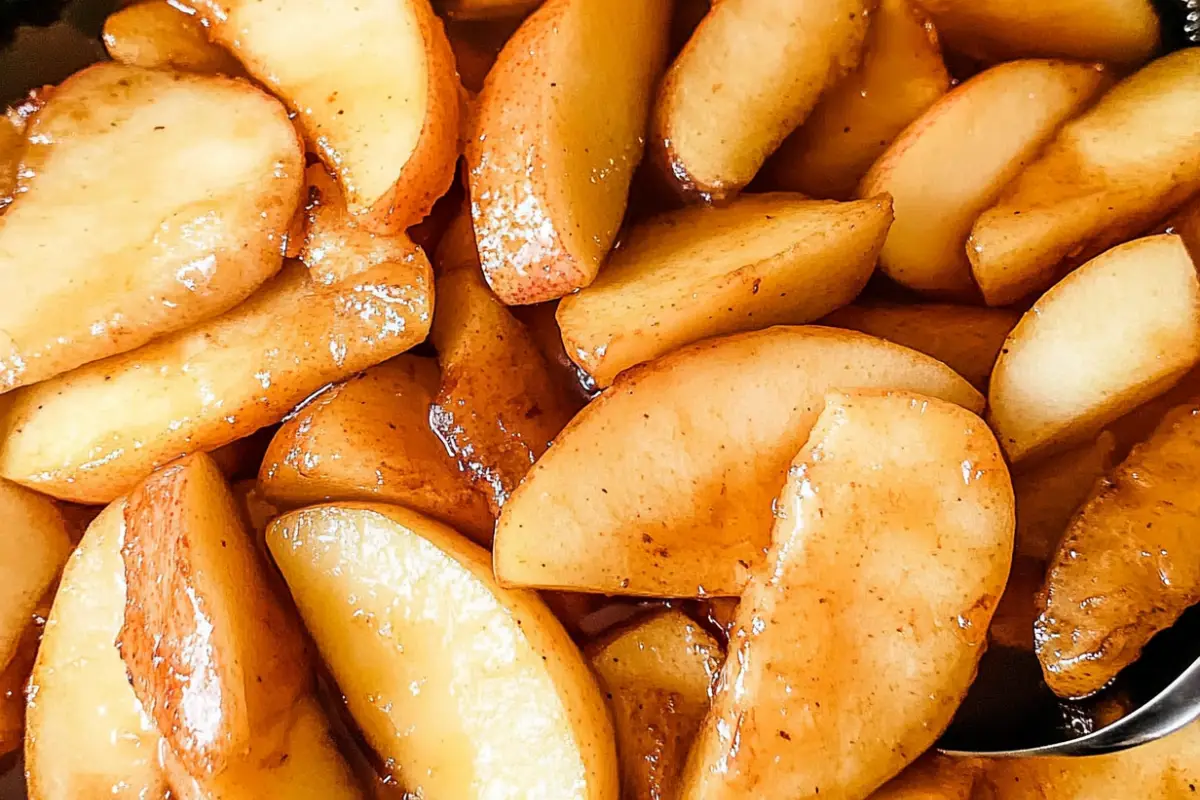
There’s just something magical about a warm skillet of fried apples, sweet, buttery, cinnamony goodness that tastes like a hug from grandma. This fried apples recipe is super simple, and chances are you already have everything you need in your kitchen.
Whether you spoon them over pancakes, serve them with pork chops, or sneak bites straight from the pan (no judgment), these caramelized apple slices are cozy, Southern comfort at its best. They come together in about 15 minutes and fill your kitchen with the most amazing fall-inspired smell, even if it’s the middle of summer.
Let’s make a batch!
Table of contents
Why This Fried Apples Recipe Works
1. Simple Ingredients, Incredible Flavor
One of the best things about this fried apples recipe is that it uses basic pantry staples. With just apples, butter, sugar, cinnamon, and a pinch of salt, you can create a dish that tastes like it took hours to make. The natural juices from the apples combine with butter and sugar to create a rich, caramel-like glaze that coats each slice beautifully.
2. Quick and Easy to Make
No need to turn on the oven or wait for dough to rise, this recipe comes together in a matter of minutes. Simply slice the apples, toss them in a skillet with butter and sugar, and let the heat work its magic. In less than 15 minutes, you’ll have a warm, flavorful dish ready to serve.
3. Perfect for Any Occasion
These fried apples make a great side dish for breakfast alongside pancakes, waffles, or oatmeal. They also work wonderfully as a topping for ice cream or yogurt, and they’re even delicious on their own as a light dessert.
4. Customizable to Your Taste
This recipe can be easily adjusted to suit your preferences:
- Prefer a deeper flavor? Add a splash of vanilla extract.
- Want more spice? Try adding nutmeg, cloves, or allspice.
- Like it less sweet? Reduce the sugar or use honey instead.
- Love a hint of tartness? Squeeze in a bit of lemon juice.
5. A Healthier Dessert Option
Unlike heavy, flour-based desserts, fried apples offer a naturally sweet and satisfying treat with minimal added sugar. Apples are packed with fiber, vitamins, and antioxidants, making this dish a healthier way to satisfy your sweet tooth.
Ingredients Breakdown
To make this fried apples recipe, you’ll need just a few simple ingredients. Let’s break them down and understand why each one is important:
- 4 medium apples, peeled, cored, and sliced: The star of the dish! You can use a variety of apples, depending on your flavor preference.
- Best choices: Granny Smith (tart and holds shape well), Honeycrisp (sweet and crisp), or Fuji (extra juicy and naturally sweet).
- 2 tablespoons butter: Adds richness and helps caramelize the apples beautifully.
- 3 tablespoons brown sugar: Provides a deep, molasses-like sweetness that enhances the natural flavor of the apples.
- 1 teaspoon cinnamon: The perfect spice to complement the apples and give them a warm, comforting aroma.
- 1/4 teaspoon nutmeg (optional): Adds a slightly nutty and earthy spice that pairs wonderfully with cinnamon.
- 1 tablespoon lemon juice: Helps prevent the apples from browning and adds a touch of brightness to balance the sweetness.
- Pinch of salt: A tiny bit of salt enhances the overall flavor and keeps the sweetness from becoming overpowering.
Step-by-Step Instructions
Follow these easy steps to make perfect fried apples every time:
1: Prepare the Apples (5 minutes)
- Peel, core, and slice the apples into ¼-inch thick slices.
- If using Granny Smith apples, you might want to add an extra teaspoon of brown sugar since they are more tart.
Pro Tip: To prevent browning, toss the apple slices with the lemon juice immediately after cutting them.
2: Melt the Butter (2 minutes)
- In a large skillet over medium heat, melt 2 tablespoons of butter.
- Let it heat until it starts to bubble, but be careful not to let it burn.
Pro Tip: If you want an extra caramelized flavor, use unsalted butter and add a small drizzle of maple syrup at this stage.
3: Cook the Apples (5 minutes)
- Add the apple slices to the skillet.
- Stir frequently and cook until they start to soften, about 5 minutes.
4: Add the Seasonings (2 minutes)
- Sprinkle the brown sugar, cinnamon, nutmeg (if using), and salt over the apples.
- Stir everything together to coat the apples evenly.
5: Simmer Until Tender (10 minutes)
- Lower the heat to medium-low and let the apples simmer for 10 minutes.
- Stir occasionally to ensure even cooking.
- The apples should become tender, caramelized, and coated in a syrupy glaze.
6: Serve Warm
- Remove from heat and serve immediately!
- These fried apples are delicious on their own or as a topping for pancakes, waffles, oatmeal, or even pork chops.
Tips for Better Fried Apples Recipe
- Choose the right apples: Use firm varieties like Granny Smith, Honeycrisp, or Fuji. These hold their shape better when cooked.
- Add some extra flavor: For a richer taste, include a splash of vanilla extract or a tablespoon of maple syrup.
- Balance the sweetness: Adjust the amount of brown sugar according to your preference. Less sugar for a more tart dish, or more for extra sweetness.
- Avoid overcooking: Keep an eye on the apples as they cook; you want them tender but not mushy.
- Serve with different dishes: Pair with pork chops, serve over pancakes, or enjoy as a dessert with a scoop of vanilla ice cream.
How to Store
Store any leftover fried apples in an airtight container in the refrigerator for up to 3 days. Reheat them in a skillet over low heat or in the microwave for about 30 seconds. You can also freeze the fried apples for up to 2 months, but be aware that the texture may be slightly softer when reheated.
How to Serve
Fried apples can be served in many ways:
- As a warm side dish alongside pork chops, ham, or roasted chicken.
- On top of pancakes, waffles, or French toast for a sweet breakfast treat.
- As a dessert, paired with vanilla ice cream or a dollop of whipped cream.
- Stirred into oatmeal or yogurt for a flavorful breakfast addition.
Variants Fried Apples Recipe
- Cranberry Fried Apples: Add dried cranberries for a touch of tartness.
- Spicy Fried Apples: Include a pinch of cayenne pepper for some heat.
- Caramel Fried Apples: Drizzle caramel sauce over the cooked apples before serving.
- Bourbon Fried Apples: Add a tablespoon of bourbon for a more grown-up version.
- Honey Fried Apples: Substitute brown sugar with honey for a different flavor profile.
Recipe Card
Fried Apples Recipe
4
servings10
minutes15
minutes150
kcalThis easy fried apples recipe makes a sweet and buttery side dish or dessert that’s full of comforting flavors. Perfect for fall or any time you crave something warm and delicious.
Keep the screen of your device on
Ingredients
4 medium apples, peeled, cored, and sliced
2 tablespoons butter
3 tablespoons brown sugar
1 teaspoon cinnamon
1/4 teaspoon nutmeg (optional)
1 tablespoon lemon juice
Pinch of salt
Directions
- Prepare the apples: Peel, core, and slice the apples into 1/4-inch thick slices.
- Melt the butter: In a large skillet over medium heat, melt the butter until it begins to bubble.
- Cook the apples: Add the sliced apples to the skillet and sauté for 5 minutes, stirring frequently.
- Add seasonings: Sprinkle the brown sugar, cinnamon, nutmeg (if using), lemon juice, and salt over the apples. Stir well to coat the apples evenly.
- Simmer: Cook for an additional 10 minutes, stirring occasionally, until the apples are tender and caramelized.
- Serve warm: Enjoy as a side dish, dessert, or a topping for pancakes, waffles, or ice cream.
Notes
- You can prepare this dish ahead of time and reheat it when needed.
- Leftover fried apples make an excellent topping for oatmeal or yogurt.
- Nutmeg is optional but adds depth to the flavor.
- The lemon juice helps prevent the apples from browning and enhances the flavors.
Like this recipe?
Follow @wikitasty on Pinterest
Frequently Asked Question
Firm apples like Granny Smith, Honeycrisp, or Fuji are best because they hold their shape when cooked.
Yes, fried apples can be made ahead of time and stored in the fridge for up to 3 days. Reheat before serving.
While fried apples are a sweet treat, you can adjust the amount of sugar to make them lighter. They provide fiber from the apples, but the recipe does contain butter and sugar.
Yes, fried apples can be frozen for up to 2 months. Thaw in the fridge and reheat in a skillet or microwave.
Fried apples pair well with pork chops, ham, or roasted meats, and can also be served over pancakes, waffles, or ice cream.
Final Toughts
This fried apples recipe is proof that simple ingredients can create something truly magical. With their rich, caramelized flavor and warm cinnamon spice, these apples are a versatile dish that works as a cozy side, a breakfast topping, or even a light dessert. Whether we’re making them for a holiday table, a quick weeknight treat, or just to satisfy a craving for something sweet, these fried apples are always a winner.
If you love classic Southern flavors, you might also enjoy trying Southern Cornbread and Sweet Cornbread, a perfect pairing for fried apples! And if we’re in the mood for something creamy and comforting, we check out this Creamy Rice Pudding Recipe, another warm and nostalgic dessert option.
For more delicious apple-based recipes, we should take a look at this Homemade Apple Jam Recipe, a fantastic way to preserve the flavors of fresh apples for longer!
We’d love to hear how your fried apples turned out! Did you try any fun variations? Let us know in the comments below, and don’t forget to share this recipe with friends and family. Happy cooking!