Last Updated on November 7, 2025 by Souhail
There’s something truly magical about biting into a Little Debbie Christmas Tree Cake during the holidays, and now, you can bring that joy to life in your own kitchen! With soft layers of moist vanilla cake, fluffy cream filling, and that signature white glaze with festive sprinkles, this homemade version captures all the nostalgic flavors you love.
Whether you’re whipping up a batch for a holiday party or just feeling a little festive, this recipe is a total crowd-pleaser. It’s easy enough to make with the kids, but impressive enough to wow your guests. Ready to recreate this classic holiday treat with a homemade twist? Let’s make some Christmas baking memories!
Table of contents
Why This Recipe Works
Recreating the beloved Little Debbie Christmas Tree Cake requires precision and creativity. The original treats are known for their soft, fluffy texture, creamy filling, and decorative flair. Here’s why this recipe captures the magic:
1. Perfectly Soft Cake Layers
The base of this recipe is a vanilla sponge cake, light yet sturdy enough to hold the filling and decorations. Using cake flour ensures a tender crumb, while a combination of butter and oil adds richness and moisture.
2. Creamy Filling That Melts in Your Mouth
The creamy filling is a simple mixture of butter, powdered sugar, and marshmallow fluff. This combination mirrors the signature light sweetness of the original cakes without being overly heavy.
3. Festive Design Made Easy
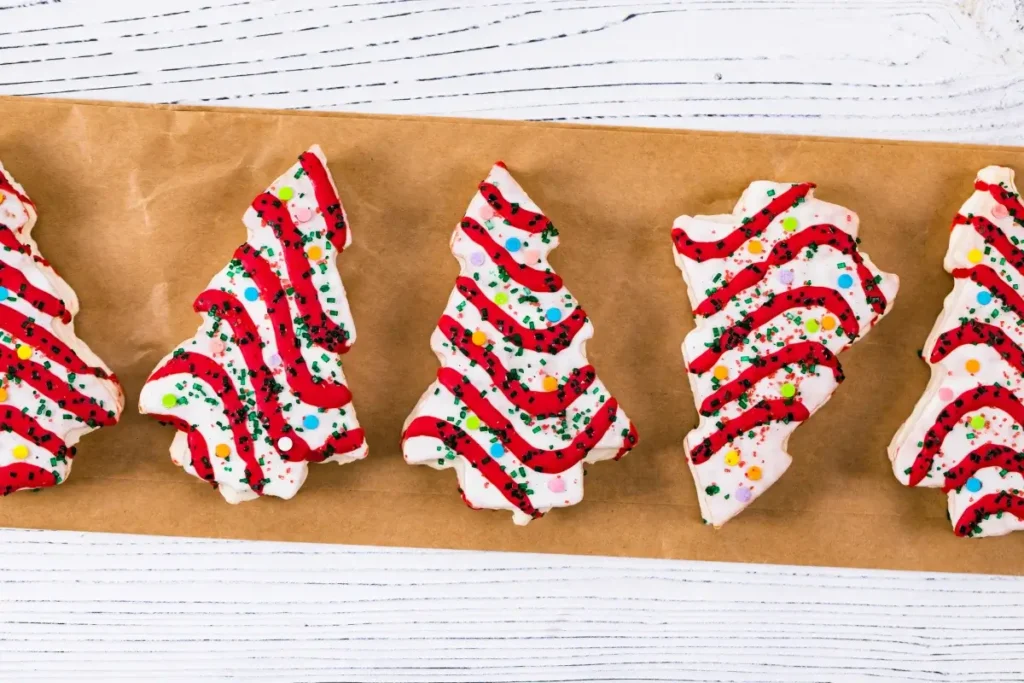
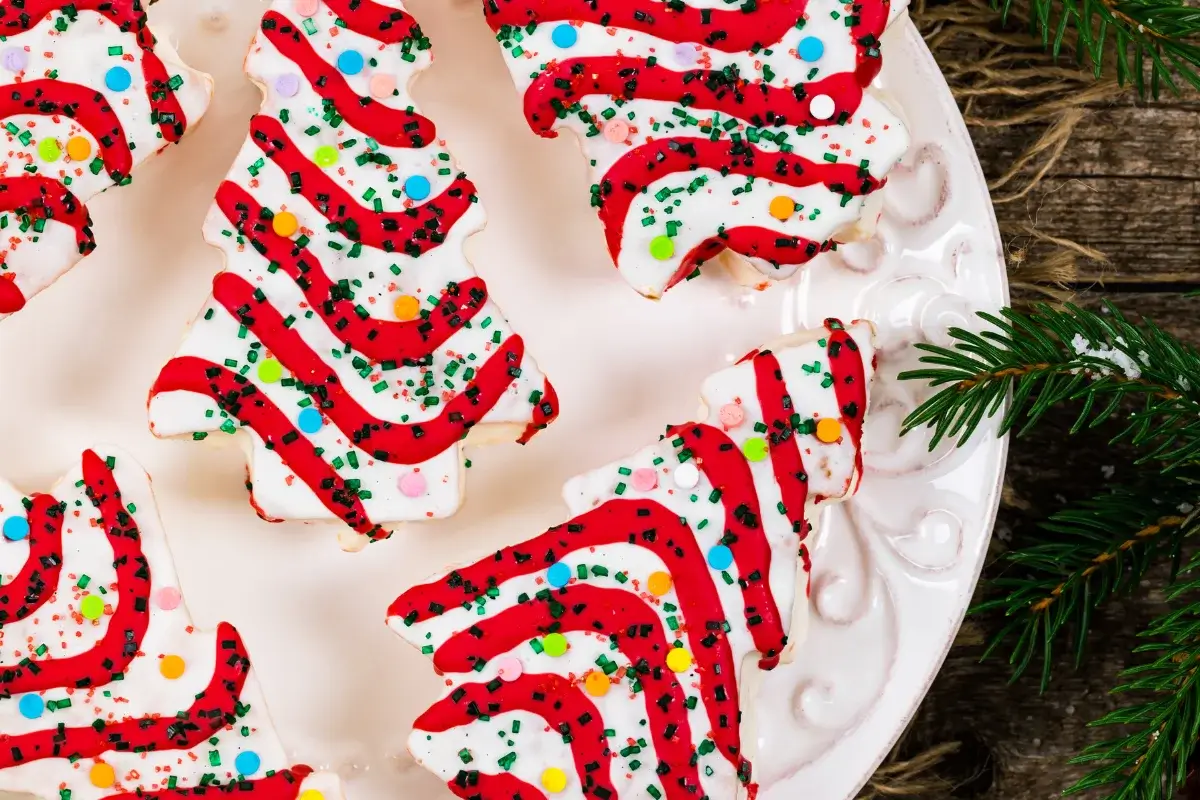
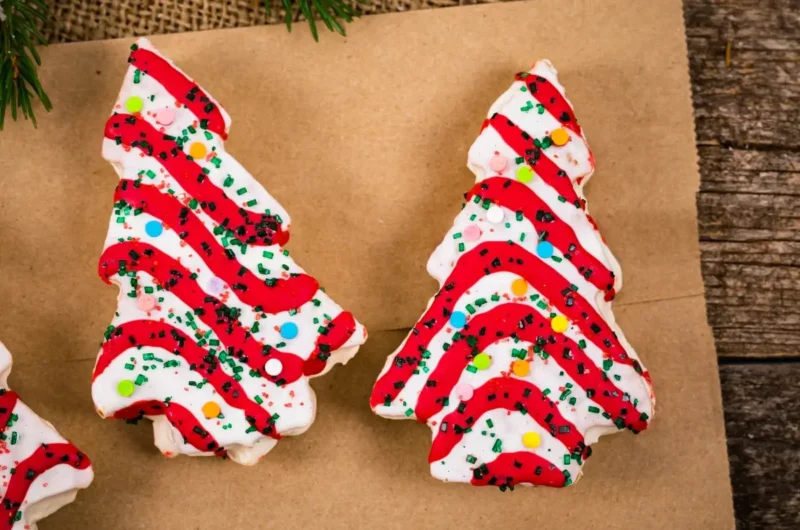
Shaping the cakes into Christmas trees is easier than you think! A tree-shaped cookie cutter or a printable stencil helps you achieve the iconic shape. Green icing and red drizzle replicate the festive decorations perfectly, while white sprinkles add a delightful crunch.
4. Customizable to Your Preferences
This recipe is versatile! Want a chocolate twist? Add cocoa powder to the cake batter. Need a gluten-free option? Substitute almond or gluten-free flour. The possibilities are endless, allowing you to cater to your family’s dietary needs or flavor preferences.
5. Fun and Festive Activity
This recipe turns baking into a holiday tradition. Involve your kids in decorating the cakes, they’ll love adding sprinkles and icing. These cakes make wonderful homemade gifts, too, packaged in festive tins or bags.
6. Better than Store-Bought
While Little Debbie cakes are delicious, homemade versions offer a fresher taste, no preservatives, and the joy of baking from scratch. Plus, you can adjust the sweetness, decorations, and size to suit your preferences.
Ingredients Breakdown
Here’s everything you’ll need to make your own Little Debbie Christmas Tree Cakes at home. Each ingredient is carefully chosen to replicate the flavor and texture of the original cakes.
For the Vanilla Sponge Cake
- 1 ½ cups cake flour: Provides a tender, delicate crumb (Find out more about Cake Flour vs. All-Purpose Flour).
- 1 tsp baking powder: Ensures the cake rises evenly.
- ½ tsp baking soda: Helps the cake achieve a fluffy texture.
- ¼ tsp salt: Balances the sweetness and enhances flavor.
- ½ cup unsalted butter, softened: Adds richness to the cake.
- ¼ cup vegetable oil: Keeps the cake moist and soft.
- ¾ cup granulated sugar: Sweetens the cake base.
- 2 large eggs, at room temperature: Ensures the batter emulsifies properly.
- 1 tsp pure vanilla extract: Adds that classic vanilla flavor.
- ½ cup buttermilk: Reacts with the baking soda for a soft, tender crumb.
And for the Cream Filling
- ½ cup unsalted butter, softened: The base for a creamy, smooth filling.
- 1 cup powdered sugar: Sweetens and stabilizes the filling.
- 1 cup marshmallow fluff: Creates a light, fluffy texture reminiscent of the original.
- 1 tsp vanilla extract: Adds depth to the filling.
For Decoration
- 2 cups white chocolate chips or candy melts: For the smooth, white coating.
- 2 tbsp vegetable shortening: Ensures the chocolate coating spreads easily.
- Green food coloring: For a festive touch on the coating.
- Red icing gel: Perfect for creating the iconic red drizzle.
- White sprinkles or sanding sugar: Adds crunch and a decorative sparkle.
Optional Tools
- Tree-shaped cookie cutter or stencil: For shaping the cakes.
- Piping bags and tips: For neat decorating.
Step-by-Step Instructions
1. Prepare the Cake Batter (15 minutes)
- Preheat your oven to 350°F (175°C). Grease and line a large rectangular baking sheet (approximately 9×13 inches) with parchment paper.
- In a medium bowl, whisk together the cake flour, baking powder, baking soda, and salt.
- In a large mixing bowl, cream together the butter, oil, and sugar until light and fluffy, about 2-3 minutes.
- Beat in the eggs one at a time, followed by the vanilla extract.
- Alternate adding the dry ingredients and buttermilk, starting and ending with the dry ingredients. Mix until just combined.
2. Bake the Cake (20-25 minutes)
- Pour the batter into the prepared pan, spreading it evenly.
- Bake for 20-25 minutes, or until a toothpick inserted into the center comes out clean.
- Let the cake cool completely in the pan before turning it out onto a cutting board.
3. Cut and Shape the Cakes (10 minutes)
- Use a tree-shaped cookie cutter to cut out Christmas tree shapes from the cooled cake. If you don’t have a cutter, trace and cut shapes using a knife and a printable stencil.
- Set the shaped cakes aside.
4. Make the Cream Filling (5 minutes)
- In a mixing bowl, beat the butter until creamy. Gradually add powdered sugar and mix until smooth.
- Beat in the marshmallow fluff and vanilla extract until light and fluffy.
5. Assemble the Cakes (10 minutes)
- Pipe or spread a generous layer of filling onto one tree-shaped cake.
- Top with another tree-shaped cake, sandwiching the filling. Repeat for all cakes.
6. Decorate the Cakes (30 minutes)
- Melt the white chocolate chips and shortening in a microwave-safe bowl, stirring every 20 seconds until smooth. Add green food coloring to half the mixture.
- Dip each cake in the melted white chocolate, covering it completely. Let excess chocolate drip off before placing the cake on a parchment-lined tray.
- Use the green chocolate to pipe or drizzle tree-like patterns.
- Add red drizzle with icing gel and sprinkle white sanding sugar over the tops.
7. Set and Serve (15 minutes)
- Allow the decorated cakes to set at room temperature or in the refrigerator.
- Serve and enjoy your homemade Little Debbie Christmas Tree Cakes!
Pro Tips for Successful Little Debbie Christmas Tree Cake
Creating the perfect Little Debbie Christmas Tree Cakes at home takes some finesse, but with these expert tips, you’ll achieve bakery-level results every time.
1. Achieve a Perfectly Soft Cake
- Use Cake Flour: The low protein content of cake flour keeps the cake tender. If you only have all-purpose flour, you can make a substitute by mixing 1 cup of all-purpose flour with 2 tablespoons of cornstarch.
- Room Temperature Ingredients: Ensure your butter, eggs, and buttermilk are at room temperature. This helps the ingredients blend seamlessly, resulting in a smooth batter and even baking.
- Don’t Overmix: Mix the batter just until combined to avoid developing gluten, which can make the cake dense.
2. Master the Filling
- Smooth and Creamy Texture: Beat the butter well before adding the powdered sugar and marshmallow fluff. This ensures a light and fluffy filling without lumps.
- Chill if Needed: If your filling becomes too soft while assembling the cakes, pop it in the fridge for 10 minutes to firm up before piping or spreading.
3. Cutting Perfect Tree Shapes
- Freeze the Cake First: A slightly chilled cake is easier to cut into shapes without crumbling. After the cake cools completely, place it in the freezer for 15-20 minutes before using the cookie cutter.
- Get the Most Out of Your Cake: Arrange the cookie cutter or stencil strategically to minimize scraps. Leftover cake bits can be used for cake pops!
4. Work Smart with Chocolate Coating
- Thin the Chocolate Properly: Adding a bit of vegetable shortening or coconut oil to the melted chocolate helps it coat the cakes smoothly. Avoid over-melting, as this can cause the chocolate to seize.
- Use a Fork for Dipping: Place the cake on a fork and spoon the chocolate over it. Let excess chocolate drip off before placing the cake on a tray to set.
Get more details about how to properly melt chocolate.
5. Nail the Decoration
- Let Chocolate Set Slightly Before Adding Sprinkles: This ensures the sprinkles adhere well without sliding off.
- Steady Hands for the Drizzle: Use a small piping bag or a zip-top bag with a tiny corner snipped off to create neat red and green patterns.
6. Keep It Fun!
- Baking with kids? Let them handle the sprinkles or piping decorations. It’s a fantastic way to make memories while baking these holiday treats.
Variants of the Recipe
The Little Debbie Christmas Tree Cake Recipe is already a holiday classic, but there’s plenty of room to add your unique spin! Below are some delightful variations to try, whether you want to explore new flavors, adapt to dietary needs, or switch up the presentation.
1. Chocolate Christmas Tree Cakes
Swap the vanilla sponge with a rich chocolate cake. Add ½ cup of cocoa powder to the dry ingredients and a splash of espresso for depth. Use chocolate filling instead of marshmallow fluff by mixing whipped cream and melted chocolate. Coat with dark chocolate and drizzle white icing for contrast.
2. Peppermint Christmas Tree Cakes
For a minty holiday twist, add 1 teaspoon of peppermint extract to both the cake batter and filling. Decorate with crushed candy canes instead of sprinkles for a crunchy, festive finish.
3. Gluten-Free Christmas Tree Cakes
Replace the cake flour with a 1-to-1 gluten-free baking flour blend. Ensure your marshmallow fluff and other decorations are certified gluten-free. The result? A holiday treat that everyone can enjoy without compromising flavor or texture.
4. Red Velvet Christmas Tree Cakes
Make a festive red velvet version by adding red food coloring and a tablespoon of cocoa powder to the batter. Use cream cheese frosting in place of the marshmallow filling and decorate with green icing for a vibrant Christmas look.
5. Mini Christmas Tree Cake Pops
Turn scraps or smaller cutouts of the cake into cake pops. Crumble the cake, mix it with the filling, roll into balls, and coat with white chocolate. Insert a stick and decorate with sprinkles for a fun, bite-sized treat.
For a creative and festive way to enjoy these iconic treats, try transforming them into a creamy, crowd-pleasing dessert. Our Little Debbie Christmas Tree Dip recipe is the perfect holiday treat, combining nostalgia with simplicity. It’s a no-bake option that highlights the flavors of the cakes in a fun, shareable format.
Serving Suggestions

The joy of these Little Debbie Christmas Tree Cakes lies not only in their flavor but also in how beautifully they complement a holiday spread. Here are some ideas to elevate your serving game:
1. Holiday Dessert Platter
Arrange the cakes on a festive platter surrounded by other treats like candy canes, gingerbread cookies, and chocolate truffles. Add sprigs of fresh rosemary or holly for a seasonal touch.
2. Pair with Beverages
- Hot Cocoa: Serve the cakes with a steaming cup of hot chocolate topped with whipped cream and marshmallows. The rich cocoa and creamy filling make a perfect match.
- Milk or Eggnog: A classic option, especially for kids. The creamy, festive flavors of eggnog make it a standout pairing.
3. As Gifts
- Package the cakes in clear cellophane bags tied with red and green ribbons. Add a handwritten note or gift tag for a personal touch.
- Place them in festive tins lined with parchment paper for a nostalgic, homemade gift.
4. Themed Party Centerpiece
Use a tiered cake stand to create a “Christmas tree” display of the cakes. Sprinkle powdered sugar over the setup for a snow-dusted effect.
5. Dessert Bar Idea
If you’re hosting a party, set up a “decorate your own tree cake” station. Provide plain cakes, various icings, sprinkles, and edible decorations for guests to personalize their treats.
These serving ideas make your homemade Little Debbie Christmas Tree Cakes not just a dessert but a show-stopping centerpiece for any holiday occasion.
Storage and Freezing Instructions
To ensure your Little Debbie Christmas Tree Cakes stay fresh and delicious, follow these detailed storage and reheating tips. Whether you’re saving leftovers or preparing the cakes in advance, these methods will help maintain their flavor, texture, and festive appearance.
Short-Term Storage (Up to 3 Days)
- At Room Temperature:
- If you plan to enjoy the cakes within 1-2 days, store them in an airtight container at room temperature.
- Place parchment paper between layers to prevent the decorations from sticking or smudging.
- Keep the container in a cool, dry spot away from direct sunlight or heat sources to preserve the chocolate coating.
- Refrigeration:
- For slightly longer storage (up to 3 days), refrigerate the cakes in an airtight container.
- Let the cakes sit at room temperature for about 15-20 minutes before serving to allow the chocolate and filling to soften slightly.
Freezing the Cakes (Up to 2 Months)
- Freezing Fully Decorated Cakes:
- Arrange the cakes in a single layer on a baking sheet and place them in the freezer for 1-2 hours, or until the decorations are firm.
- Wrap each cake individually in plastic wrap, then transfer them to a freezer-safe bag or container. Label with the date to track freshness.
- Freezing Unassembled Cakes:
- Freeze the cake layers and filling separately for best results. Wrap the layers in plastic wrap and place the filling in an airtight container.
- When ready to assemble, thaw both components in the refrigerator overnight, then proceed with decoration.
Thawing Frozen Cakes
- Transfer the cakes from the freezer to the refrigerator and let them thaw overnight. Avoid microwaving the cakes, as this can cause the chocolate coating to melt unevenly.
Creative Uses for the Recipe
The Little Debbie Christmas Tree Cake Recipe is a festive treat on its own, but with a bit of creativity, it can become the star ingredient in a variety of other desserts. Here are some imaginative ways to transform these cakes into delightful new holiday treats:
1. Christmas Tree Cake Trifle
Layer your homemade cakes with whipped cream, fresh berries, and crumbled cookies in a large glass bowl or individual cups. The colorful layers create a show-stopping dessert that’s perfect for holiday gatherings.
2. Christmas Tree Cake Milkshake
Blend one or two cakes with vanilla ice cream, a splash of milk, and a drizzle of chocolate syrup to create a decadent holiday milkshake. Top with whipped cream, sprinkles, and a piece of cake for garnish.
3. Ice Cream Sandwiches
Cut the cakes into smaller squares or rectangles and sandwich a scoop of your favorite ice cream between two pieces. Freeze until firm, then dip the edges in sprinkles for a festive touch.
Recipe Card
FAQs
Yes! The cakes can be made up to 2 days in advance and stored in an airtight container at room temperature. For longer storage, freeze the fully assembled cakes for up to 2 months. Thaw them in the fridge overnight before serving.
No problem! Use a printable stencil and a sharp knife to cut tree shapes manually. Alternatively, you can opt for other festive shapes like stars or bells if you have those cutters.
Chill the cake in the freezer for 15-20 minutes before cutting. This firms up the sponge and makes it easier to cut clean shapes. Use gentle pressure with the cutter to avoid crushing the cake.
… And finally
The Little Debbie Christmas Tree Cake Recipe is more than just a festive dessert; it’s a delightful way to celebrate the holiday season with family and friends. By recreating this nostalgic treat at home, you get to enjoy the fresh, flavorful version of a beloved classic while adding your own creative touch.
From the soft vanilla sponge to the creamy marshmallow filling and beautifully festive decorations, these cakes are guaranteed to impress your loved ones. They’re perfect for gifting, entertaining, or simply indulging in a bit of holiday cheer.
What makes this recipe truly special is its versatility. Whether you choose to follow the original design, experiment with fun variations, or incorporate the cakes into other desserts, you’re creating memories that will last well beyond the holiday season.
Now it’s your turn! Gather your ingredients, turn on your favorite holiday playlist, and start baking these festive cakes today. I’d love to hear how your cakes turned out, leave a comment below or share your creations on social media. Let’s make this season sweeter, one Christmas tree cake at a time!


