Last Updated on February 23, 2026 by Souhail
There is something undeniably magical about the moment you pull a pan of freshly baked brownies out of the oven. The aroma that fills my tiny West Village kitchen is enough to make my neighbors knock on the door asking if I’m selling tickets to a chocolate factory. But let’s be real, while classic chocolate brownies are a staple in any baker’s repertoire, there is one variation that holds a special place in my heart and on my dessert table: mint brownies. I still remember the first time I tried them at a bustling bakery in SoHo years ago.
The cool, refreshing burst of mint cutting through the rich, dense fudge was a revelation. It wasn’t just sweet; it was sophisticated yet playful. These aren’t just for St. Patrick’s Day or Christmas; they are the perfect comforting treat for a rainy Tuesday night when you need a little pick-me-up, or an impressive finale to a dinner party where you want to leave your guests speechless.
The flavor profile is a beautiful dance between deep, bittersweet cocoa and bright, aromatic peppermint, creating a balance that keeps you reaching for just one more bite.
Table of contents
Why This Mint Brownie Recipe Is Absolute Magic
You might be wondering why you should bother making these from scratch when box mixes exist. Trust me, once you taste the difference, you will never go back. Here is why this specific recipe stands out in my cookbook and in my kitchen:
- The Texture Balance: We use a combination of melted butter and oil to ensure the crumb stays moist for days, while using high-quality cocoa powder gives it that intense chocolate depth without being overly sweet.
- The Mint Factor: Instead of relying solely on extract which can sometimes taste medicinal, we layer flavors with a hint of fresh mint infusion in the batter and a luscious buttercream frosting spiked with pure peppermint oil.
- Customizable for Everyone: Whether you are hosting a vegan friend or managing gluten intolerance, this base is incredibly forgiving. You can easily swap the all-purpose flour for a 1:1 gluten-free blend, or use flax eggs and dairy-free chocolate to make it completely plant-based without sacrificing that fudgy texture.
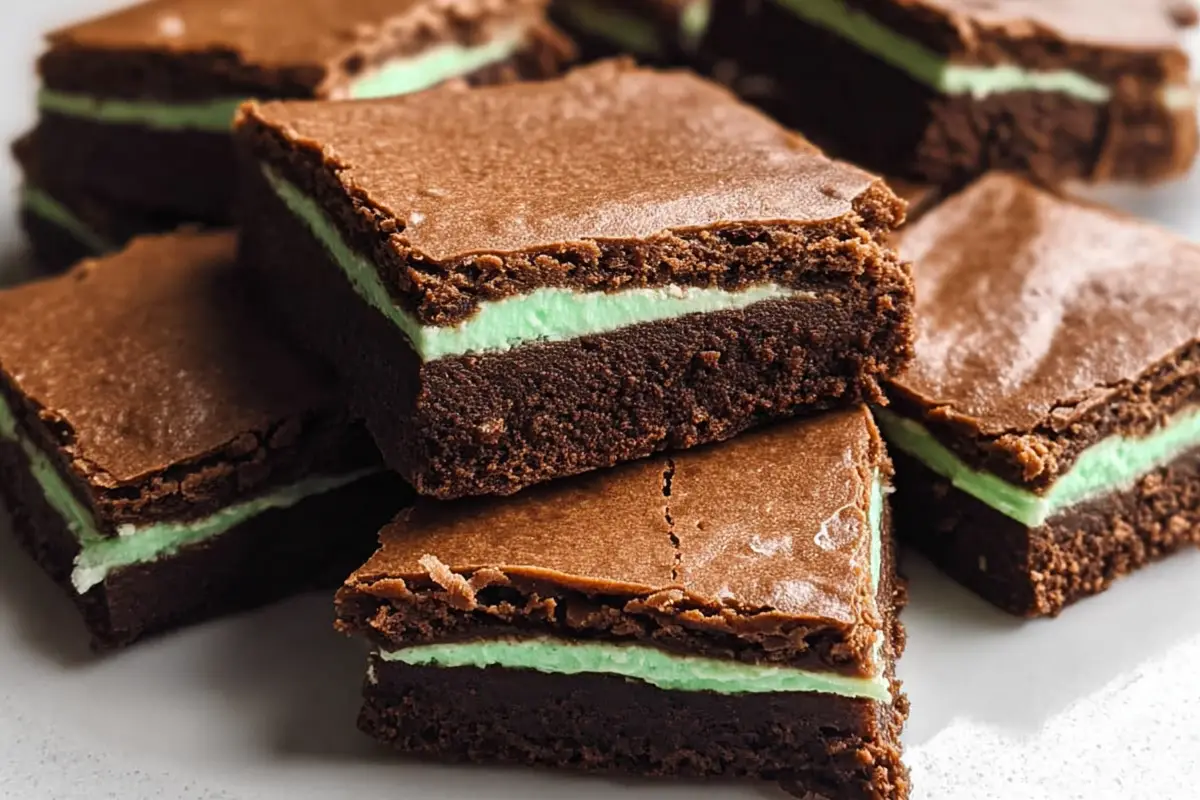
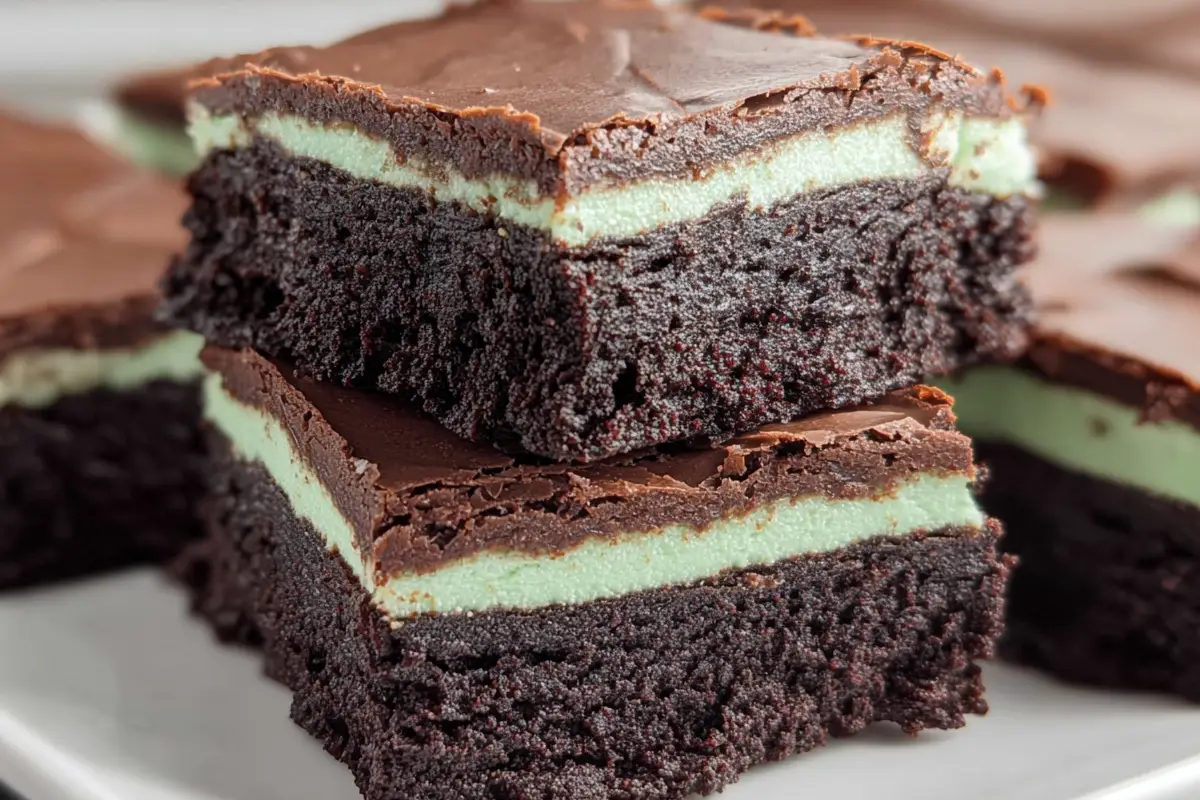
- The Visual Wow: The contrast of the dark, almost black brownie against the pale green frosting and a drizzle of dark chocolate ganache makes these look like they came from a high-end patisserie.
Let’s Chat About Getting Them Perfect
Baking is science, but it is also an art, and I want you to feel confident every step of the way. Here are my top secrets to ensuring your mint brownies turn out flawless:
- Don’t Overmix: Once you add the flour, mix only until the white streaks disappear. Overworking the gluten will give you a cakey brownie instead of the desired fudgy density.
- Cool Completely Before Frosting: This is the hardest part because they smell amazing, but if you frost warm brownies, your beautiful green layer will melt into a swampy mess. Patience is key here!
- Measure Your Cocoa Correctly: Spoon your cocoa powder into the measuring cup and level it off. Packing it down can lead to dry, bitter brownies.
- Use Good Extracts: Since mint is such a dominant flavor, invest in a high-quality peppermint extract or food-grade peppermint oil. Cheap extracts can leave a strange aftertaste.
- The Toothpick Test: For fudgy brownies, you want a few moist crumbs clinging to the toothpick when you test the center. If it comes out bone dry, you have baked them too long.
Speaking of unique textures and ingredients, if you ever find yourself with extra sourdough starter, don’t toss it! Our Sourdough Brownies offer a fascinating chewiness that pairs wonderfully with mint if you dare to experiment. Also, if you are looking for a completely different way to start your day with a protein punch, our Cottage Cheese Pancakes are a game changer before you dive into dessert prep later.
Variations on a Classic Theme
While I adore the classic combination of chocolate and peppermint, the beauty of baking lies in experimentation. Once you master the base recipe, the world is your oyster, or rather, your candy shop. Here are a few ways you can shake things up to suit different moods or dietary needs.
The Andes Mint Copycat If you grew up loving those foil-wrapped Andes candies, this version is for you. Instead of a spreadable frosting, you can press a layer of semi-sweet chocolate chips over the hot brownies straight out of the oven. Let them sit for five minutes until soft, then spread them smooth and sprinkle heavily with crushed peppermint candies. This creates a thin, snappy shell that mimics the iconic candy texture, offering a satisfying crunch against the soft interior.
Vegan Decadence Dairy-free does not mean flavor-free. To make these vegan, simply replace the butter with an equal amount of high-fat coconut oil or a premium vegan butter stick that browns well. Use a flax egg (one tablespoon of ground flaxseed mixed with three tablespoons of water) to bind the batter. For the frosting, whip up some full-fat coconut cream that has been chilled overnight with powdered sugar and mint extract. The result is surprisingly rich, with a subtle tropical undertone that pairs beautifully with the mint.
Gluten-Free Gourmet For my friends who avoid gluten, swapping in a high-quality almond flour blend or a dedicated gluten-free all-purpose flour works wonders. Almond flour adds a slight nuttiness and increases the moisture content, making the brownie even denser and more truffle-like. Just ensure your cocoa powder and chocolate chips are certified gluten-free to avoid any cross-contamination issues. The texture remains incredibly fudgy, and no one will guess it lacks wheat flour.
Double Chocolate Mint Explosion Why stop at cocoa powder? Fold in a cup of chopped dark chocolate chunks or mint chocolate chips into the batter before baking. As the brownies bake, these pockets of chocolate melt slightly, creating molten lava centers within the already rich cake. This variation is for the true chocoholic who wants intensity in every single bite, elevating the dessert from a simple treat to a serious indulgence.
Serving Suggestions
Let’s talk about presentation because we eat with our eyes first. These mint brownies are stunning on their own, cut into neat squares and dusted with a little extra cocoa powder. However, if you are serving them at a dinner party, try plating a warm square alongside a scoop of vanilla bean ice cream. The heat of the brownie melting the cold cream creates an instant sauce that is heavenly. For a festive touch, garnish with crushed candy canes during the holidays or fresh mint leaves in the spring. You could also serve them with a side of strong espresso or a glass of cold milk to cut through the richness. If you are feeling fancy, drizzle a little salted caramel over the top to introduce a savory element that balances the sweet mint perfectly.
Storage and Reheating Instructions
Life gets busy, and sometimes you need your treats to last. Store your frosted mint brownies in an airtight container at room temperature for up to three days. If your kitchen is particularly warm, pop them in the fridge to keep the frosting firm; they will stay good for up to a week. To reheat, microwave a single square for 10 to 15 seconds to bring back that gooey, fresh-baked texture. Avoid reheating the entire pan as it can dry out the edges. You can also freeze unfrosted brownies for up to three months; just thaw them overnight and frost before serving for the freshest experience.
Creative Uses for the Recipe
Don’t let leftovers sit idle! Crumble up day-old mint brownies and use them as a topping for vanilla yogurt or oatmeal for a decadent breakfast treat. You can also blend them into a milkshake with vanilla ice cream and a splash of milk for the ultimate mint chocolate chip shake. Another fun idea is to use small squares as the base for mini dessert sliders, sandwiching them with a little whipped cream and fresh strawberries. They also make incredible gifts; package a few squares in a cute tin with a handwritten note for a thoughtful hostess present that everyone will love.
How Do You Make it
Mint Brownies
These mint brownies are the definition of decadent, featuring a ultra-fudgy chocolate base topped with a silky, refreshing peppermint buttercream. Perfect for any occasion!
16
servings20
minutes25
minutes285
kcalKeep the screen of your device on
Ingredients
- For the Brownies
0.5 cup unsalted butter
1 cup granulated sugar
2 large eggs
1 teaspoon vanilla extract
0.75 cup unsweetened cocoa powder
0.5 cup all-purpose flour
0.25 teaspoon salt
0.5 cup semi-sweet chocolate chips
- For the Mint Frosting
0.5 cup unsalted butter, softened
2 cups powdered sugar
2 tablespoons heavy cream
0.5 teaspoon peppermint extract
3 drops green food coloring (optional)
0.25 cup dark chocolate, melted (for drizzle)
Directions
- First things first, get your oven preheated to 350 degrees Fahrenheit and line an 8×8 inch baking pan with parchment paper, leaving a little overhang on the sides so you can lift the brownies out later.
- In a medium saucepan over low heat, melt the butter until it is just liquid, then remove it from the heat immediately.
- Stir the sugar into the warm butter until it looks a bit grainy, then whisk in the eggs one at a time, followed by the vanilla extract, mixing until everything is smooth and glossy.
- Next, sift the cocoa powder, flour, and salt directly into the wet mixture to avoid any lumps.
- Gently fold these dry ingredients in using a spatula just until you no longer see streaks of flour; be careful not to overmix here or your brownies will lose their fudgy texture.
- Fold in the chocolate chips last, reserving a few to sprinkle on top if you like. Pour the thick, dark batter into your prepared pan and spread it evenly into the corners.
- Slide the pan into the center rack of your oven and bake for about 22 to 25 minutes.
- You are looking for the edges to be set and pulling away slightly from the pan, but the center should still look a tiny bit underdone.
- toothpick inserted into the middle should come out with moist crumbs, not clean.
- Remove the pan from the oven and place it on a wire rack to cool completely.
- This is crucial; if the brownies are even slightly warm, the frosting will slide right off.
- While the brownies are cooling, make the frosting.
- In a stand mixer or using a hand blender, beat the softened butter until it is pale and fluffy, which should take about two minutes.
- Gradually add the powdered sugar, one half-cup at a time, beating on low speed until incorporated.
- Drizzle in the heavy cream and peppermint extract, then turn the speed up to high and whip for another two minutes until light and airy.
- Add the food coloring now if you want that classic minty green hue.
- Once the brownies are fully cool, lift them out of the pan using the parchment paper sling and place them on a cutting board.
- Spread the mint frosting generously over the top, using an offset spatula to create swirls or a smooth finish. Finally, drizzle the melted dark chocolate over the frosting in a zig-zag pattern for a professional look.
- Let the chocolate set for about 10 minutes, then slice into 16 squares and serve.
Notes
- Cooling is Critical: Never rush the cooling process. Warm brownies will melt the butter in the frosting, causing it to separate and become oily.
- Peppermint Potency: Peppermint oil is much stronger than extract. If using oil, start with just 1 or 2 drops and taste as you go.
- Clean Cuts: For perfectly sharp squares, chill the frosted brownies in the fridge for 30 minutes before slicing, and wipe your knife with a hot damp cloth between cuts.
- Pan Size: Using a 9×9 pan will result in thinner brownies; reduce the baking time by about 3-5 minutes if you choose this size.
- Butter Temperature: Ensure your butter for the frosting is soft but not melted. It should yield to pressure but still hold its shape.
- Storage: If storing in the fridge, let the brownies sit at room temperature for 15 minutes before eating to restore their soft, fudgy texture.
Nutrition Facts
- Total number of serves: 16
- Calories: 285kcal
- Fat: 16g
- Saturated Fat: 10g
- Cholesterol: 0.55mg
- Sodium: 0.45mg
- Carbohydrates: 34g
- Fiber: 2g
- Sugar: 26g
- Protein: 3g
Like this recipe?
Follow @wikitasty on Pinterest
FAQS
Absolutely! In fact, they often taste better the next day as the flavors have time to meld. You can bake and frost them up to two days in advance and store them in an airtight container.
This usually happens if you overmix the batter after adding the flour or if you bake them too long. Mix only until combined and pull them out while the center is still slightly jiggly.
Yes, the food coloring is purely aesthetic. Your brownies will taste exactly the same with white frosting; they just won’t have that traditional bright green look.
You can use spearmint extract for a milder, sweeter flavor, or even a splash of crème de menthe liqueur if you want an adult version. Just ensure liquids are accounted for so the frosting doesn’t get too runny.
Swap the all-purpose flour for a 1:1 gluten-free baking blend. Make sure your cocoa powder and chocolate chips are also certified gluten-free to be safe.
A Little Story About Mint and Memory
I’ll never forget the winter I spent interning at a bakery in Brooklyn. It was freezing, the kind of cold that seeps into your bones, and the head chef decided to make a batch of mint brownies to boost morale. The scent of peppermint mingling with roasting coffee beans filled the air, instantly lifting everyone’s spirits. He told me that mint and chocolate were a classic pairing because they represent the balance of life: the deep, serious notes of chocolate grounded by the bright, uplifting spark of mint.
That lesson stuck with me. Now, whenever I make these, I think of that chilly Brooklyn morning and the warmth of community found in sharing food. It’s more than just dessert; it’s a memory maker.
Health Benefits of the Recipe
While definitely a treat, dark chocolate (used in the chips and drizzle) is rich in antioxidants called flavonoids, which can support heart health. Cocoa powder also contains minerals like iron and magnesium. Plus, the aroma of peppermint is known to help aid digestion and boost energy levels naturally, making this a somewhat functional indulgence!
Final Thoughts
There you have it, my friends: the ultimate guide to creating mint brownies that will wow anyone lucky enough to take a bite. Whether you are baking for a holiday gathering, a quiet night in, or just because you deserve something sweet, this recipe delivers on flavor, texture, and joy. Remember, baking is about having fun and making memories, so don’t stress if your swirls aren’t perfect—they will still taste incredible.
If you loved these, you might also enjoy my recipe for Salted Caramel Blondies or my Double Chocolate Chunk Cookies. Grab your apron, preheat that oven, and let’s get baking!