- Easy, comforting snack that packs classic pizza flavors into quick, handheld rolls perfect for game nights or weeknights.
- Chef tips ensure perfect texture: keep fillings cold, avoid overfilling, brush with garlic butter, and let rolls rest briefly.
- Highly adaptable and make-ahead friendly: gluten-free, breakfast, or spicy variants; freeze unbaked and reheat in oven or air fryer.
Last Updated on March 1, 2026 by Souhail
There is something magical about coming home to my small NYC apartment after a long day of testing recipes in the city. The lights are buzzing outside, and I just want something warm and comforting without the fuss of a full dinner. That is exactly when I crave something simple like pepperoni pizza rolls. They fit into everyday life perfectly as a quick weeknight meal or a festive dish for when friends come over to watch the game.
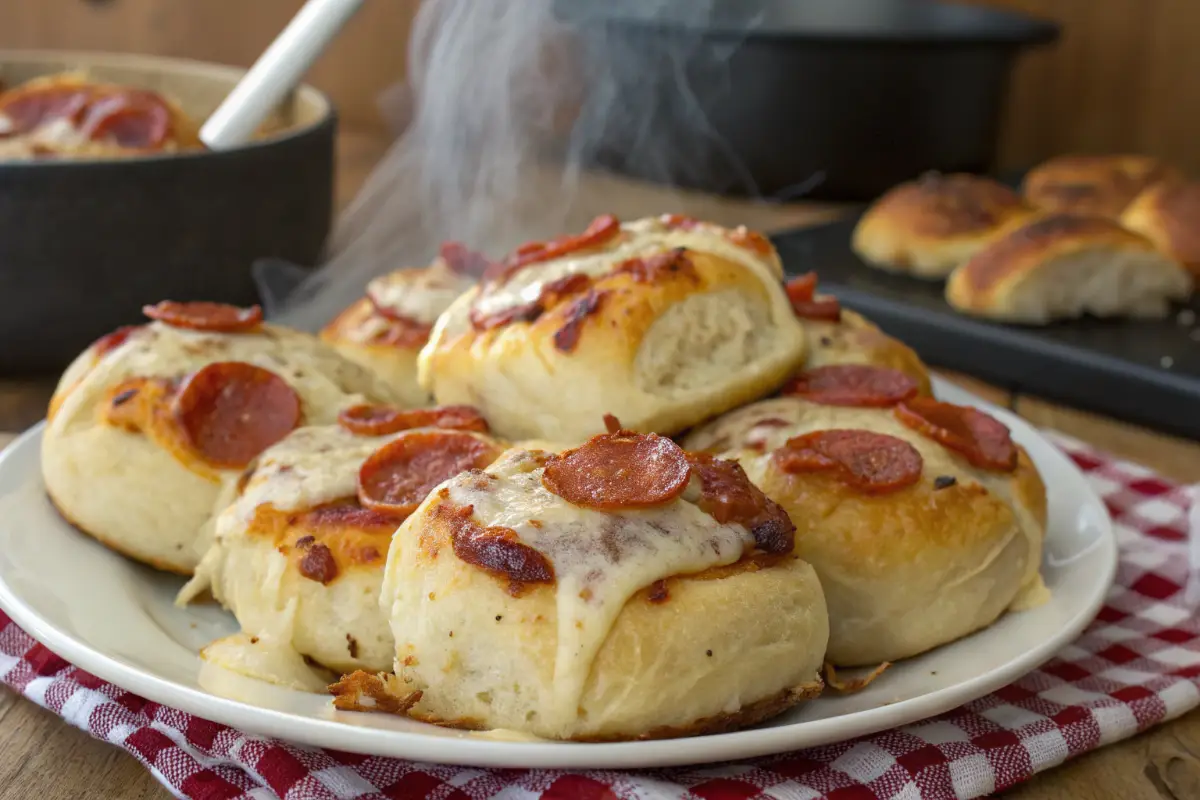
The flavor profile is everything you love about a classic slice, packed into bite-sized pockets of savory sauce, melty cheese, and spicy meat. What makes this recipe so special is the balance of crispy dough and gooey center that reminds me of late nights in college, but with a chef approved twist that elevates the texture.
Table of contents
- Why You Will Fall in Love With These Pepperoni Pizza Rolls
- My Go-To Secrets for Perfect Pepperoni Pizza Rolls
- Variants of the Recipe
- Serving Suggestions
- Storage and Reheating Instructions
- Creative Uses for the Recipe
- How Do You Make It
- FAQS
- A Little Story From My NYC Kitchen
- Health Benefits of the Recipe
- Final Thoughts
Why You Will Fall in Love With These Pepperoni Pizza Rolls
Let me tell you, these little bites of joy are a game changer. I developed this recipe after countless requests from my New York friends who wanted a snack that was faster than delivery but just as satisfying. Here is why this recipe works so well:
- The dough stays tender: Using a blend of baking powder and yeast-free techniques means you get that soft, pillowy texture without hours of rising time.
- Flavor locked in: Rolling the ingredients inside the dough creates a steam pocket that keeps the cheese melty and the pepperoni perfectly spiced.
- Customizable heat: You control the spice level by choosing mild or spicy pepperoni, or even adding a dash of red pepper flakes to the sauce.
- Budget friendly: This recipe uses pantry staples and affordable ingredients, making it perfect for feeding a crowd without breaking the bank.
If you love creative handheld meals, you might also enjoy these pizza croissants that bring a buttery twist to the classic flavor combo. You can easily make this recipe gluten-free by swapping in your favorite gluten-free pizza dough, or dairy-free by using plant-based mozzarella. For a veggie boost, toss in some finely diced bell peppers or spinach without compromising the texture.
My Go-To Secrets for Perfect Pepperoni Pizza Rolls
Getting that golden, crispy exterior with a gooey center is all about technique. Here are my chef-tested tips to make sure your rolls turn out flawless every time:
- Keep ingredients cold: Chill your cheese and pepperoni before assembling. This prevents the filling from leaking out during baking.
- Do not overfill: It is tempting to stuff them full, but leaving a small border around the edges ensures a clean seal.
- Brush with garlic butter: A quick brush of melted butter mixed with garlic powder right after baking adds incredible aroma and flavor.
- Let them rest: Allow the rolls to cool for 2-3 minutes after baking. This helps the cheese set slightly so you do not burn your mouth on the first bite.
If you enjoy making rolled comfort foods, you might find inspiration in these traditional cabbage rolls that use a similar wrapping technique for hearty results.
Variants of the Recipe
One of the best things about this base recipe is how adaptable it is. Whether you are catering to picky eaters or exploring new flavor combinations, these variations will keep your snack rotation exciting.
The Veggie Lover’s Twist Swap half the pepperoni for sautéed mushrooms, diced zucchini, or roasted red peppers. The key is to pre-cook watery vegetables to avoid a soggy center. This version adds fiber and nutrients while keeping that satisfying savory profile. It is a great way to sneak extra veggies into kids’ meals without them noticing.
The Breakfast Edition Transform these into a morning treat by replacing the marinara with a thin layer of pesto or even a scrambled egg mixture. Add crumbled breakfast sausage and a sprinkle of cheddar cheese. These make an impressive brunch item, especially when served alongside fresh fruit. If you enjoy sweet and savory mornings, you might also love these croissant cinnamon rolls for a weekend treat.
The Spicy Calabrese Style For heat seekers, mix a tablespoon of Calabrian chili paste into your marinara sauce and use spicy pepperoni. Finish with a drizzle of hot honey after baking. The sweet heat combination is absolutely addictive and perfect for adult game nights.
The Gluten-Free Comfort Version Use your favorite store-bought gluten-free pizza dough or make a simple cloud bread version using eggs and cream cheese. The assembly method stays the same, and the result is just as comforting for those avoiding gluten.
Serving Suggestions
These pepperoni pizza rolls shine on their own, but pairing them thoughtfully can turn a simple snack into a full experience. I love serving them with a small ramekin of warm marinara for dipping, garnished with fresh basil ribbons. For a balanced plate, add a crisp side salad with Italian dressing to cut through the richness.
If you are hosting a party, arrange the rolls on a wooden board with assorted dipping sauces like ranch, garlic aioli, or even a spicy sriracha mayo. For a fun kid-friendly presentation, skewer each roll with a colorful toothpick and serve alongside veggie sticks. The contrast of warm, cheesy rolls with cool, crunchy vegetables makes every bite more enjoyable.
Storage and Reheating Instructions
Leftover pepperoni pizza rolls store beautifully for up to 3 days in an airtight container in the refrigerator. To reheat, I recommend using an air fryer or conventional oven at 350°F for 5-7 minutes to restore that crispy exterior. Avoid the microwave if possible, as it can make the dough chewy.
If you must use a microwave, place a cup of water alongside the rolls to help retain moisture. For longer storage, freeze unbaked rolls on a baking sheet, then transfer to a freezer bag. Bake straight from frozen, adding 3-5 minutes to the cooking time. This make-ahead trick is a lifesaver for busy weeks.
Creative Uses for the Recipe
Do not limit these to just snacking! I love crumbling baked rolls over a bowl of tomato soup for a fun twist on croutons. They also make an excellent addition to a lunchbox, paired with fruit and a small salad. For parties, slice the rolls in half after baking and arrange them on a platter as mini appetizers.
You can even use the same filling and dough technique to make a pull-apart pizza bread for a crowd. If you enjoy creative handheld snacks, you might also explore these corned beef egg rolls for your next gathering.
How Do You Make It
Pepperoni Pizza Rolls
4
servings15
minutes18
minutes285
kcalThese cheesy, savory pepperoni pizza rolls are your new go-to snack. Packed with classic pizza flavor in every bite, they are perfect for game night, quick dinners, or whenever you need a comforting treat.
Keep the screen of your device on
Ingredients
1 pound pizza dough, store-bought or homemade
0.75 cup marinara sauce
1.5 cups shredded mozzarella cheese
0.5 cup grated Parmesan cheese
4 ounces sliced pepperoni
1 teaspoon Italian seasoning
2 tablespoons unsalted butter, melted
0.5 teaspoon garlic powder
Fresh basil for garnish, optional
Directions
- Start by preheating your oven to 400°F and lining a baking sheet with parchment paper.
- On a lightly floured surface, roll out the pizza dough into a large rectangle about 0.25 inch thick.
- Spread the marinara sauce evenly over the dough, leaving a small border around the edges.
- Sprinkle the mozzarella and Parmesan cheeses over the sauce, then arrange the pepperoni slices in a single layer.
- Lightly dust with Italian seasoning. Carefully roll the dough tightly from the long side, pinching the seam to seal.
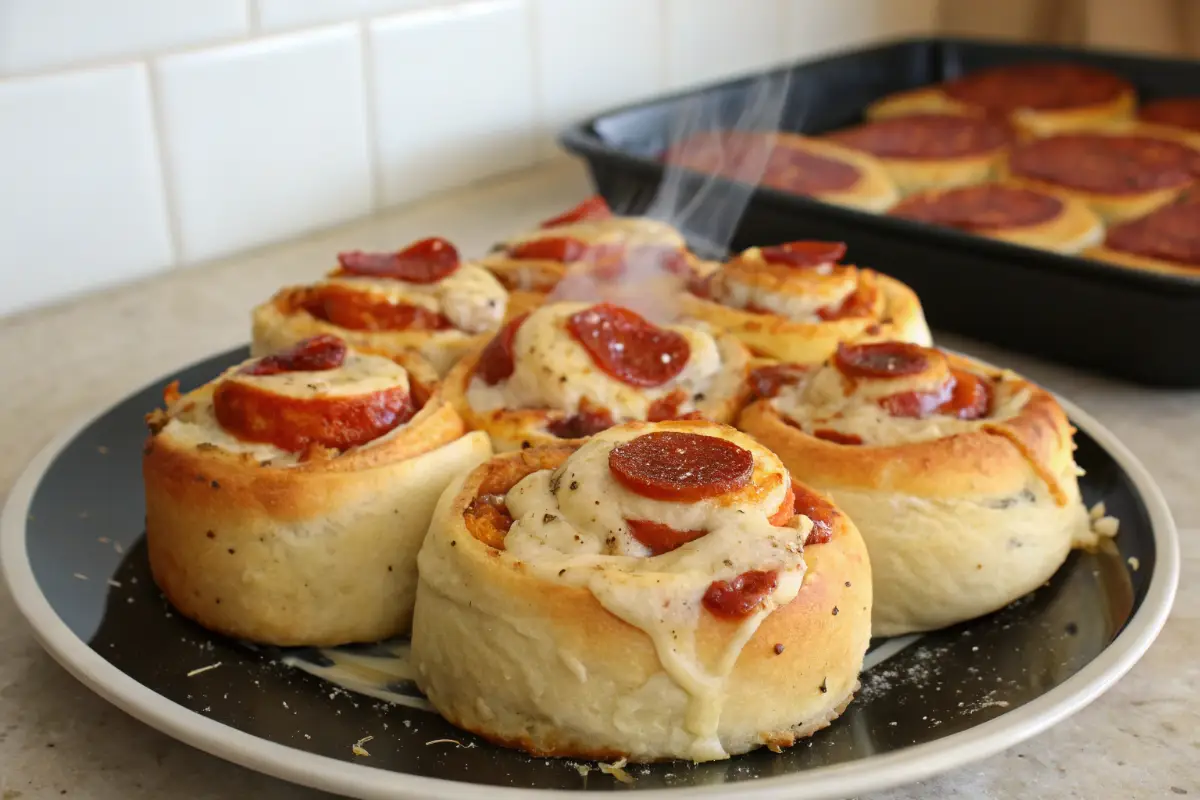
- Slice the roll into 12 equal pieces using a sharp knife or kitchen scissors.
- Place each piece cut-side down on the prepared baking sheet, spacing them about 1 inch apart. Bake for 16 to 18 minutes, or until the rolls are golden brown and the cheese is bubbly.
- While they bake, mix the melted butter with garlic powder.
- As soon as the rolls come out of the oven, brush them lightly with the garlic butter.
- Let them cool for 2 to 3 minutes before serving.
- Garnish with fresh basil if desired, and serve warm with extra marinara for dipping.
Notes
- For extra crispy rolls, brush the tops with olive oil before baking.
- If the dough feels sticky while rolling, lightly flour your hands and rolling pin.
- You can prepare these up to 4 hours ahead and refrigerate before baking.
- For a richer flavor, add a tablespoon of cream cheese to the filling mixture.
- Ensure your oven is fully preheated for even browning.
- Use a pizza cutter for clean, easy slicing.
Nutrition Facts
- Total number of serves: 4
- Calories: 285kcal
- Fat: 14g
- Saturated Fat: 6g
- Cholesterol: 0.35mg
- Sodium: 0.680mg
- Carbohydrates: 26g
- Fiber: 2g
- Sugar: 4g
- Protein: 14g
Like this recipe?
Follow @wikitasty on Pinterest
FAQS
Absolutely! Assemble the rolls, place them on a baking sheet, and freeze until solid. Then transfer to a freezer bag. Bake straight from frozen, adding 3-5 minutes to the cooking time.
This usually happens if they are overfilled or not sealed properly. Leave a small border when adding filling and pinch the dough seam firmly. Chilling the filling ingredients beforehand also helps.
For the crispiest results, reheat in an air fryer or oven at 350°F for 5-7 minutes. This restores the golden exterior better than a microwave.
Yes! Italian sausage, ham, or even cooked bacon work wonderfully. Just ensure any raw meats are pre-cooked before assembling.
Combine 3 cups flour, 1 packet yeast, 1 teaspoon sugar, 1 teaspoon salt, 1 cup warm water, and 2 tablespoons olive oil. Knead until smooth, let rise 1 hour, then proceed with the recipe.
They are perfect for meal prep! Store baked rolls in the fridge for up to 3 days and reheat as needed for quick lunches or snacks.
A Little Story From My NYC Kitchen
I first perfected this recipe during a particularly snowy January in Brooklyn. My roommates and I were stuck indoors, craving something fun and easy. We raided the fridge, found leftover dough and pepperoni, and started experimenting. The moment we pulled that first tray from the oven, the whole apartment smelled like our favorite pizzeria. Now, whenever I make these, I am reminded of laughing over board games with steam fogging up the windows. That is the magic of simple, heartfelt food.
Health Benefits of the Recipe
While this is a treat, it does offer some perks! The mozzarella provides calcium and protein for muscle health. Using a tomato-based sauce adds lycopene, an antioxidant linked to heart health. You can boost nutrition further by adding spinach or using whole wheat dough for extra fiber.
Final Thoughts
There you have it, my friend: the ultimate pepperoni pizza rolls recipe that brings joy to any moment. Whether you are feeding a hungry family, hosting friends, or just treating yourself after a long day in the city, these little rolls deliver big on flavor and comfort. I hope they become a staple in your kitchen just like they are in mine.
If you enjoyed this recipe, you might also love exploring other easy handheld meals like these Amish stuffed cabbage rolls for your next cozy dinner. Now, go preheat that oven and let the cheesy magic begin. Happy cooking!