
- Starter is a living wild-yeast culture made from only flour and water, giving sourdough its tang and rise.
- Easy and cheap for beginners—minimal equipment, flexible feeding schedules, and lots of baking possibilities.
- Health benefits: easier digestion, lower glycemic index, and natural prebiotics without additives.
- Pro tips: use filtered water, whole wheat/rye to jump-start, keep it 70–78°F, and be patient (5–7+ days).
Last Updated on November 10, 2025 by Souhail
I still remember the first time I decided to make a sourdough starter recipe. I was stuck at home during a snowy New York winter, craving something hearty and wholesome. A loaf of crusty, chewy sourdough felt like the ultimate comfort food—but I had no idea that the magic behind it was something so alive, so oddly satisfying to nurture. Yep, I’m talking about the starter: the bubbly, tangy, wild yeast culture that transforms flour and water into golden, crusty loaves.
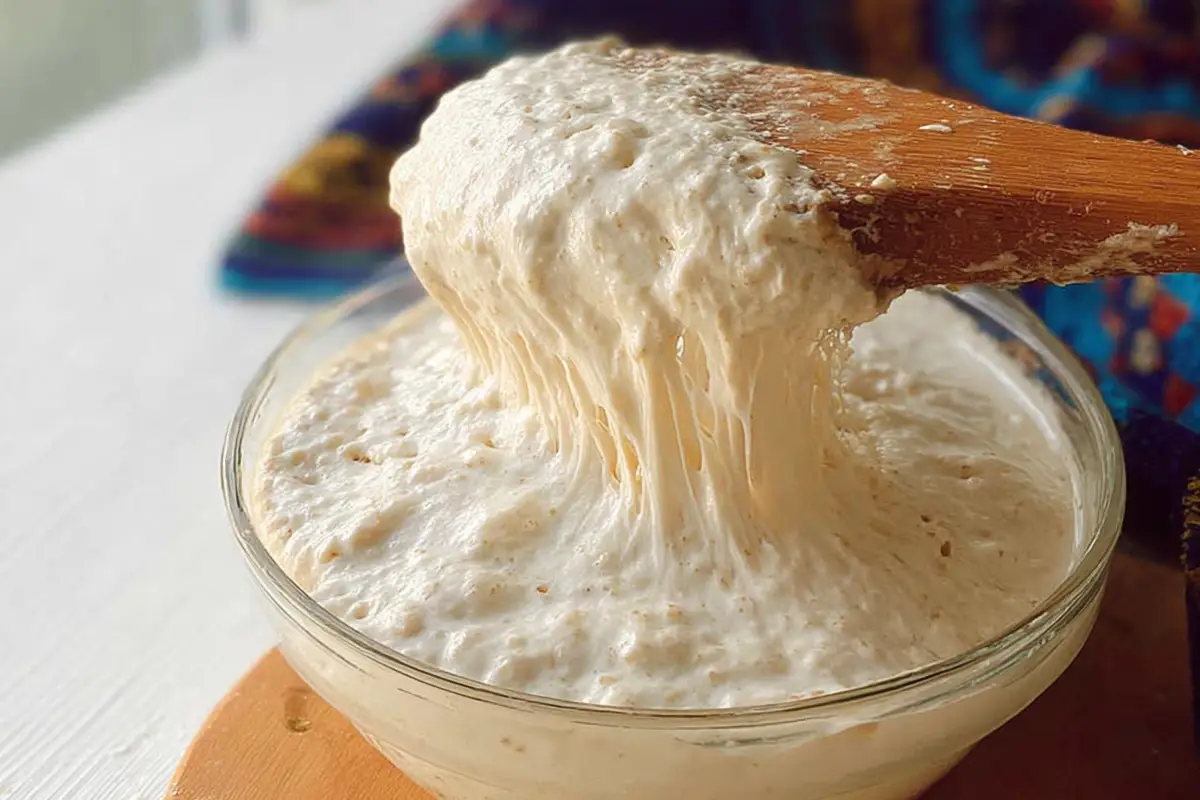
A sourdough starter is the heart and soul of any sourdough recipe. It’s a living culture of wild yeast and lactic acid bacteria that gives sourdough its signature tang and beautiful rise. The best part? You only need two ingredients to get it going: flour and water. That’s it! And with a little patience and love, your starter will become the foundation for everything from artisan loaves to pancakes, waffles, and even pizza dough.
This recipe is perfect for beginners, and once your starter is active, the possibilities are endless. It’s a simple joy that fits right into a cozy weekend project, a daily kitchen ritual, or even a fun science experiment with kids. Plus, you’ll feel like a total bread wizard.
Table of contents
- Here’s Why This Sourdough Starter Recipe Actually Works (and Why You’ll Love It)
- Health Benefits of Sourdough Starter
- How to Make a Sourdough Starter From Scratch
- Want to make it gluten-free or vegan?
- How To Make It
- Pro Tips to Get Your Starter Bubbly and Happy
- Let’s Talk Variants: Different Flours, Textures, and Schedules
- How to Serve Up That Starter Love
- Storage and Reheating Tips for Your Starter
- Fun Ways to Use Sourdough Starter (Beyond Bread)
- FAQs About Sourdough Starter Recipe
- And In Conclusion
Here’s Why This Sourdough Starter Recipe Actually Works (and Why You’ll Love It)
There’s something incredibly satisfying about making a sourdough starter from scratch. You’re essentially building your own little yeast farm using just flour, water, and patience. No fancy ingredients, no commercial yeast—just good old-fashioned fermentation. Here’s why this process is totally worth it:
- It uses natural wild yeast: You’re cultivating the wild yeast that’s already present in your flour and environment. This gives your bread a rich, complex flavor you just can’t get with store-bought yeast.
- It’s ridiculously cheap: Two ingredients. That’s it. Flour and water. Once your starter is active, you never have to buy yeast again (as long as you keep it alive!).
- It’s super beginner-friendly: You don’t need any special equipment. A glass jar, a spoon, and a kitchen scale (or measuring cups) will do the trick.
- It’s flexible: Once established, your starter is very forgiving. You can keep it on the counter for daily baking or store it in the fridge and feed it once a week.
- It creates minimal waste: You can use sourdough discard to make so many yummy things. My go-to is this cozy sourdough pumpkin bread in the fall—it’s soft, spiced, and deeply satisfying.
- It connects you to centuries of tradition: Sourdough baking is one of the oldest forms of breadmaking. There’s something magical about tapping into that heritage with your own homemade starter.
Health Benefits of Sourdough Starter
Sourdough is easier to digest than many commercial breads because the fermentation process breaks down gluten and phytic acid. It also has a lower glycemic index and can be a good source of prebiotics and beneficial bacteria. Bonus: no additives or preservatives—just clean, real food.
How to Make a Sourdough Starter From Scratch
You’re going to create a living culture that, with time and love, will become your loyal baking buddy. We’ll feed it daily with equal parts flour and water. This process takes about 7 days—sometimes a little longer depending on your environment, but don’t worry, I’ll guide you the whole way.
You’ll need:
- A clean glass jar or container (with a loose-fitting lid or cloth cover)
- A spoon or spatula for stirring
- Flour (all-purpose, whole wheat, or rye work best)
- Filtered or dechlorinated water
- A rubber band or marker for tracking growth
Want to make it gluten-free or vegan?
Great news—it already is vegan! And if you need it to be gluten-free, just swap the flour with a good quality gluten-free flour blend (ideally one made for baking, with a mix of rice flour, potato starch, and xanthan gum). Buckwheat and brown rice flours also work beautifully, although they’ll ferment a bit differently.
Once your starter is healthy and active, you’re ready to bake all kinds of naturally leavened goodies—from classic boules to creative bakes like pumpkin muffins (I’ve got a great pumpkin muffin recipe here you can totally riff on with discard).
How To Make It
Sourdough Starter Recipe from Scratch
1
jar (for ongoing use)200
kcal10
minutes7
daysThis sourdough starter recipe uses just flour and water to cultivate wild yeast for baking delicious, naturally leavened bread. Perfect for beginners!
Keep the screen of your device on
Ingredients (to repeat daily for 7 days)
0.5 cup (60g) whole wheat or unbleached all-purpose flour (or rye for a boost)
0.25 cup (60g) filtered or dechlorinated water
Directions
- Day 1 :
- In a clean jar, mix ½ cup (60g) whole wheat or all-purpose flour with ¼ cup (60g) filtered water. Stir until no dry bits remain. The consistency should be like a thick pancake batter. Scrape down the sides, loosely cover the jar, and leave it at room temperature (70–75°F is ideal).
- Day 2 :
- You might see a few bubbles and a mild tangy smell—awesome! Discard about half the starter (around ½ cup). Add ½ cup (60g) flour and ¼ cup (60g) water to the remaining mix. Stir well, cover again, and let it rest.
- Day 3–4 :
- By now, things should be getting more active. Expect a stronger sour smell and more bubbles. Keep feeding the same way: discard half, then add fresh flour and water. Stick to the same time each day if possible. Your starter might rise and fall—that’s normal!
- Day 5–6 :
- Your starter should be doubling in size a few hours after feeding. If not, be patient. Try switching to whole wheat or rye flour for a boost. Keep discarding and feeding daily.
- Day 7 :
- If your starter is reliably doubling within 4–6 hours of feeding, smells pleasantly sour (like yogurt or beer), and is full of bubbles, congratulations! It’s ready to use in your favorite sourdough bread or discard recipes.
Notes
- Whole wheat or rye flour helps kickstart fermentation faster in the early days.
- Use filtered water—chlorine can slow or kill yeast activity.
- A rubber band or marker on the jar helps track how much your starter rises.
- If you miss a day early on, just feed and continue—starters are resilient!
- You can store discard in a separate container in the fridge for future recipes.
- Once mature, your starter can be stored in the fridge and fed weekly.
Nutrition Facts
- Calories: 200kcal
- Fat: 1g
- Sodium: 1mg
- Carbohydrates: 42g
- Fiber: 3g
- Sugar: 0g
- Protein: 6g
Like this recipe?
Follow @wikitasty on Pinterest
Pro Tips to Get Your Starter Bubbly and Happy
Even though it’s just flour and water, getting your starter to thrive can feel like a mini science project. Don’t worry—I’ve made all the rookie mistakes so you don’t have to. Here’s what I wish I knew when I started:
- Use filtered or dechlorinated water: Tap water with chlorine can inhibit yeast growth. Either let it sit out overnight, boil and cool it, or use filtered water.
- Choose the right flour: Unbleached all-purpose flour works fine, but whole wheat or rye flour will kick-start fermentation faster, especially in the early days.
- Keep it warm (but not hot): Starters love temperatures between 70°F and 78°F. Too cold and they’ll slow down; too warm and they’ll over-ferment.
- Use a scale if possible: Measuring by weight ensures consistent results. If you’re not using a scale, use equal parts flour and water by volume (about ½ cup each).
- Be patient with the process: Sourdough starter recipe usually takes 5 to 7 days to get a strong starter going. Some days it’ll look quiet—don’t stress. Just keep feeding it and trust the process.
- Mark your jar: A rubber band or marker helps you track the rise of your starter. When it doubles within 4–6 hours after feeding, you know it’s ready to bake.
Pro tip: Once your starter is active, store extra discard in a separate jar in the fridge. That way, you’ll always have some on hand for yummy comfort recipes like this lasagna soup—which pairs beautifully with a slice of crusty sourdough!
Let’s Talk Variants: Different Flours, Textures, and Schedules
Once you’ve got the hang of a basic starter, there are so many fun ways to experiment. Here are a few variations to try:
1. Whole Wheat Sourdough Starter
Using whole wheat flour gives your starter a boost of nutrients and often gets it going faster. The flavor is a bit nuttier and heartier—great for more rustic loaves.
2. Rye Flour Starter
Rye flour is like sourdough rocket fuel. The natural sugars and enzymes encourage speedy fermentation, making it perfect for jump-starting your culture. Expect a slightly earthier, tangier result.
3. Gluten-Free Sourdough Starter
Use brown rice flour, sorghum flour, or a gluten-free all-purpose blend. It’ll ferment differently (sometimes more slowly), but the result is still bubbly and bakes beautifully into gluten-free breads.
4. Refrigerator Schedule
If you don’t plan to bake every day, no worries. Once your starter is mature, store it in the fridge and feed it once a week. Just pull it out a day before baking and give it a few good feedings to reactivate it.
How to Serve Up That Starter Love
Once your starter is bubbly and mature, the possibilities are endless. Here are a few cozy, flavorful ideas to try:
- Bake crusty sourdough bread and serve it alongside a bowl of chicken of the woods stew for the ultimate forest-foraged comfort meal.
- Turn discard into sweet fall treats like homemade pumpkin bread, muffins, or even pancakes.
- Get creative with breakfast—try using discard in waffles or savory crepes.
- Use it in savory applications too: flatbreads, sourdough crackers, even pizza crust!
Storage and Reheating Tips for Your Starter
Taking care of your sourdough starter is kind of like caring for a low-maintenance pet. Here’s how to keep it happy and alive:
- Short-term: If you’re baking daily, leave your starter at room temp and feed it once every 24 hours.
- Long-term: Not baking every day? Pop it in the fridge and feed it once a week. Let it sit at room temperature for a few hours after feeding.
- Reviving a sleepy starter: If your starter’s been in the fridge for a while and looks sluggish, feed it a few times at room temp to get it perky again.
Fun Ways to Use Sourdough Starter (Beyond Bread)
Got extra starter? Awesome! Here are some of my favorite creative uses:
- Sourdough waffles or pancakes – the tangy flavor is chef’s kiss.
- Add it to banana bread or muffins for a slight tang and boost of moisture.
- Homemade crackers – roll them thin, sprinkle with herbs and sea salt, and bake for the crunchiest snack.
- Make sourdough focaccia – the bubbly structure of the starter makes it extra airy and soft.
FAQs About Sourdough Starter Recipe
Typically 5 to 7 days. Some may take up to 10 days depending on temperature and flour used.
Absolutely. It works well, though whole wheat or rye often ferments faster at the start.
It might be too cold, or your water might contain chlorine. Try switching to whole wheat flour, warm it slightly (but not over 80°F), and use filtered water.
Yes, at least in the early days. Discarding helps keep the acidity balanced and prevents overwhelming the culture with too much food.
Yes! Discard is great for pancakes, muffins, crackers, and even pumpkin bread or muffins.
When it consistently doubles in volume within 4–6 hours after feeding and has a pleasantly sour, yeasty smell.
And In Conclusion
Making your own sourdough starter recipe is like unlocking a secret ingredient that’s been hiding in your pantry all along. With just flour, water, and a little care, you’re on your way to baking bread that’s flavorful, nourishing, and totally unique to your kitchen. Whether you’re dreaming of golden boules or cozy fall bakes, your new starter is the perfect place to begin. Try it out, and let me know how it goes—there’s a whole world of wild yeast magic waiting for you!