Last Updated on April 19, 2025 by Souhail
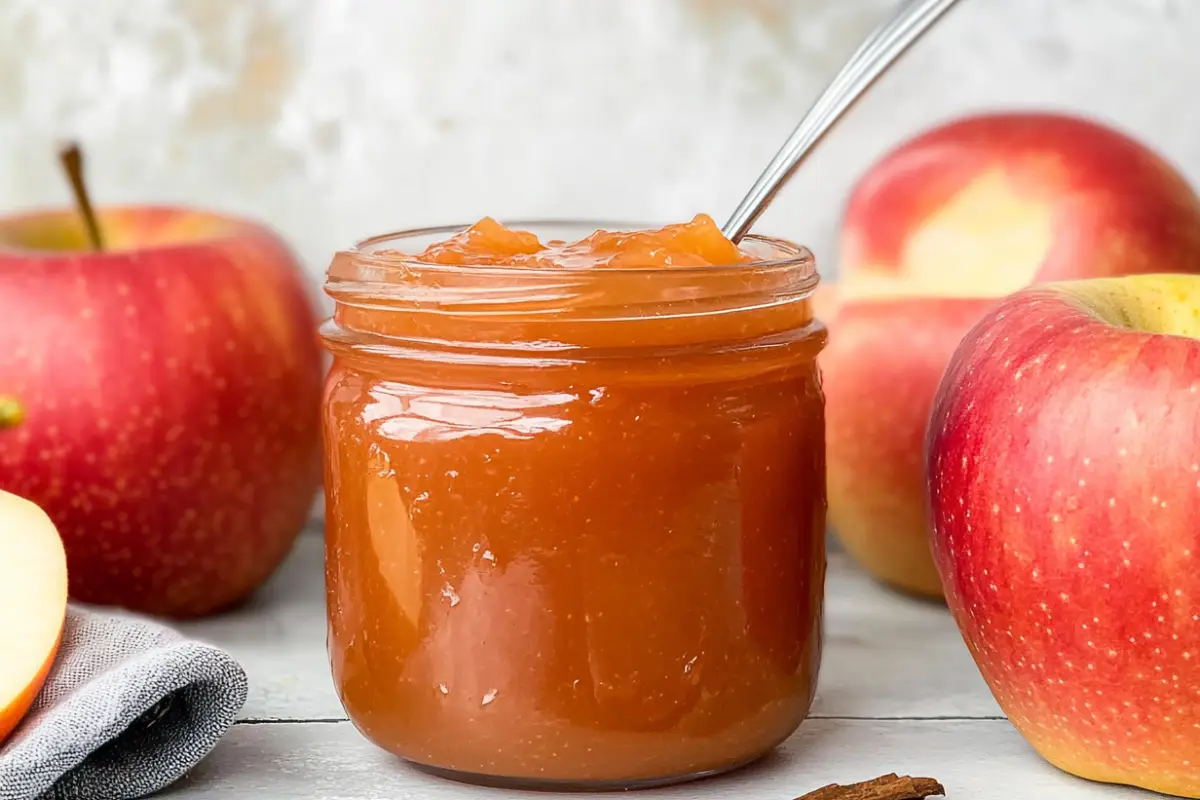
Nothing beats the taste of a homemade apple jam recipe, bursting with the natural sweetness and tartness of fresh apples. Whether you’re spreading it on warm toast, spooning it over pancakes, or using it as a filling for pastries, this apple jam is a must-try for anyone who loves homemade preserves.
Apples have been cherished for centuries, and making jam is one of the best ways to enjoy their flavor all year round. This apple jam recipe is incredibly easy to prepare, requiring just a few ingredients and no need for store-bought pectin. The natural pectin in apples helps achieve the perfect thick consistency without any additives.
Perfect for fall when apples are in abundance, this jam brings warmth and comfort to your kitchen with every spoonful. The combination of cinnamon, lemon juice, and a touch of sugar enhances the apples’ natural flavors, making this jam a delicious addition to your breakfast or dessert table.
If you’re looking for a simple yet flavorful way to preserve apples, this recipe is the perfect choice. It’s great for beginners who want to try their hand at jam-making without the hassle of complex techniques. Plus, it makes a wonderful homemade gift for friends and family!
Table of contents
Why This Recipe Works
1. No Pectin Needed – Natural and Simple
Many jam recipes require added pectin to help thicken the mixture, but this apple jam recipe relies on the natural pectin found in apples. This makes the process easier, ensuring a perfect jam consistency without extra ingredients.
2. Customizable Flavor Profile
This apple jam is highly versatile, allowing you to adjust the sweetness, spices, or even add extra fruit for unique variations. Love a spiced jam? Add nutmeg and cloves for a cozy autumnal touch. Prefer a tangy twist? Increase the lemon juice for a sharper flavor.
3. Perfect for Beginners
Unlike some jam recipes that require precise cooking temperatures or special canning equipment, this apple jam recipe is straightforward and forgiving. Even if you’ve never made jam before, you can follow these easy steps to achieve a delicious, homemade preserve.
4. Healthy and Preservative-Free
When you make your own jam, you have full control over the ingredients. Store-bought jams often contain artificial preservatives, excessive sugar, or high-fructose corn syrup. This homemade version is made with natural ingredients, ensuring a healthier and more flavorful alternative.
5. Great for Storage and Gifting
Homemade apple jam stores well in sealed jars, making it a great pantry staple. It also makes a thoughtful gift—package it in a decorative jar, tie it with a ribbon, and share it with loved ones for holidays or special occasions.
Ingredients Breakdown
Main Ingredients:
- Apples (6 cups, peeled and chopped) – Use fresh, firm apples like Granny Smith, Fuji, or Honeycrisp for the best balance of sweetness and tartness.
- Sugar (2 cups) – Granulated sugar helps sweeten the jam and preserve it for longer. You can adjust the amount based on your preference.
- Lemon Juice (2 tablespoons) – Adds acidity to enhance the apple flavor and helps preserve the jam.
- Cinnamon (1 teaspoon, optional) – Gives the jam a warm, spiced flavor that complements the apples.
- Water (½ cup) – Helps cook the apples down to a smooth consistency.
Step-by-Step Instructions
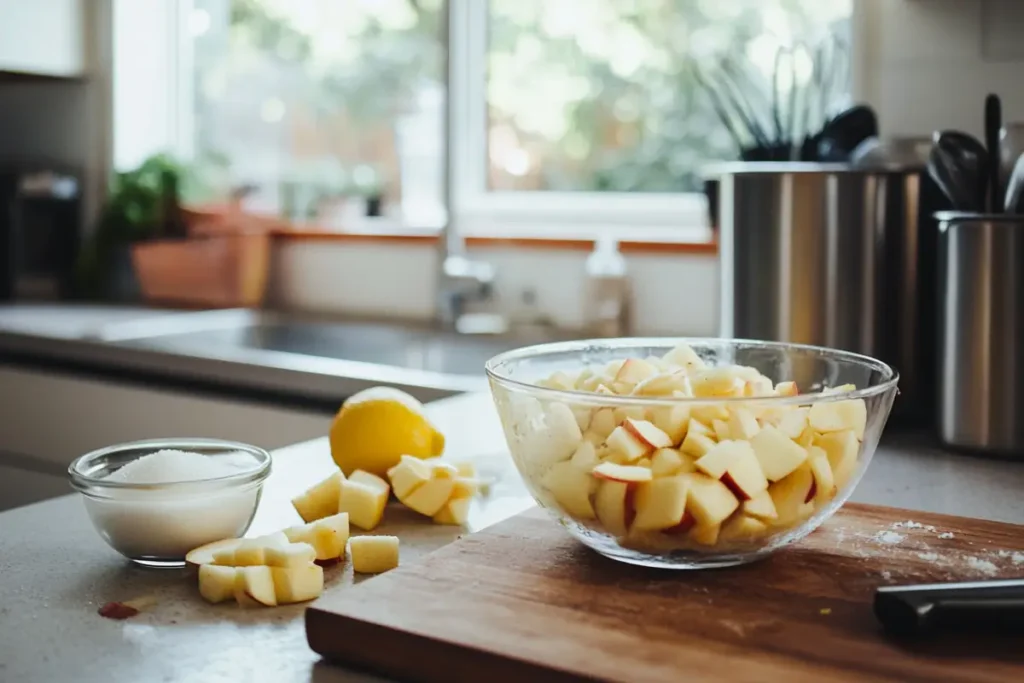
1. Prepare the Apples
Start by peeling and coring your apples. Once peeled, chop them into small chunks—about 1-inch pieces. This will help them cook down more quickly. The more uniform the pieces, the easier it is to achieve a smooth jam texture. You’ll need about 6 cups of chopped apples.
2. Cook the Apples
In a large, heavy-bottomed pot, add the chopped apples and the water. Turn the heat to medium and cook the apples, stirring occasionally. After about 10 minutes, the apples will begin to soften.
3. Add Sugar and Lemon Juice
Once the apples have softened, stir in the sugar and lemon juice. Continue to cook, stirring frequently, until the sugar has fully dissolved. The mixture should start to look syrupy. This process typically takes about 5–7 minutes.
4. Add Spices
If you’re using cinnamon (or any other spices), now’s the time to add them. Stir in the cinnamon, making sure it is well-distributed throughout the mixture. You can also add a pinch of ground ginger or nutmeg for additional warmth and flavor.
5. Simmer and Thicken
Lower the heat to medium-low and let the mixture simmer. Keep stirring regularly to prevent burning, and use a potato masher or the back of a spoon to mash the apples as they cook. Continue simmering for about 30–40 minutes, or until the jam thickens to your desired consistency. You’ll know it’s ready when a spoonful of jam placed on a plate forms a gel-like texture and holds its shape.
6. Check for Doneness
To test the consistency, place a spoonful of the jam on a cold plate and let it sit for 2 minutes. Run your finger through the jam—if it wrinkles and doesn’t run, it’s ready. If it’s still too runny, cook for an additional 10 minutes and test again.
7. Jar the Jam
Once the jam has thickened, remove it from the heat. Carefully ladle the hot jam into sterilized jars while it’s still hot. Seal the jars with lids, making sure they’re airtight.
8. Cool and Store
Allow the jars to cool to room temperature before storing them. Once cooled, the jam can be kept in the fridge for up to 3 weeks. If you’ve followed proper canning techniques, the jam should last for several months on the shelf.
Pro Tips for Successful Apple Jam Recipe
1. Use the Right Apples
For the best results, use apples that have a balance of sweetness and tartness, such as Granny Smith, Fuji, or Honeycrisp. Avoid apples that are too soft or mealy, as they may not hold their shape during cooking and could lead to a mushy jam.
2. Don’t Skip the Lemon Juice
Lemon juice is essential for both flavor and preservation. The acid helps balance the sweetness and helps prevent the jam from becoming too cloying. Plus, it aids in setting the jam to the right consistency.
3. Control the Sugar
While this recipe calls for 2 cups of sugar, feel free to adjust the amount based on your taste. If you prefer a less sweet jam, start with 1 ½ cups and gradually add more as the mixture cooks. Remember, the sugar also helps with the jam’s shelf life, so reducing it too much might affect preservation.
4. Smash and Mash for Texture
If you love a chunky jam, go light on the mashing. But if you want a smoother, more spreadable consistency, mash the apples down more thoroughly as they cook. You can even use an immersion blender once the apples have softened, though this might result in a smoother texture.
5. Test Consistency Before Canning
Be sure to test the jam’s consistency before sealing it into jars. It’s crucial to ensure that it has thickened properly, as a runny jam won’t preserve as well. Always perform the cold plate test, and if needed, cook for a few more minutes.
6. Sterilize Your Jars
Sterilizing the jars before filling them with jam is essential for food safety. To sterilize, simply place the jars in a pot of boiling water for 10 minutes, then dry them thoroughly before filling. If you’re not using a canning method, storing in the fridge will work just fine, and the jam will stay fresh for up to 3 weeks.
Variants of the Recipe
One of the best things about this apple jam recipe is how easily it can be customized. Whether you want to add extra spices, mix in other fruits, or create a sugar-free version, there’s a variation for every preference. Here are some delicious ways to switch it up:
1. Spiced Apple Jam
If you love warm, cozy flavors, try adding more spices to your jam. Along with cinnamon, include a pinch of nutmeg, cloves, or ginger. These spices enhance the natural sweetness of apples and make the jam perfect for fall and winter treats.
2. Apple-Pear Jam
For a milder, slightly floral flavor, mix in some pears. Replace half of the apples with ripe pears, such as Bartlett or Anjou. The pears will add a delicate sweetness that pairs beautifully with apples.
3. Apple-Cranberry Jam
If you prefer a tart twist, add fresh or dried cranberries to the jam. Cranberries not only bring a bright color but also provide a tangy contrast that balances the sweetness of the apples. This version is especially great for the holiday season!
4. Honey-Sweetened Apple Jam
For a refined sugar-free version, replace the sugar with honey. Start with 1 cup of honey and adjust according to taste. Honey adds a rich depth of flavor while keeping the jam naturally sweet.
5. Vanilla Apple Jam
A splash of vanilla extract or the seeds from a vanilla bean pod can elevate the flavor of your apple jam. Add the vanilla at the end of cooking for the best aroma and taste.
6. Apple-Ginger Jam
If you love a little zing, add freshly grated ginger or candied ginger to your apple jam. The spicy-sweet combination is perfect for spreading on toast or serving with cheese.
Serving Suggestions
This apple jam recipe is incredibly versatile, making it perfect for a variety of dishes. Whether you enjoy it for breakfast, dessert, or as an accompaniment to savory dishes, here are some delicious ways to serve it:
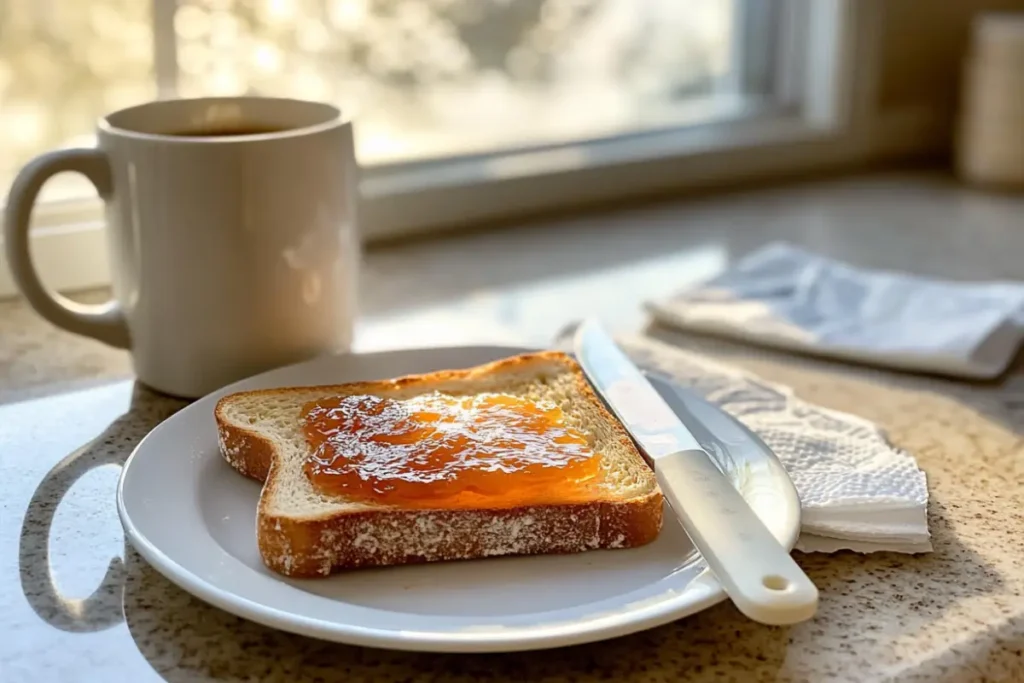
1. Classic Toast and Butter
The simplest and most traditional way to enjoy apple jam is on warm toast with butter. The creamy, salty butter contrasts beautifully with the sweet and spiced jam. Try it on sourdough, whole wheat, or even brioche for an extra indulgent treat.
2. Pancakes and Waffles
Drizzle apple jam over pancakes or waffles instead of maple syrup. You can even mix it with a bit of warm butter to create a delicious spreadable topping.
3. Yogurt and Oatmeal
For a healthier option, swirl a spoonful of apple jam into Greek yogurt or oatmeal. The natural sweetness of the jam enhances the flavor without the need for added sugars.
4. Cheese Pairing
Apple jam pairs wonderfully with cheese, especially sharp cheddar, brie, or gouda. Serve it on a cheese board with crackers and nuts for an elegant appetizer.
5. Pastry Filling
Use apple jam as a filling for croissants, turnovers, or Danish pastries. Simply spread a layer onto puff pastry, fold, and bake until golden and flaky.
6. Ice Cream Topping
For a decadent dessert, warm up some apple jam and drizzle it over vanilla ice cream. Add a sprinkle of cinnamon or crushed nuts for extra texture.
7. Sandwich Spread
Upgrade your peanut butter and jelly sandwich by replacing the jelly with homemade apple jam. It also works well in grilled cheese sandwiches, adding a sweet contrast to the melted cheese.
8. Meat Glaze
Believe it or not, apple jam can be used as a glaze for meats like pork or chicken. Brush it onto grilled or roasted meats for a caramelized, sweet-savory finish.
Storage Instructions
Proper storage ensures your apple jam recipe stays fresh and delicious for as long as possible. Here’s how to store and reheat it for the best results:
Short-Term Storage (Refrigeration)
If you plan to consume your apple jam within a few weeks, store it in an airtight jar in the refrigerator. Make sure the jam has cooled completely before sealing the jar. In the fridge, it will stay fresh for up to 3 weeks.
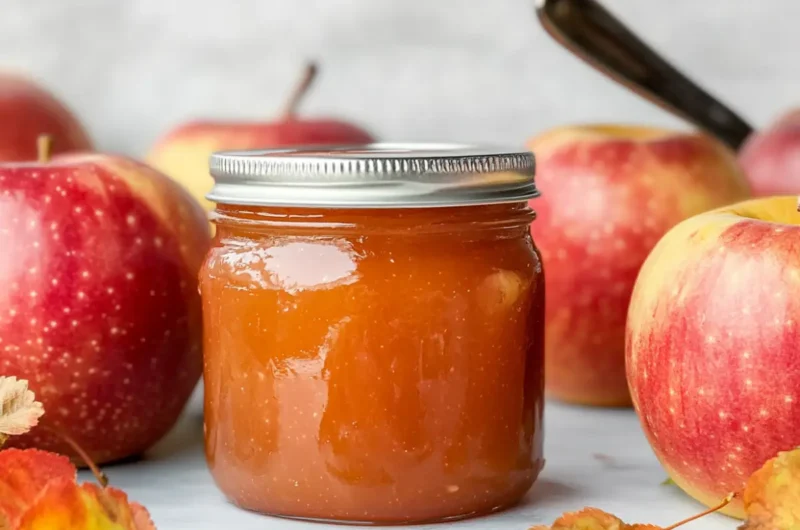
Long-Term Storage (Canning & Sealing)
For longer storage, use the proper canning method:
- Sterilize the jars – Boil the glass jars in water for 10 minutes.
- Fill the jars – While the jam is still hot, carefully ladle it into the jars, leaving about ½ inch of space at the top.
- Seal the jars – Wipe the rims clean, place the lids on, and process in a boiling water bath for 10 minutes.
- Store in a cool, dark place – Once sealed properly, the jam can last up to 12 months.
Freezing Option
If you don’t want to go through the canning process, you can freeze the jam instead. Pour the cooled jam into freezer-safe containers, leaving some space for expansion. Freeze for up to 6 months.
Recipe Card
Homemade Apple Jam Recipe
3
servings15
minutes40
minutes50
kcalThis apple jam recipe is simple, delicious, and made with just a few ingredients—no pectin required!
Keep the screen of your device on
Ingredients
6 cups apples, peeled and chopped
2 cups sugar
2 tbsp lemon juice
1 tsp cinnamon (optional)
½ cup water
Directions
- Peel, core, and chop the apples into small pieces.
- In a large pot, add apples and water. Cook over medium heat for 10 minutes, stirring occasionally.
- Add sugar and lemon juice, stirring until the sugar dissolves.
- Stir in cinnamon (if using) and continue cooking for 30–40 minutes, mashing the apples as they soften.
- Test the jam’s consistency by placing a spoonful on a cold plate. If it wrinkles when touched, it’s ready.
- Pour the hot jam into sterilized jars, seal, and allow to cool. Store in the fridge for up to 3 weeks.
Notes
- For a chunkier jam, mash lightly. For a smooth texture, blend with an immersion blender.
- To store long-term, use the canning method or freeze for up to 6 months.
Like this recipe?
Follow @wikitasty on Pinterest
FAQs
If your jam isn’t thickening, it may need more cooking time. Continue simmering for an additional 10–15 minutes, stirring often. You can also test the jam on a cold plate to check if it’s ready.
Yes! You can use honey, maple syrup, or a sugar substitute. However, keep in mind that sugar helps preserve the jam, so a sugar-free version may have a shorter shelf life.
For a smoother consistency, use an immersion blender or a food processor to puree the jam before jarring. If you prefer a chunkier texture, mash the apples only slightly.
Yes, but keep in mind that a larger batch will take longer to cook. Make sure to stir frequently to prevent burning.
The best way to test is with the cold plate method: place a spoonful of jam on a cold plate, wait 2 minutes, and check if it wrinkles when touched. If it does, the jam is ready.
– In the fridge: 3 weeks
– Canned (sealed properly): Up to 12 months
– Frozen: Up to 6 months
Final Words
Making your own apple jam using this recipe is a rewarding and delicious way to preserve the fresh taste of apples all year round. This recipe is simple, requires no pectin, and can be customized with different flavors to suit your taste. Whether you’re spreading it on toast, using it in desserts, or adding it to savory dishes, homemade apple jam is a versatile addition to your kitchen.
If you enjoyed this recipe, you might also love trying some other homemade spreads! Check out this Tomato Jam Recipe for a savory twist or explore the Difference Between Tomato Sauce and Tomato Jam to learn more about these delicious condiments.
Looking for the perfect bread to pair with your apple jam? Try this Sandwich Bread Recipe or explore if Sweet Potato is a Substitute for Bread for a unique take on breakfast!
If you have a sweet tooth, don’t miss the Raspberry Jam Recipe with Pectin or the Cherry Jelly Recipe for even more delicious homemade jam options.
I’d love to hear how your apple jam turned out! Leave a comment below and let me know if you tried any variations. Don’t forget to share your creations on social media and tag us, we can’t wait to see your homemade jams!