
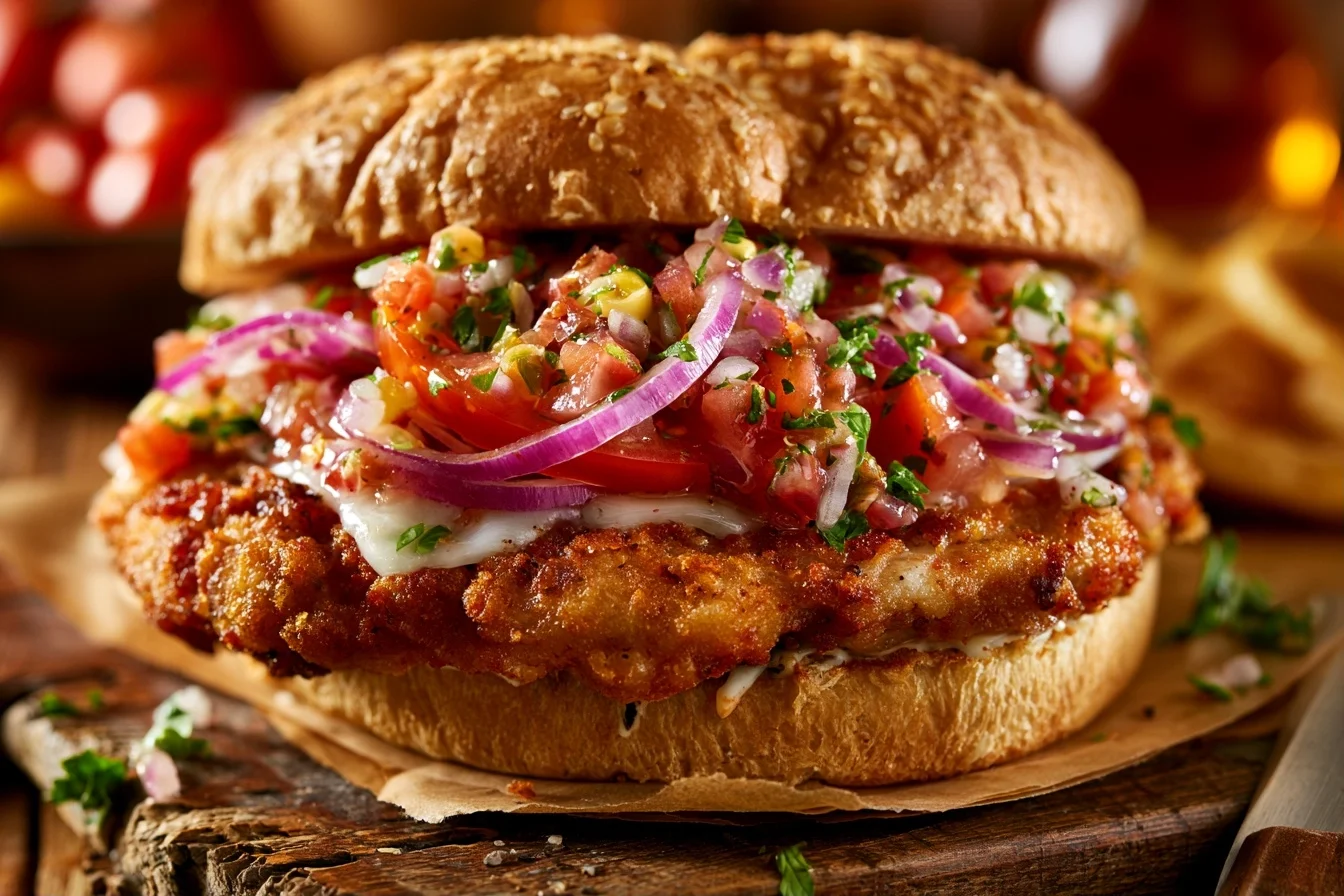
- Ready in about 30 minutes; thin pounded chicken yields juicy interior and shatteringly crisp crust, delivering restaurant-quality sandwich at home.
- Pound breasts to 1/4 inch and set up a three-step breading station: flour, egg, panko for the signature crispy exterior.
- Maintain oil at 350°F; heat at least five minutes and test with bread to ensure golden crisp without greasiness.
- Choose crusty rolls or ciabatta, spread mayo or aioli as a moisture barrier, and reheat cutlets in a 350°F oven to restore crisp.
Last Updated on July 25, 2026 by Simon
This post contains affiliate links. As an Amazon Associate, we earn from qualifying purchases. This means we may earn a small commission if you purchase through our links, at no extra cost to you.
There’s something magical about biting into a perfectly crispy chicken milanesa sandwich. The thin, pounded chicken breast shatters between your teeth, releasing all its juicy goodness, while the bread soaks up just enough of the golden coating to stay crispy. This Latin American classic has become a beloved handheld meal across the USA, and honestly, once you make it at home, you’ll understand why it’s so addictive.
I first fell in love with this sandwich during a culinary trip through Argentina and Mexico, where street vendors serve them fresh and hot to hungry crowds. The beauty of a chicken milanesa sandwich lies in its simplicity. You pound chicken thin, bread it with seasoned panko, fry it until golden, and stack it between two slices of crusty bread with your favorite toppings. In less than 30 minutes, you’ll have a restaurant-quality meal that tastes far better than any fast food.
What makes this breaded chicken sandwich so special is how versatile it truly is. Whether you’re feeding a family on a weeknight or hosting a casual lunch gathering, the chicken milanesa sandwich delivers impressive flavor without demanding complicated techniques. The crispy exterior contrasts beautifully with the tender meat inside, creating a textural experience that keeps people coming back for more.
Table of contents
- Why You'll Love This Recipe
- Making Your Perfect Crispy Chicken Milanesa Sandwich
- Pro Tips for the Best Chicken Milanesa Sandwich Results
- Creative Variations on the Chicken Milanesa Sandwich
- Understanding the Nutrition in Your Sandwich
- Pairing Your Sandwich with Perfect Sides
- Keeping Your Leftovers Fresh and Delicious
- Frequently Asked Questions About This Recipe
Why You’ll Love This Recipe
- This recipe comes together in just 30 minutes, making it perfect for busy weeknights when you need a satisfying meal without spending hours in the kitchen.
- The thin-pounded chicken breast cooks quickly and evenly, ensuring juicy, tender meat with a shatteringly crisp golden crust that rivals any restaurant version.
- You can customize this breaded chicken sandwich with endless topping combinations, from simple lettuce and tomato to creamy avocado and spicy aioli.
- This Latin-inspired sandwich requires minimal ingredients and basic cooking skills, making it an excellent choice for both beginner and experienced home cooks.
- Leftovers store beautifully, and you can prepare the breaded cutlets ahead of time, allowing you to fry them fresh whenever hunger strikes.
Making Your Perfect Crispy Chicken Milanesa Sandwich
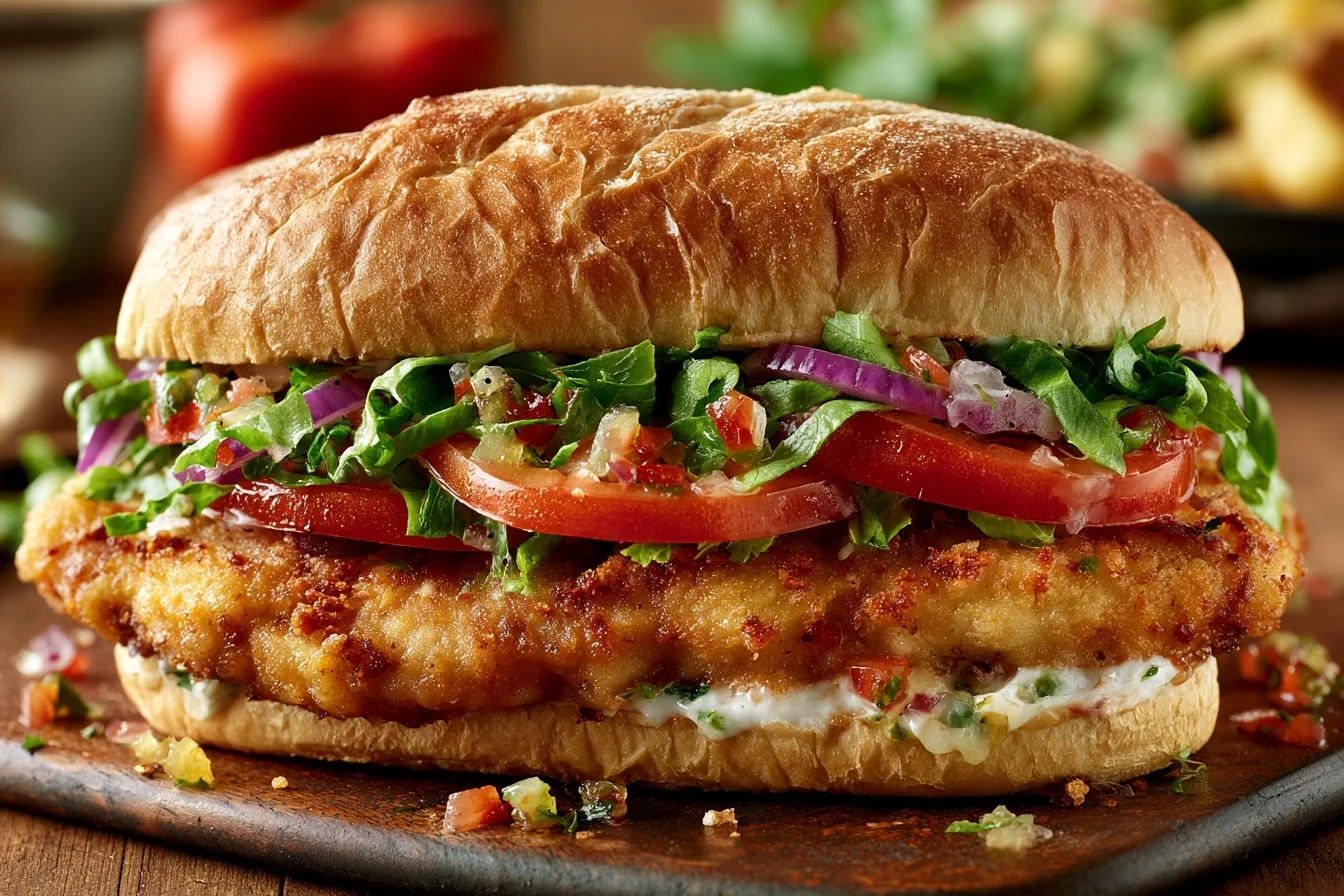

Chicken Milanesa Sandwich
This authentic Latin American chicken milanesa sandwich features a thin, pounded chicken breast that’s breaded and fried until golden and crispy, then served on crusty bread with fresh toppings. Ready in under 30 minutes, it’s the perfect handheld meal for lunch or dinner.
4
servings15
minutes12
minutes520
kcalKeep the screen of your device on
Ingredients
4 pieces boneless, skinless chicken breasts
1 cup all-purpose flour
2 large eggs
1.5 cups panko breadcrumbs
2 teaspoons salt
1 teaspoon black pepper
2 cups vegetable oil
4 pieces crusty rolls or ciabatta bread
1 cup fresh lettuce
1 medium tomato
0.5 cup mayonnaise
1 lime fresh lime
Directions
- Prepare your chicken by placing each breast between two pieces of plastic wrap. Using a meat mallet’s flat side, gently but firmly pound the chicken from the center outward until it reaches approximately one-quarter inch thickness. Remove the plastic wrap carefully.
- Set up your breading station with three shallow bowls. In the first bowl, combine flour with half a teaspoon of salt and a quarter teaspoon of black pepper. In the second bowl, beat the eggs together. In the third bowl, combine panko breadcrumbs with the remaining salt and pepper.
- Bread each chicken cutlet by first coating it thoroughly in the seasoned flour, shaking off excess. Then dip it into the beaten egg, coating both sides completely. Finally, press it firmly into the panko mixture, ensuring an even coating on all surfaces. Place breaded cutlets on a plate.
- Heat your oil in a large skillet or shallow pan to 350°F. Use a thermometer to verify the temperature. Allow the oil to heat for at least five minutes before proceeding. Test readiness by dropping a small piece of bread into the oil—it should sizzle immediately and turn golden in about 60 seconds.
- Fry the chicken by carefully placing breaded cutlets into the hot oil, working in batches to avoid overcrowding. Fry for approximately three to four minutes per side until the coating turns golden brown and the chicken reaches an internal temperature of 165°F. Transfer fried cutlets to a paper towel-lined plate.
- Assemble your sandwiches by spreading mayo on the inside of your crusty bread if desired. Layer with fresh lettuce, your hot fried chicken cutlet, and sliced tomato. Add any additional toppings you prefer, then squeeze fresh lime juice over the chicken.
Notes
- For best results, pound the chicken to a consistent thickness to ensure even cooking throughout.
- Don’t skip the thermometer when checking oil temperature—this is crucial for achieving crispy results without burning the coating.
- You can prepare breaded cutlets up to 8 hours in advance and refrigerate them until ready to fry.
- For a spicier version, add cayenne pepper or paprika to the breadcrumb mixture.
- Leftovers can be reheated in a 350°F oven for about 5 minutes to restore crispiness.
Nutrition Facts
- Serving Size: 1
- Total number of serves: 4
- Calories: 520kcal
- Fat: 18g
- Carbohydrates: 42g
- Fiber: 2g
- Protein: 38g
Like this recipe?
Follow @wikitasty on Pinterest
Pro Tips for the Best Chicken Milanesa Sandwich Results
Creating an outstanding chicken milanesa sandwich requires attention to a few key details. First, pounding the chicken evenly ensures it cooks uniformly and stays incredibly tender. Second, the breading technique makes all the difference between a mediocre sandwich and an unforgettable one. Finally, the oil temperature determines whether you get a golden crust or a greasy mess. Let me walk you through my professional tips to guarantee success every time.
Pounding the Chicken Properly
Always place your chicken breast between two pieces of plastic wrap before pounding. This prevents splatter and keeps your kitchen clean. Use a meat mallet’s flat side to pound gently but firmly, working from the center outward until the chicken reaches about one-quarter inch thickness. Uneven thickness leads to dry spots, so take your time here. Think of it as creating a uniform canvas for your breading.
The Three-Step Breading Station
Set up three shallow bowls: one with flour mixed with salt and pepper, one with beaten eggs, and one with panko breadcrumbs. Coat the chicken in flour first, shaking off excess, then dip in egg, then press into panko. This triple-dredge technique creates that signature crispy exterior everyone loves. Let the breaded cutlets rest on a plate for five minutes before frying—this helps the coating adhere better. You can also refrigerate them for up to two hours if you’re preparing ahead.
Nailing the Oil Temperature
Use a thermometer to maintain oil at 350°F. Too cool, and your sandwich becomes greasy. Too hot, and the outside burns before the inside cooks through. Heat your oil for at least five minutes before adding chicken. Test the temperature with a small piece of bread—it should sizzle immediately and turn golden in about 60 seconds. This simple check prevents disappointing results and ensures perfectly fried chicken every time.
Choosing Your Bread Wisely
The bread makes or breaks your sandwich experience. Look for crusty rolls or ciabatta that won’t get soggy from the hot, juicy chicken. Avoid soft sandwich bread—it falls apart and doesn’t provide enough structure. Toast your bread lightly if you want extra crunch and flavor. Some people butter and grill their bread for added richness. Consider that a good bread should support the chicken, not compete with it.
Building Flavor Layers
Don’t just slap the chicken between bread. Build your sandwich strategically by spreading a thin layer of mayo or aioli on the bread first—this creates a moisture barrier. Add crisp lettuce next, then your hot chicken, then tomato, and finally any other toppings. This order prevents bread from getting soggy while maximizing flavor in every bite. A squeeze of fresh lime juice adds authentic Latin American flair that elevates the entire experience.
Creative Variations on the Chicken Milanesa Sandwich
The beauty of this breaded chicken sandwich lies in its adaptability. Once you master the basic technique, you can create endless variations that suit your taste preferences and dietary needs. Whether you want to add international flavors, accommodate dietary restrictions, or simply experiment with new combinations, the foundation remains solid. Here are some fantastic directions you can take this classic dish.
Spicy Chipotle Version
Mix chipotle peppers in adobo sauce with mayo to create a smoky, spicy spread for your bread. Add crispy bacon, fresh cilantro, and sliced avocado to complement the heat. This variation transforms your chicken milanesa sandwich into a bold, restaurant-style creation that impresses everyone. The smoke from the chipotle pairs beautifully with the crispy chicken coating.
Mediterranean-Inspired Take
Spread your bread with hummus instead of mayo, then add roasted red peppers, fresh spinach, crumbled feta cheese, and a drizzle of olive oil. This variation brings Mediterranean flavors to your crispy chicken, creating a lighter yet satisfying sandwich. The tanginess of feta complements the savory chicken beautifully, and the roasted peppers add sweetness and depth.
Gluten-Free Option
Simply substitute regular panko with gluten-free panko breadcrumbs and use gluten-free flour in your breading station. The technique remains identical, and your results will be just as crispy and delicious. Pair it with gluten-free bread, and you’ve created an inclusive meal everyone can enjoy. Many specialty stores now carry excellent gluten-free bread options that won’t compromise on taste or texture.
Crispy Cheese-Stuffed Version
Before breading, carefully slice a pocket into the side of your pounded chicken breast and stuff it with mozzarella cheese and fresh herbs. Seal the edges gently, then proceed with the breading and frying as normal. The cheese melts inside, creating a gooey surprise that takes your sandwich to another level. This variation turns your chicken milanesa sandwich into something truly special and memorable.
Comparison to Similar Sandwiches
If you enjoy this recipe, you might also love our chicken parmesan recipe, which uses a similar breading technique but with a tomato and cheese topping. For a lighter handheld option, try our homemade chicken tenders recipe, which uses the same frying method but creates individual strips perfect for dipping. If you want something with a similar sandwich format, our cheeseburger sliders recipe follows comparable assembly principles with ground beef instead.
Understanding the Nutrition in Your Sandwich
A single serving of this chicken milanesa sandwich contains approximately 520 calories, making it a substantial meal that truly satisfies hunger. The protein content reaches about 38 grams, which comes primarily from the chicken breast and helps keep you full throughout the afternoon. This breaded chicken sandwich delivers excellent nutritional value when you consider the quality of the ingredients and the satisfaction it provides.
The carbohydrate content sits around 42 grams, mostly from the bread and breading coating. Fat content comes to approximately 18 grams, with much of it from the frying oil and any spreads you choose. The fiber content provides about 2 grams, depending on your bread choice. If you want to reduce calories, use a lighter bread, skip heavy spreads, and load up on fresh vegetables instead. The beauty of this sandwich is how easily you can adjust it to match your nutritional goals.
Remember that these numbers represent a baseline calculation. Your actual nutrition will vary based on bread type, portion size, and specific toppings. Using whole grain bread instead of white bread increases fiber content significantly. Choosing olive oil-based spreads instead of mayo reduces saturated fat. Adding extra lettuce and tomato boosts vitamins and minerals without adding many calories. This flexibility makes the chicken milanesa sandwich adaptable to various dietary approaches.
Pairing Your Sandwich with Perfect Sides
A chicken milanesa sandwich shines brightest when accompanied by thoughtful side dishes that complement its crispy, savory profile. Fresh lime wedges are essential—squeeze them over the sandwich before eating for authentic Latin American flavor that brightens every bite. Crispy fried plantain chips offer a delicious starchy accompaniment that echoes the sandwich’s cultural roots. A simple green salad dressed with lime vinaigrette provides refreshing contrast to the rich fried chicken.
For a more casual approach, serve your sandwich with classic French fries or seasoned potato wedges. Black beans or refried beans make excellent sides that add protein and fiber to your meal. Pickled vegetables like jalapeños or onions add tang and brightness. A cold beverage—whether it’s Mexican horchata, fresh lemonade, or simply iced tea—rounds out the experience perfectly. The key is choosing sides that respect the sandwich’s simplicity while adding variety to your plate.
Consider the occasion when selecting sides. For a casual lunch, keep things simple with chips and salsa. For a more substantial dinner, offer rice and beans alongside your sandwich. At a gathering, provide multiple side options so guests can customize their meal. The versatility of the chicken milanesa sandwich means it adapts beautifully to any dining situation, from quick weeknight dinners to entertaining friends and family.
Keeping Your Leftovers Fresh and Delicious
Store leftover breaded chicken cutlets separately from assembled sandwiches to maintain optimal texture and freshness. Place cooled cutlets in an airtight container lined with paper towels, which absorb excess moisture and keep them crispy. They’ll stay fresh in your refrigerator for up to three days. Store any bread separately in a sealed bag to prevent it from drying out. When you’re ready to eat, simply reheat the chicken and reassemble your sandwich with fresh bread and toppings.
To reheat your chicken milanesa, place the cutlets on a baking sheet and warm them in a 350°F oven for about five minutes. This method restores crispiness far better than microwaving, which tends to make breading soggy and rubbery. Alternatively, reheat them in a skillet over medium heat for two to three minutes per side. Never microwave breaded chicken if you want to maintain that satisfying crunch. The oven method takes slightly longer but delivers superior results.
For freezer storage, wrap individual cooled cutlets tightly in plastic wrap, then place them in a freezer bag. They’ll maintain quality for up to two months. Thaw them overnight in your refrigerator before reheating. You can also freeze fully assembled sandwiches wrapped in foil, though the bread texture will change slightly upon thawing. For best results with frozen sandwiches, thaw them completely before eating, or reheat wrapped in foil at 325°F for about ten minutes. The key to success is protecting your chicken from freezer burn through proper wrapping.
Frequently Asked Questions About This Recipe
I know you probably have some questions about making the perfect chicken milanesa sandwich. Below, I’ve answered the most common questions I receive from home cooks who want to master this delicious recipe. Whether you’re wondering about ingredient substitutions, cooking techniques, or serving suggestions, you’ll find helpful answers here.
Yes, you can use chicken thighs, though they require slightly longer cooking time. Pound them to the same thickness as breasts. Thighs are actually more forgiving since they stay juicier than white meat. Just monitor the oil temperature carefully to ensure they cook through before the coating burns.
Use neutral oils with high smoke points like vegetable oil, canola oil, or peanut oil. Avoid olive oil, which has a lower smoke point and will burn at the required temperature. Peanut oil is my personal favorite because it creates an incredibly crispy exterior and adds subtle flavor without overwhelming the chicken.
Pound the chicken to approximately one-quarter inch thickness. This thickness ensures the chicken cooks through quickly while the coating becomes golden and crispy. If it’s too thick, the outside will burn before the inside finishes cooking. If it’s too thin, it becomes tough and dry.
While baking is healthier, it won’t produce the same crispy, golden crust that makes this sandwich special. If you prefer baking, place breaded cutlets on an oiled baking sheet and spray them with cooking spray. Bake at 400°F for about 12-15 minutes until golden. The texture will be different but still delicious and much lighter.
You can bread chicken up to 8 hours in advance. Place breaded cutlets on a parchment-lined baking sheet, cover loosely with plastic wrap, and refrigerate. This actually helps the coating adhere better. For longer storage, freeze breaded cutlets for up to one month. Fry directly from frozen, adding just a minute or two to cooking time.
Milanesa and schnitzel are essentially the same technique—thin pounded meat that’s breaded and fried. Milanesa is the Latin American version, while schnitzel is the European (particularly German and Austrian) version. The main difference is cultural context and sometimes the type of meat used. Both create that delicious crispy exterior and tender interior.
Now you have everything you need to create an incredible chicken milanesa sandwich that rivals any restaurant version. The technique is straightforward, the ingredients are accessible, and the results are absolutely worth the minimal effort. I encourage you to make this sandwich soon and discover why it’s become such a beloved classic across the Americas and beyond.
Share your creation with family and friends, and don’t be surprised when they ask you to make it again. There’s something special about serving food you’ve made with your own hands, especially when it tastes this good. Happy cooking, and enjoy every crispy, juicy bite of your homemade chicken milanesa sandwich.