
Last Updated on July 30, 2026 by Simon
This post contains affiliate links. As an Amazon Associate, we earn from qualifying purchases. This means we may earn a small commission if you purchase through our links, at no extra cost to you.
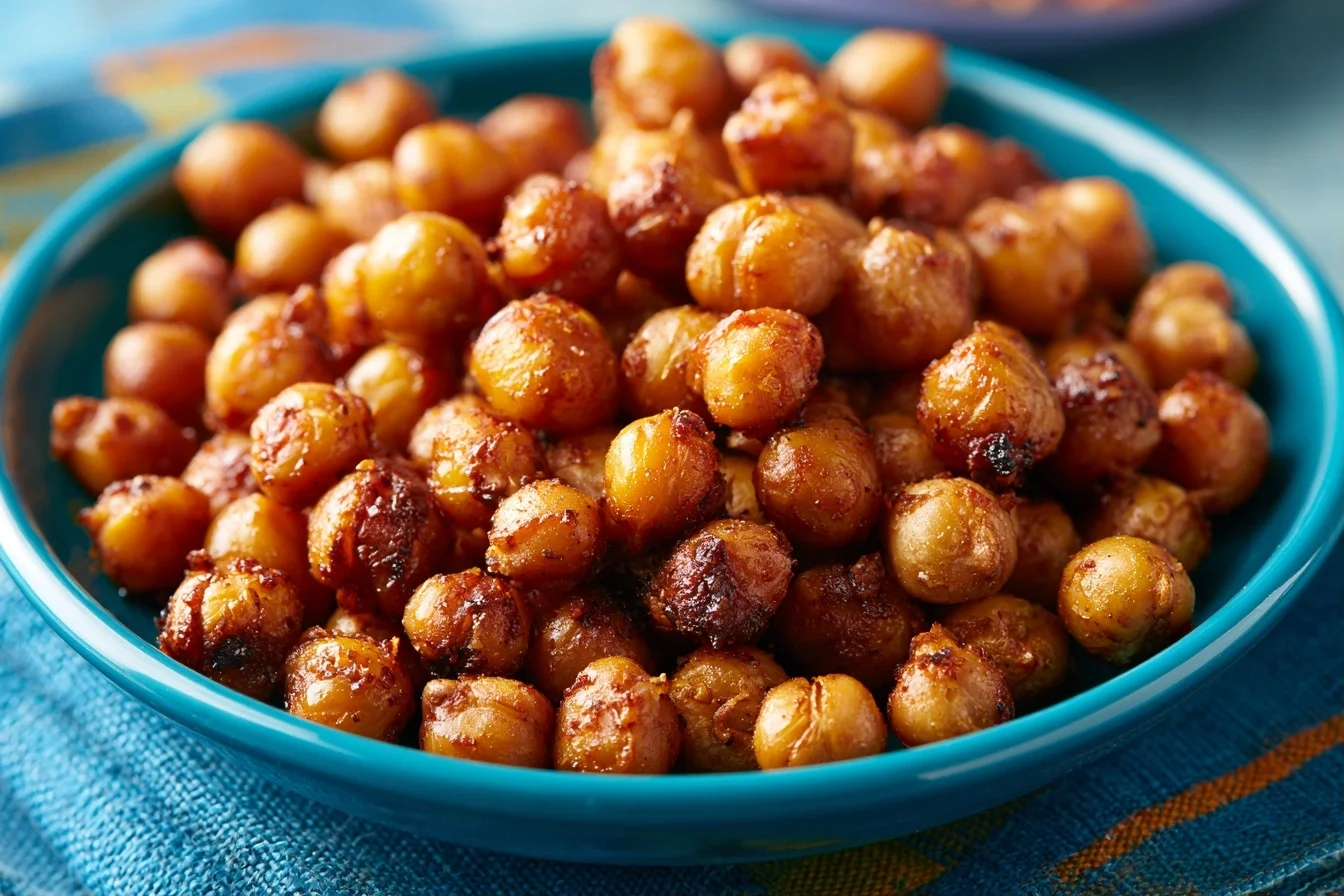
There’s something magical about transforming humble chickpeas into crispy roasted chickpeas that rival any store-bought snack. These golden, crunchy bites deliver serious flavor with minimal effort, making them my go-to recipe whenever I need a healthy alternative to chips or crackers. Whether you’re prepping for game day, packing lunch boxes, or simply craving something satisfying between meals, crispy roasted chickpeas deliver every single time.
I discovered this recipe years ago when I was experimenting with ways to use leftover canned chickpeas. One Sunday afternoon, I tossed them with olive oil and spices, roasted them until golden, and my entire family couldn’t stop eating them. Now, I make batch after batch because they’re so versatile and ridiculously addictive. The best part? They’re plant-based, packed with protein and fiber, and require just five minutes of hands-on prep work.
What makes roasted chickpea snacks so special is their incredible texture contrast. The exterior becomes wonderfully crispy while the interior stays tender, creating that perfect crunch your taste buds crave. Plus, you control exactly what goes into them, so you can customize the seasonings to match your mood, whether that’s savory and spicy, sweet and smoky, or Mediterranean and herbaceous.
Table of contents
- Why You'll Love This Recipe
- The Perfect Crispy Roasted Chickpeas Recipe
- Pro Tips for Maximum Crispiness
- Endless Flavor Variations for Crispy Roasted Chickpeas
- Nutritional Breakdown of Your Crispy Roasted Chickpeas
- Creative Ways to Enjoy Your Roasted Chickpea Snacks
- Keeping Your Roasted Chickpeas Fresh and Crispy
- Common Questions About Making Crispy Roasted Chickpeas
Why You’ll Love This Recipe
- These crispy roasted chickpeas come together in just 35 minutes total, with only 5 minutes of active preparation, making them perfect for busy weeknights or spontaneous snacking urges when you want something homemade and wholesome.
- Each serving packs an impressive 6 grams of plant-based protein and 5 grams of dietary fiber, making this recipe an excellent choice for vegetarians, vegans, and anyone looking to boost their nutritional intake without sacrificing taste or satisfaction.
- You’ll achieve that addictive crispy texture that rivals any commercial snack, but with complete control over sodium levels, ingredient quality, and flavor profiles so you know exactly what you’re eating with every crunchy bite.
- This recipe yields approximately 3 cups of snacks from just one can of chickpeas, making it incredibly budget-friendly and economical compared to purchasing pre-packaged health snacks at premium prices.
- The versatility of this recipe means you can create endless flavor combinations using your favorite spices, seasonings, and herbs, so you’ll never get bored and can match any craving or dietary preference your household enjoys.
The Perfect Crispy Roasted Chickpeas Recipe
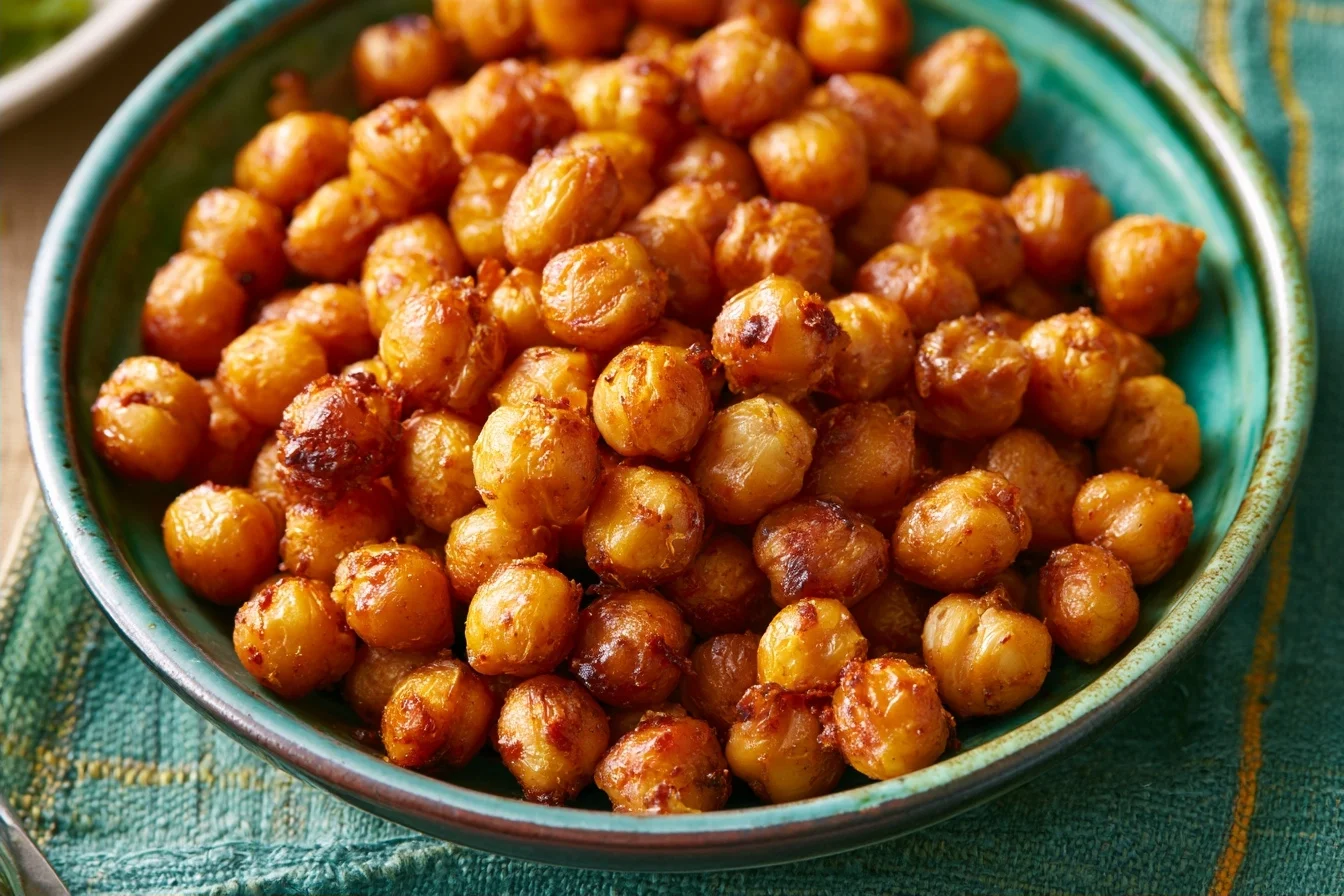

Crispy Roasted Chickpeas
Transform canned chickpeas into an addictive, crunchy snack with this simple recipe. Toss with olive oil and your favorite seasonings, then roast until golden and crispy. Perfect for meal prep, entertaining, or satisfying afternoon cravings.
3
servings5
minutes30
minutes140
kcalKeep the screen of your device on
Ingredients
2 cans chickpeas
3 tablespoons olive oil
1 teaspoon garlic powder
1 teaspoon smoked paprika
0.5 teaspoon cumin
0.5 teaspoon sea salt
0.25 teaspoon black pepper
0.25 teaspoon cayenne pepper
Directions
- Prepare your chickpeas by draining and rinsing them under cold water. Pat them completely dry using paper towels or a clean kitchen towel, removing as much moisture as possible.
- Combine the dried chickpeas with olive oil in a large mixing bowl. Toss until every chickpea is evenly coated with oil.
- Add your seasonings—garlic powder, smoked paprika, cumin, sea salt, black pepper, and cayenne pepper if using. Toss thoroughly until all chickpeas are evenly coated with the spice mixture.
- Spread the chickpeas in a single layer on a large baking sheet lined with parchment paper. Avoid overcrowding so hot air can circulate evenly around each piece.
- Roast at 400°F for 15 minutes, then shake the baking sheet to ensure even browning and roasting.
- Continue roasting for another 15-20 minutes until the chickpeas are golden brown and sound hollow when tapped. Total roasting time is typically 30-35 minutes.
Notes
- Ensure chickpeas are completely dry before roasting for maximum crispiness. Pat them with paper towels for at least one minute.
- Do not seal the container while chickpeas are still warm, as trapped steam will soften them and compromise the crispy texture.
- Oven temperatures vary, so start checking at 25 minutes and adjust roasting time as needed based on your specific oven.
- For air fryer preparation, cook at 380°F for 15-20 minutes, shaking the basket every 5 minutes for even cooking.
- These chickpeas are naturally vegan and gluten-free when using certified gluten-free seasonings.
Nutrition Facts
- Serving Size: 1
- Total number of serves: 3
- Calories: 140kcal
- Fat: 4g
- Carbohydrates: 18g
- Fiber: 5g
- Protein: 6g
Like this recipe?
Follow @wikitasty on Pinterest
Pro Tips for Maximum Crispiness
Getting perfectly crispy roasted chickpeas requires a few key techniques that make all the difference between mediocre and absolutely addictive snacks. First, thorough drying is essential—after draining and rinsing your chickpeas, pat them completely dry with paper towels or a clean kitchen towel. Any residual moisture will create steam during roasting, preventing that crucial crispy exterior from developing properly. Second, don’t overcrowd your baking sheet; spread the chickpeas in a single layer so hot air circulates evenly around each one. Finally, shake the pan halfway through cooking to ensure uniform browning and crispiness throughout.
Drying Your Chickpeas Thoroughly
Moisture is the enemy of crispiness, so invest time in this crucial step. After draining canned chickpeas, rinse them under cold water and then spread them on a clean kitchen towel. Pat them gently but firmly until they’re completely dry to the touch. This removes excess water that would otherwise convert to steam during roasting, which softens rather than crisps the chickpeas. For best results, let them air-dry for 10-15 minutes after patting.
Oil Distribution and Seasoning Technique
Toss your dried chickpeas with olive oil and seasonings in a bowl before spreading them on the baking sheet. This ensures even coating and prevents clumping during roasting. Use about 2 tablespoons of quality olive oil per can of chickpeas—enough to coat them without making them greasy. For even seasoning distribution, toss the chickpeas with your spice blend, then let them sit for a few minutes so the flavors adhere properly before transferring to the oven.
Temperature and Timing Considerations
Roasting at 400°F provides the ideal balance between cooking through and achieving that golden-brown exterior. However, oven temperatures vary, so start checking around the 20-minute mark. You’re looking for chickpeas that are golden brown and sound hollow when you tap them. If they’re still soft at 30 minutes, give them another 5-10 minutes. Remember that they continue crisping slightly as they cool, so don’t wait until they’re completely hard in the oven or they’ll become brittle.
Flavor Maximization Without Burning
Spices and seasonings can scorch if roasted too aggressively, so consider adding delicate seasonings like fresh herbs or cheese after roasting. Heartier spices like cumin, paprika, and garlic powder handle the heat beautifully and develop deeper flavors during roasting. For similar roasted seed snacks, apply the same principle—roast first with hardy spices, then finish with delicate seasonings for optimal flavor.
Endless Flavor Variations for Crispy Roasted Chickpeas
The beauty of this recipe lies in its incredible versatility. Therefore, you can transform the same basic chickpea foundation into completely different snacks depending on your mood, dietary needs, or what’s in your pantry. In addition, most variations require just minor adjustments to the seasoning blend, making experimentation quick and fun. Let me share some of my favorite flavor combinations that keep this recipe exciting.
Mediterranean Herb Blend
This variation captures the essence of sunny Mediterranean flavors with dried oregano, basil, thyme, and a touch of lemon zest. Toss your chickpeas with 2 tablespoons olive oil, 1 teaspoon each of dried oregano and basil, 0.5 teaspoon thyme, and 0.5 teaspoon lemon zest before roasting. After they finish roasting and cool slightly, sprinkle with a pinch of sea salt and crumbled feta cheese if desired. Serve alongside a fresh Mediterranean chickpea salad for a complete Mediterranean meal experience.
Spicy Chili Lime Variation
For heat lovers, combine 2 tablespoons olive oil with 1 teaspoon chili powder, 0.5 teaspoon cayenne pepper, 0.5 teaspoon cumin, and 0.25 teaspoon garlic powder. After roasting, toss immediately with 1 tablespoon lime juice and a pinch of sea salt. The lime juice adds brightness that cuts through the heat beautifully. This version pairs wonderfully with cold beverages and makes an excellent addition to taco night or Cinco de Mayo celebrations.
Sweet and Smoky Maple Cinnamon
If you prefer sweeter snacks, try this unexpected combination. Toss dried chickpeas with 2 tablespoons olive oil, 1 tablespoon maple syrup, 1 teaspoon smoked paprika, 0.5 teaspoon cinnamon, and 0.25 teaspoon sea salt. The maple syrup caramelizes during roasting, creating a complex sweet-savory profile. This variation works beautifully as an afternoon snack or even crumbled over yogurt for breakfast.
Everything Bagel Seasoning Blend
This trendy seasoning combination includes sesame seeds, poppy seeds, dried garlic, dried onion, and sea salt. Toss your chickpeas with 2 tablespoons olive oil and 2 tablespoons everything bagel seasoning blend. Roast as directed, and you’ll achieve snacks that taste remarkably similar to your favorite bagel topping. Store these in an airtight container and enjoy them straight from the pantry for instant satisfaction.
Vegetarian and Vegan-Friendly Options
All variations of crispy roasted chickpeas are naturally vegetarian and vegan since they contain no animal products. However, if you want to add a cheesy flavor without dairy, try nutritional yeast. Toss roasted chickpeas with 2 tablespoons nutritional yeast, 1 teaspoon garlic powder, and 0.5 teaspoon paprika for a savory, umami-rich snack. This option provides additional B vitamins and a satisfying cheese-like flavor that vegans especially appreciate.
Gluten-Free and Allergen-Conscious Variations
The base recipe is naturally gluten-free since chickpeas contain no gluten. Therefore, simply verify that any seasoning blends or spices you use don’t contain hidden gluten or cross-contamination. All variations mentioned above work perfectly for gluten-free diets. Additionally, if you have nut allergies, this recipe remains safe since it contains no tree nuts or peanuts, making it an excellent snack option for schools and workplaces with strict allergen policies.
Nutritional Breakdown of Your Crispy Roasted Chickpeas
Understanding the nutritional profile of crispy roasted chickpeas helps you make informed choices about incorporating them into your diet. Each serving delivers impressive macronutrient content that supports sustained energy and satiety. In addition, chickpeas provide essential micronutrients that many people don’t get enough of in their regular diet.
Per serving (approximately one cup or 100g), you’ll consume around 140 calories, making these snacks relatively light compared to traditional chips or crackers. The protein content reaches 6 grams per serving, which is substantial for a plant-based snack and helps keep you satisfied between meals. Furthermore, the 5 grams of dietary fiber supports digestive health and contributes to feelings of fullness. The fat content sits at approximately 4 grams, primarily from the olive oil used in preparation, which provides heart-healthy monounsaturated fats.
Carbohydrates total around 18 grams per serving, with 5 grams coming from fiber, leaving 13 grams of net carbs. This makes crispy roasted chickpeas suitable for most dietary approaches, including moderate low-carb eating. Additionally, chickpeas contain important minerals like iron, magnesium, and manganese, which support energy production and bone health. Similar to homemade energy balls, these roasted chickpeas provide sustained nutrition without refined sugars or artificial ingredients.
Creative Ways to Enjoy Your Roasted Chickpea Snacks
While crispy roasted chickpeas shine as a standalone snack, their versatility extends far beyond mindless munching. First, consider crumbling them over salads for added crunch and protein—they work especially well on Mediterranean-inspired salads with fresh vegetables and feta cheese. Second, sprinkle them over soups just before serving to add textural contrast and boost the nutritional profile. Third, mix them into trail mix with dried fruit, nuts, and dark chocolate chips for a satisfying homemade snack mix that beats store-bought versions.
Furthermore, roasted chickpeas make excellent additions to grain bowls, providing both substance and textural interest. You can also pulse them slightly in a food processor to create a breadcrumb-like topping for casseroles or vegetables. Additionally, they work beautifully as a crunchy topping for yogurt parfaits, adding protein and fiber to breakfast. For entertaining, serve them in small bowls alongside other appetizers at parties—they’re healthier than chips but equally satisfying and impressive to guests who appreciate thoughtful snacking options.
Keeping Your Roasted Chickpeas Fresh and Crispy
Proper storage ensures your crispy roasted chickpeas maintain their satisfying crunch for as long as possible. After they cool completely to room temperature, transfer them to an airtight glass container or resealable plastic bag. Avoid storing them in sealed containers while still warm, as trapped steam will soften the exterior and compromise crispiness. Store your container in a cool, dry pantry rather than the refrigerator, which can introduce moisture and cause them to lose their crunch.
When stored properly in an airtight container at room temperature, crispy roasted chickpeas remain fresh and crunchy for up to five days, though honestly, they rarely last that long in my house. For longer storage, freeze them in a freezer-safe container or bag for up to three months. To enjoy frozen roasted chickpeas, simply spread them on a baking sheet and reheat in a 350°F oven for 5-8 minutes until they regain their crispiness. This reheating method restores the texture perfectly without drying them out, making frozen storage an excellent option for meal preppers.
Common Questions About Making Crispy Roasted Chickpeas
I receive countless questions about this recipe, and I’m happy to address the most common ones here. Whether you’re troubleshooting texture issues, wondering about ingredient substitutions, or curious about batch sizes, you’ll find helpful answers below that will set you up for success.
Soft chickpeas indicate insufficient roasting time or inadequate drying beforehand. Ensure you pat your chickpeas completely dry before roasting, as any residual moisture converts to steam and prevents crisping. Additionally, check that your oven temperature is accurate using an oven thermometer, and roast for the full 30-35 minutes, shaking the pan halfway through. If they’re still soft at 35 minutes, continue roasting in 5-minute increments until golden and crispy. Remember that they continue crisping slightly as they cool, so don’t judge doneness while they’re still hot.
Yes, you can use dried chickpeas, but they require advance preparation. Soak dried chickpeas overnight, then cook them until just tender but not falling apart. This typically takes 1.5-2 hours of simmering. After cooking, drain and dry them thoroughly as you would canned chickpeas. The roasting process remains identical. Using dried chickpeas gives you more control over the final texture and allows you to avoid added sodium found in many canned varieties.
Use approximately 2 tablespoons of olive oil per 15-ounce can of chickpeas. This amount provides sufficient coating for even browning and crispiness without creating greasiness. If you prefer lower-fat snacks, you can reduce the oil to 1.5 tablespoons, though this may result in slightly less even browning. Conversely, if you want extra-flavorful chickpeas, up to 2.5 tablespoons works well. Toss thoroughly to ensure every chickpea receives adequate oil coating.
Absolutely! Air fryers work beautifully for this recipe. Place dried and seasoned chickpeas in the air fryer basket in a single layer. Cook at 380°F for 15-20 minutes, shaking the basket every 5 minutes for even cooking. The exact time depends on your air fryer model and the size of your chickpeas. Air-fried chickpeas often achieve superior crispiness with less oil, making them an excellent option for health-conscious cooks.
Yes, crispy roasted chickpeas can be part of a diabetes-friendly diet when consumed in moderation. Each serving contains 13 grams of net carbs and 6 grams of protein, which creates a favorable macronutrient ratio that minimizes blood sugar spikes. The high fiber content also slows digestion and promotes stable blood glucose levels. However, portion control remains important, so measure out single servings rather than eating directly from the container. Consult with your healthcare provider or registered dietitian for personalized dietary guidance.
Roasting and baking use the same oven cooking method, but the terminology often reflects the intended outcome. Roasting typically involves higher temperatures and aims for browning and crispiness, while baking is gentler and focuses on cooking through without excessive browning. For crispy roasted chickpeas, we use the roasting method at 400°F to achieve that golden exterior and crunchy texture. If you baked at lower temperatures, you’d end up with softer chickpeas better suited for other applications.
I hope you’re as excited about making crispy roasted chickpeas as I am every time I pull a fresh batch from the oven. This recipe has genuinely transformed how my family approaches snacking—we’ve ditched the store-bought versions and never looked back. The combination of simplicity, nutrition, and flavor makes it a winner in every kitchen, whether you’re cooking for one or feeding a crowd.
So grab a can of chickpeas, choose your favorite seasoning combination, and start roasting. I promise you’ll be reaching for these addictive little bites again and again. Share your favorite flavor variation with me, and happy snacking!