- No yeast and under 30 minutes: quick, no-proof bagels using a simple dough and hot oven.
- Greek yogurt boosts protein and moisture, giving a tangy, tender crumb that keeps you full.
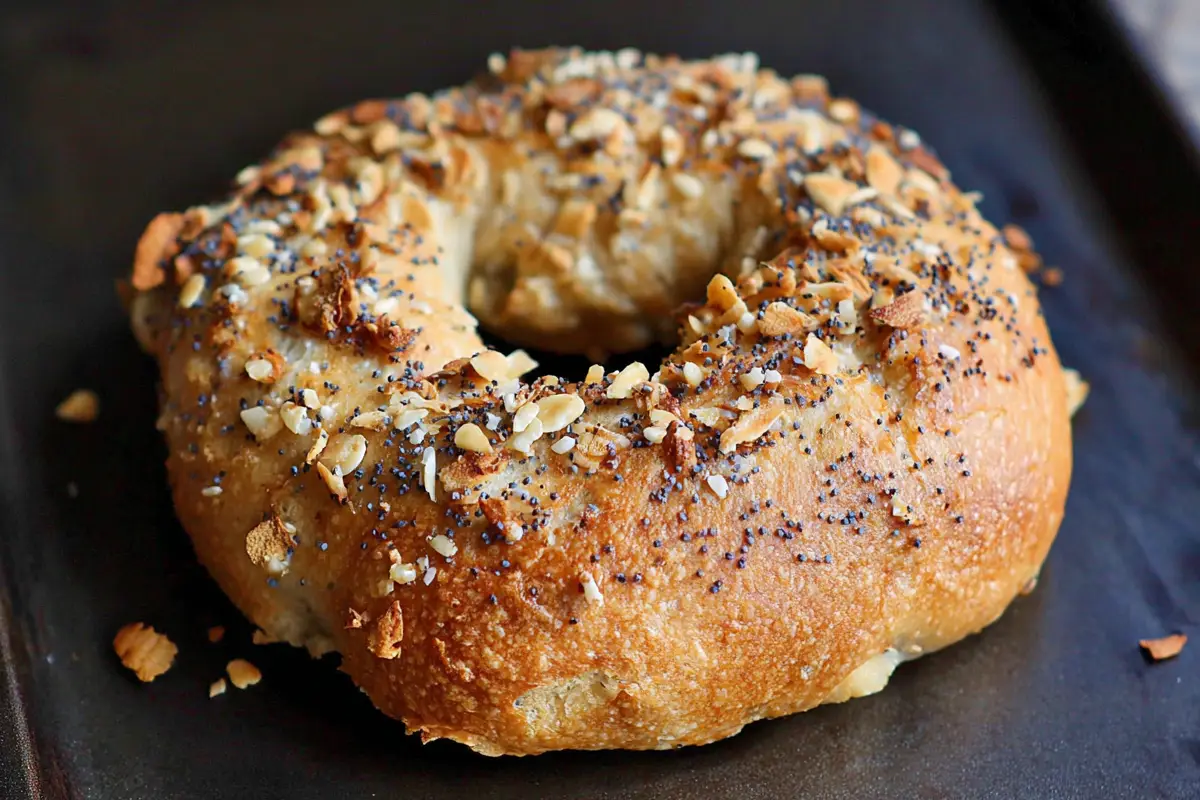
- Bakery-style texture: chewy exterior, soft interior, best when toasted for revived chew.
- Beginner friendly and endlessly customizable: sweet, savory, mini, gluten-free, or dairy-free variations.
- Store sliced in freezer up to 3 months; toast from frozen for best texture.
Last Updated on January 23, 2026 by Souhail
Protein bagels with Greek yogurt are one of those recipes I stumbled into on a busy weekday morning when I was craving a real bagel but wanted something that actually kept me full. Living in New York, bagels are practically part of the city’s DNA, and I grew up grabbing them from corner shops without a second thought. But as life got busier and nutrition started mattering more to me, I wanted a version that felt just as satisfying but packed with protein and easy enough to make at home.
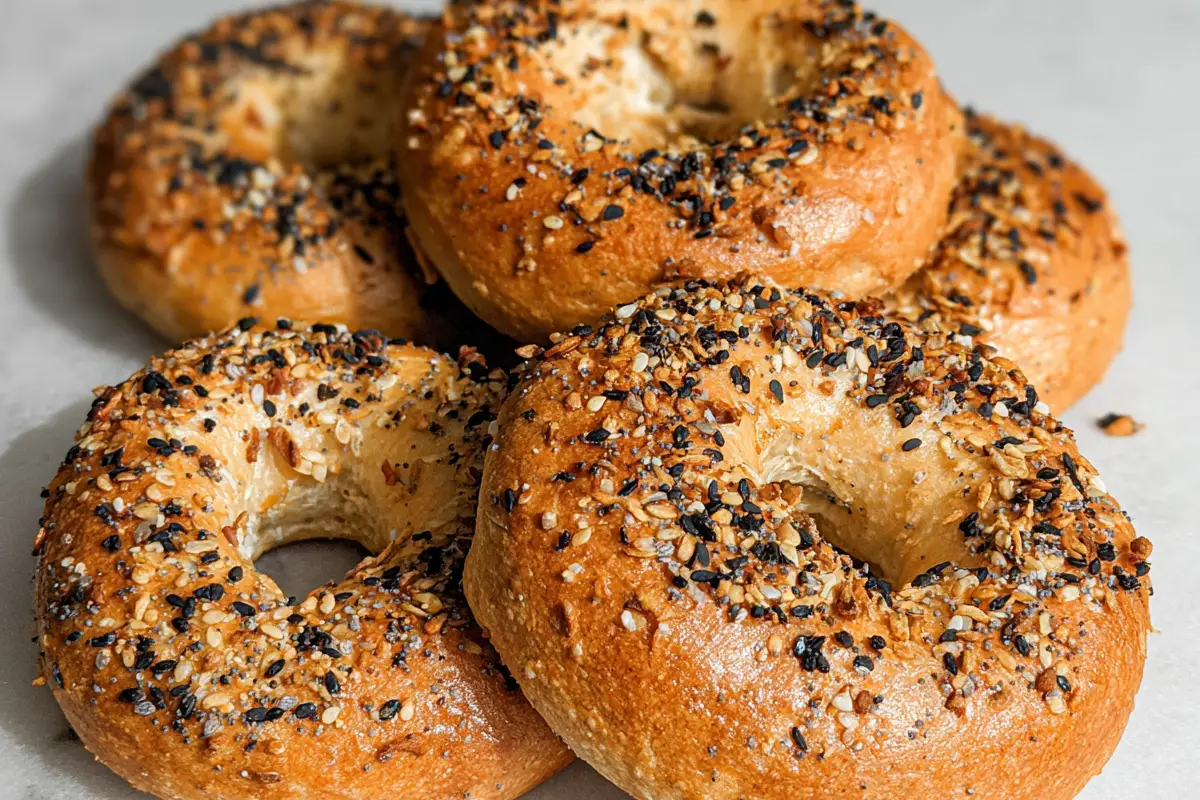
These protein bagels with Greek yogurt check every box. They are chewy on the outside, soft on the inside, and honestly hard to believe they are made with such simple ingredients. No yeast, no boiling water, no long rise times. Just a quick dough, a hot oven, and that unmistakable bagel aroma filling your kitchen. The Greek yogurt gives them a subtle tang and a tender crumb, while boosting the protein in a way that feels natural and delicious.
This is the kind of recipe that fits perfectly into everyday life. It is ideal for a quick weekday breakfast, a post workout snack, or even a cozy weekend brunch spread. Slice one open, toast it, add cream cheese or avocado, and you have something that feels indulgent but still nourishing. That balance is what makes this recipe so special to me, and I have a feeling it is going to become a staple in your kitchen too.
Table of contents
Let’s Bake These Protein Bagels Together
Protein Bagels with Greek Yogurt
4
servings10
minutes18
minutes180
kcalProtein Bagels with Greek Yogurt
Keep the screen of your device on
Ingredients
1 cup plain Greek yogurt (thick, full-fat or low-fat)
1 cup self-rising flour
1 teaspoon baking powder
1 egg (for optional egg wash)
Toppings of choice (everything seasoning, sesame seeds, etc.)
Directions
- Start by preheating your oven to 375°F and lining a baking sheet with parchment paper. In a bowl, mix the Greek yogurt, self-rising flour, and baking powder until a shaggy dough forms. It will look a little messy—totally normal!
- Turn the dough out onto a lightly floured surface and gently knead it a few times until it comes together into a smooth ball. Avoid over-kneading here—we want tender, not tough.
- Divide the dough into four equal pieces. Roll each piece into a rope, about 6 to 8 inches long, and join the ends together to form a bagel shape. Press the seams to seal.
- Place the shaped bagels on the prepared baking sheet. If you’re using egg wash, beat the egg and brush it over the tops of each bagel for that golden shine. Sprinkle on your favorite toppings if you’d like.
- Bake in the preheated oven for about 18 minutes, or until the bagels are golden and puffed. Let them cool for a few minutes before slicing or toasting.
Notes
- Use thick Greek yogurt: Watery yogurt will make your dough sticky and harder to work with.
- No self-rising flour? Use 1 cup all-purpose flour + 1½ tsp baking powder + ¼ tsp salt.
- Want extra protein? Stir in a tablespoon of ground flaxseed or hemp hearts.
- Customize with toppings: Everything bagel seasoning, sesame seeds, cinnamon sugar—you name it.
- Mini bagels option: Divide the dough into 6–8 smaller rounds and bake for 14–16 minutes.
- Store sliced in the freezer: Makes weekday mornings so much easier.
Nutrition Facts
- Total number of serves: 4
- Calories: 180kcal
- Fat: 3g
- Sodium: 320mg
- Carbohydrates: 24g
- Fiber: 2g
- Sugar: 2g
- Protein: 12g
Like this recipe?
Follow @wikitasty on Pinterest
Why These Protein Bagels with Greek Yogurt Just Make Sense
Let me tell you why I keep coming back to these protein bagels with Greek yogurt, even with a freezer full of bread in my New York apartment. This recipe just makes sense. It’s quick, flexible, and surprisingly satisfying for something that takes under 30 minutes from start to finish. It’s kind of like the same joy I get from making a batch of gluten-free banana bread—comforting, fuss-free, and something you’ll want to have on repeat.
Here’s what makes these bagels shine:
- No yeast, no proofing: If yeast intimidates you or you just don’t have time, this recipe is your best friend. No rising needed—just mix, shape, and bake.
- High in protein, naturally: Greek yogurt brings a subtle tang and moisture, while sneaking in a solid protein boost that actually keeps you full.
- Bakery-style texture: A chewy bite on the outside with a soft, slightly dense interior. And once toasted? Perfection.
- Beginner friendly: If you’re new to baking, these are the perfect confidence booster. No fancy tools or techniques required.
- Endlessly customizable: Sweet or savory, big or mini, gluten-free or dairy-free—you’ve got options.
They give you that cozy “I just made homemade bread” feeling without the hours of commitment. If you’ve ever wanted to dip your toes into baking but didn’t know where to start, this is your entry point (especially if something like a sourdough starter feels like a bit much).
Pro Tips So Your Protein Bagels Turn Out Just Right
After countless rounds of making these (and tweaking them just slightly each time), here are my go-to tips that really make a difference:
- Use thick Greek yogurt: The dough works best when your yogurt is thick and creamy—not watery. If it’s a bit loose, strain it through a paper towel or cheesecloth for 5–10 minutes.
- Mix gently: Overmixing can lead to tough bagels. Mix the dough until just combined, then knead lightly.
- Dust your hands, not the dough: A little flour on your hands helps you shape the dough without over-drying it.
- Egg wash optional, but awesome: Brushing the tops with egg gives them that shiny, golden look and helps toppings stick.
- Toast before serving: Especially after storing. Toasting revives the texture and brings back that bakery-style chew.
I love pairing a fresh-from-the-oven bagel with something bright and crisp, like a side of cucumber salad for a quick, refreshing lunch.
Let’s Talk Variations, Because Options Are Everything
Once you’ve made the base recipe, you’re going to want to play with it. Here are some of my favorite spins on this classic:
Everything Bagel Protein Bagels
Add a teaspoon of everything bagel seasoning into the dough and sprinkle more on top. Savory, bold, and amazing with cream cheese or a fried egg.
Cinnamon Raisin Protein Bagels
Add 1 teaspoon cinnamon and 2 tablespoons raisins to the dough. You can even throw in a drizzle of honey if you like a sweeter bite. These are perfect toasted with butter or almond butter.
Jalapeño Cheddar
Fold in chopped jalapeños and shredded cheddar for a spicy twist that’s perfect for breakfast sandwiches.
Mini Bagels for Meal Prep
Divide the dough into 6 or 8 smaller rounds to make mini bagels. They’re great for portion control, kids’ lunches, or when you want something snack-sized.
These kinds of small twists are what make simple recipes like this feel exciting. I often do the same with salad recipes—like turning a hearty slaw into a light lunch with my favorite Brussel sprout salad.
Serving Suggestions That Go Beyond the Basics
Fresh out of the oven, these protein bagels are soft, warm, and smell like a little NYC bakery just moved into your kitchen. But let’s level them up:
- Classic: Toast and smear with cream cheese, mashed avocado, or peanut butter and banana.
- Savory brunch: Try smoked salmon, thin red onion slices, capers, and a little lemon juice for a full-on bagel board experience.
- Sweet twist: Top a toasted cinnamon version with almond butter, maple syrup, and a pinch of sea salt.
- Light lunch: Slice a bagel and make a turkey sandwich with leafy greens, tomato, and mustard.
- Brunch spread: Add these to your weekend table with fresh fruit, eggs, and maybe even a sweet treat like pumpkin chocolate chip cookies to finish.
- Storage and Reheating Tips
- These bagels are best eaten fresh, but they store surprisingly well:
- Room Temp: Keep in an airtight container up to 2 days.
- Fridge: Not recommended—it tends to dry them out.
- Freezer: Slice before freezing, and store in a freezer bag for up to 3 months.
- To reheat, just toast from frozen or let them thaw first. Toasting brings back the best texture—crispy outside, soft inside.
FAQs
Regular yogurt is usually too thin. You can try straining it to remove extra liquid, but thick Greek yogurt works best for the right dough texture.
Easy fix! Just use 1 cup all-purpose flour mixed with 1½ teaspoons baking powder and ¼ teaspoon salt.
Yes! Use a 1:1 gluten-free self-rising flour blend. The texture may be slightly softer, but they still bake beautifully.
Not quite the same as boiled New York bagels, but they’re chewy, golden, and incredibly satisfying—especially toasted!
These are best baked right after shaping, but you can store the shaped bagels (unbaked) in the fridge overnight and bake fresh in the morning.
Definitely. Slice before freezing, then toast from frozen or thaw and reheat.
Final Thoughts
So whether you’re baking your first batch or your fiftieth, these protein bagels with Greek yogurt are always a win. They’re easy, satisfying, and endlessly flexible—which is exactly what I want in a recipe I keep in my back pocket.
I hope you give these a try! And if you do, I’d love to see how yours turn out. Tag me on social or leave a comment to share your spin on them. Want more easy bakes? You might also love my cozy gluten-free banana bread or a fresh, crunchy Brussel sprout salad for pairing.
Happy baking